
Tungsten E Power Button Repair

Kathleen Hix and 5 other contributors
Last updated on Feb 19, 2016
Views: 5.8K
View statistics:
- Past 24 Hours:
- 2
- Past 7 Days:
- 15
- Past 30 Days:
- 98
- All Time:
- 5,794
Comments: 1
1 comment on steps.
Completed: 1 2
1 person has marked this guide "completed." Will you be next?
2 people have marked this guide "completed." Including you — great job!
Favorites: 1 2
1 person has favorited (and subscribed to) this guide. Will you be next?
2 people have favorited (and subscribed to) this guide — including you!
Action Shots
Be an action hero! This guide needs images that better demonstrate how to perform specific actions.
Mismatched Prerequisites
This guide does not have a proper prerequisite guide. Help match it to its ideal partner by finding it or writing one!
Incorrect Tools
Help make this guide better by using the correct tools in images and/or text.
Step Trimmer
This guide has unnecessary steps. Trim them to be more concise!
Introduction
Go to step 1 ↓How to repair a loose power button.
What you need
Tools
-
-
-
Spudger4.9


-
-
-
Remove the stylus and SD card.
-
Using a T5 torx screwdriver, remove all 4 back panel screws.
 Ask FixBot
-
-
-
Insert a plastic opening tool under the USB and power input slots.
-
Slide the plastic opener along the seam and gently pry the cover from the PDA body to remove the cover completely.
-
-
-
Remove the screen protector by lifting the hinge out of the plastic housing.
-
Remove the top cover by gently pulling it away from the device with a plastic opening tool or your fingers.
-
-
-
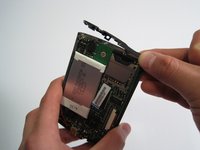
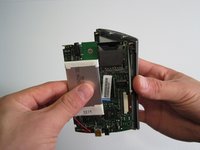
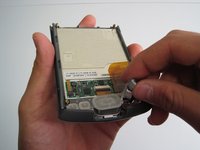
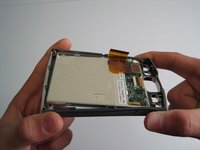
Carefully remove motherboard from the standoffs without damaging the LCD flex connector.
-
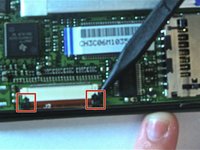
Using a spudger, unlock both sides of the flex connector block by pushing down.
-
Remove motherboard completely.
-
-
-
Remove buttons using fingers.
-
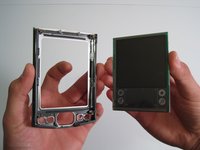
Gently flex frame to release screen from plastic frame.
-
Lift out screen.
-
-
-
-
-
-
Follow steps 1 through 4 in the Tungsten E Teardown
-
-
-
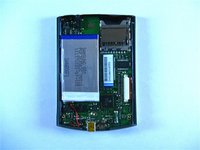
On the motherboard, find the power button near the upper right corner.
-
Check for disconnection of the power button.
-
-








To reassemble your device, follow these instructions in reverse order.
Cancel: I did not complete this guide.
One other person completed this guide.

Team

Cal Poly, Team 13-22, Maness Winter 2010 Member of Cal Poly, Team 13-22, Maness Winter 2010
CPSU-MANESS-W10S13G22
4 Members
48 Guides authored
