
Tungsten E Disassembly

Kevin Hom and 10 other contributors
Last updated on Mar 9, 2019
Views: 8.8K
View statistics:
- Past 24 Hours:
- 1
- Past 7 Days:
- 27
- Past 30 Days:
- 118
- All Time:
- 8,781
Comments: 2
1 comment on steps, 1 guide comment.
Go to guide commentsCompleted: 0 1
No one has marked this guide "completed." Will you be the first?
1 person has marked this guide "completed." It's you — great job!
Favorites: 4 5
4 people have favorited (and subscribed to) this guide. Will you be next?
5 people have favorited (and subscribed to) this guide — including you!
Action Shots
Be an action hero! This guide needs images that better demonstrate how to perform specific actions.
Introduction
Go to step 1 ↓This is a step by step guide to completely disassemble a Palm Tungsten E.
What you need
Tools
-
Spudger4.9


-
-
-
Remove the stylus and SD card.
-
Using a T5 torx screwdriver, remove all 4 back panel screws.
 Ask FixBot
-
-
-
Insert a plastic opening tool under the USB and power input slots.
-
Slide the plastic opener along the seam and gently pry the cover from the PDA body to remove the cover completely.
-
-
-
Remove the screen protector by lifting the hinge out of the plastic housing.
-
Remove the top cover by gently pulling it away from the device with a plastic opening tool or your fingers.
-
-
-
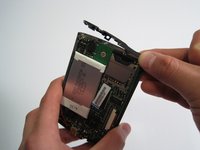
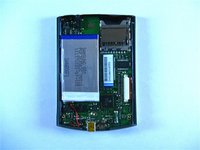
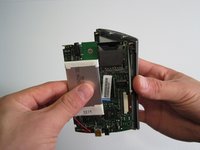
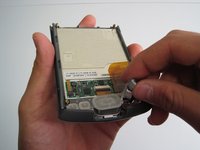
Carefully remove motherboard from the standoffs without damaging the LCD flex connector.
-
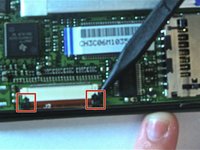
Using a spudger, unlock both sides of the flex connector block by pushing down.
-
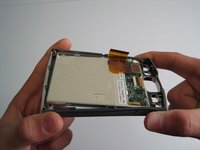
Remove motherboard completely.
-
-
-
-
Remove buttons using fingers.
-
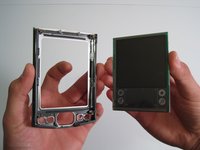
Gently flex frame to release screen from plastic frame.
-
Lift out screen.
-
-







To reassemble your device, follow these instructions in reverse order.

Team

Cal Poly, Team 13-22, Maness Winter 2010 Member of Cal Poly, Team 13-22, Maness Winter 2010
CPSU-MANESS-W10S13G22
4 Members
48 Guides authored
