What you need
-
-
Power down your Steam Deck and unplug any cables.
-
-
Tool used on this step:FixMat$36.95
-
Use a Phillips driver to remove the eight screws securing the back cover:
-
Four coarse thread 9.5 mm-long screws
-
Four fine thread 5.8 mm-long screws
-
-
-
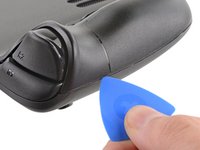
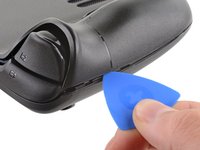
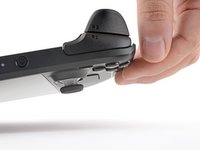
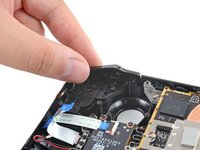
Insert an opening pick into the thin gap between the back cover and the front shell, along the edge of the right grip.
-
Pry up on the back cover to release it from the locking clips.
-
-
-
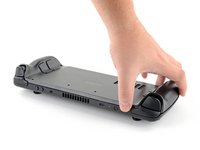
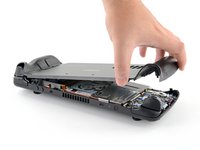
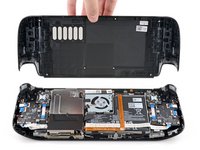
Grip the back cover at the opening you just created and pull it up and away from the device to unclip the long edges.
-
Remove the back cover.
-
-
Tool used on this step:Tweezers$4.99
-
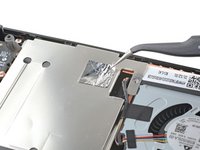
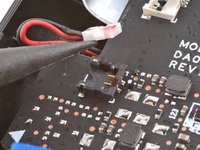
Use a pair of tweezers to remove the piece of foil tape covering the hidden screw on the board shield.
-
-
-
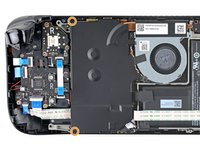
Use a Phillips driver to remove the three screws securing the board shield:
-
One 3.4 mm screw
-
Two 3.7 mm screws
-
-
-
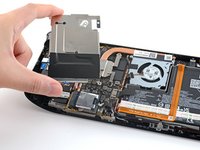
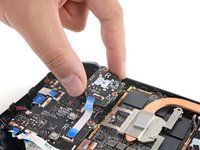
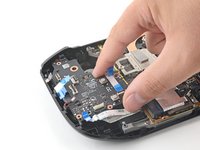
Grip the battery cable by its pull tab and pull it directly away from the motherboard to disconnect it.
-
-
-
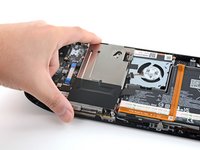
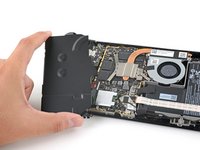
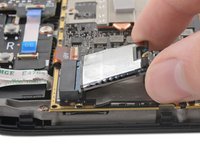
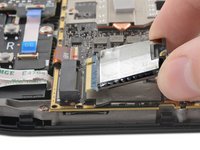
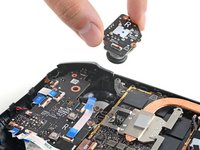
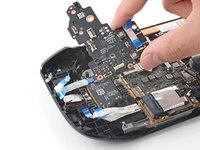
Grip the end of the SSD and pull it away from its M.2 board connector to remove it.
-
-
-
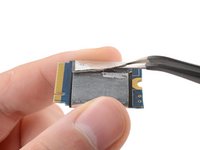
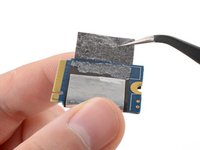
Slide the shielding off of the SSD.
-
If the shielding feels stuck, use a pair of tweezers to peel off and remove it instead. Take care to keep it in the best condition possible if you want to reuse it.
-
Only the SSD remains.
-
-
-
-
Power down your Steam Deck.
-
Once off, hold down the volume up (+) button and press the power button.
-
Release both buttons.
-
-
-
Navigate to Setup Utility.
-
Navigate to the Power menu.
-
Select Battery storage mode.
-
Select Yes to confirm.
-
-
Tool used on this step:Tweezers$4.99
-
Use a pair of tweezers to remove the piece of foil tape covering the hidden screw on the board shield.
-
-
-
Use a Phillips driver to remove the three screws securing the board shield:
-
One 3.4 mm screw
-
Two 3.7 mm screws
-
-
-
Grip the battery cable by its pull tab and pull it directly away from the motherboard to disconnect it.
-
-
-
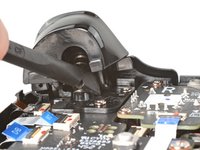
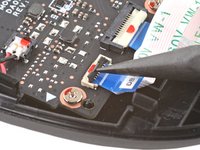
Place the flat end of a spudger onto the inside edge of the trigger's right clip.
-
Pivot the trigger clip out, away, and up from the peg to unlatch it.
-
-
-
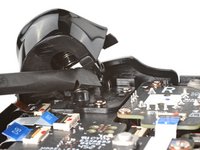
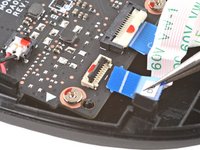
Use a Phillips driver to remove the three 5.2 mm screws securing the right trigger bracket.
-
-
Tool used on this step:Tweezers$4.99
-
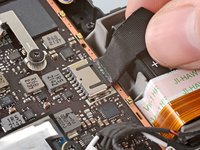
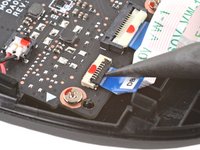
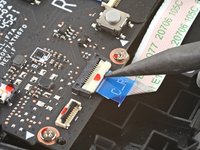
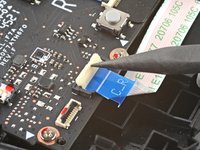
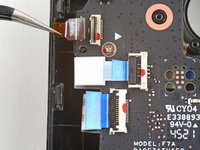
Use the pointed end of a spudger to lift up the small locking flap on the thumbstick cable's ZIF connector.
-
Use a pair of tweezers to slide the cable out of its connector.
-
-
-
Use a Phillips driver to remove the three 5.2 mm screws securing the thumbstick.
-
-
-
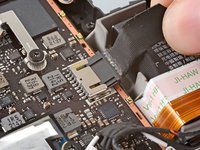
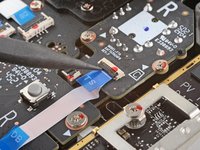
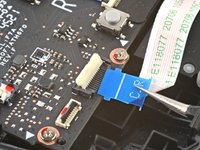
Use the pointed end of a spudger to lift up the small locking flap on the button board cable's ZIF connector.
-
Use a pair of tweezers to slide the cable out of its connector.
-
-
-
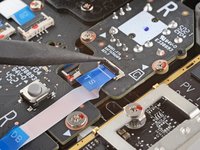
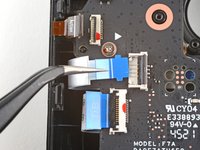
Use the pointed end of a spudger to lift up the small locking flap on the button board interconnect cable's ZIF connector.
-
Use a pair of tweezers to slide the cable out of its connector.
-
-
-
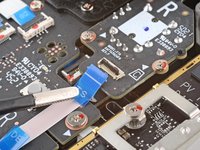
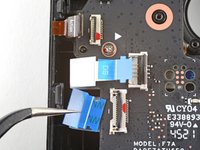
If any connectors are covered with tape, use a pair of tweezers to remove it.
-
Use the pointed end of a spudger to lift up the small locking flaps on the rest of the button board ZIF connectors. Use a pair of tweezers to slide the cables out of their connectors:
-
Disconnect the action buttons cable.
-
Disconnect the touchpad board cable.
-
Disconnect the touchpad cable.
-
-
-
Use the pointed end of a spudger to lift up on the haptics cable to disconnect it.
-
-
-
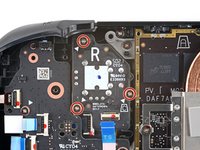
Use a Phillips driver to disconnect the four screws securing the right button board:
-
Three 5.2 mm screws
-
One 3.9 mm screw
-
-
-
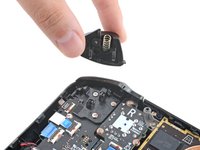
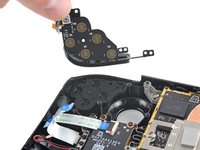
Use a Phillips driver to remove the two 5.2 mm screws securing the right bumper assembly.
-
-
-
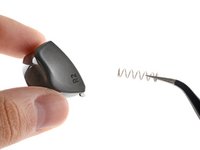
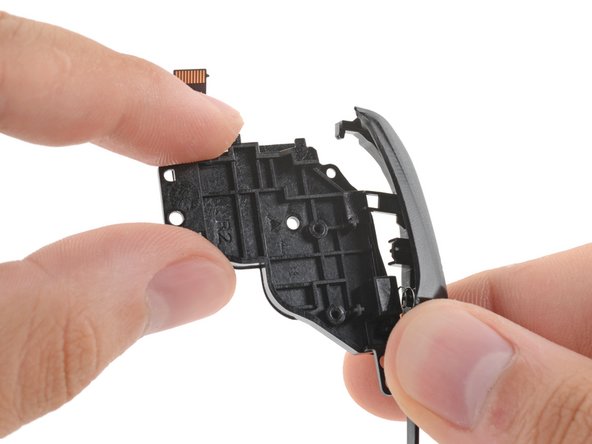
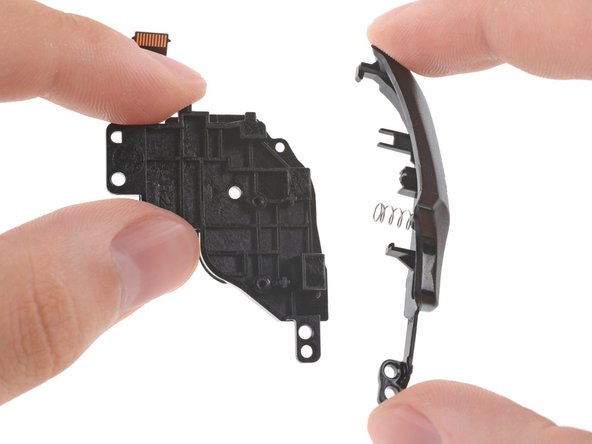
Lift the button up and away from the bracket to unclip the topmost plastic tab.
-
Disconnect the rest of the plastic tabs to remove the button.
-


To reassemble your device, follow these instructions in reverse order.
Cancel: I did not complete this guide.
One other person completed this guide.
2 Guide Comments
I'm sorry, what is this meant to be?
The title is "Ultra battery", but you don't even touch it after disconnecting it.
Also, WHY DO YOU REMOVE THE BACK COVER TWICE AND DISCONNECT THE BATTERY TWICE AS WELL?!
This literally combines the SSD replacement, battery storage mode and right bumper into one tutorial.
I thought this would be a mod to, well, REPLACE THE BATTERY TO HIGHER CAPACITY VARIANT.