
Sony Xperia Z5 Rear Glass Replacement

Dominik Schnabelrauch and one other contributor
Last updated on Dec 3, 2019
Views: 1.5K
View statistics:
- Past 24 Hours:
- 1
- Past 7 Days:
- 23
- Past 30 Days:
- 80
- All Time:
- 1,524
Comments: 0
No one has left comments on this guide. Will you be first?
Go to guide commentsCompleted: 0 1
No one has marked this guide "completed." Will you be the first?
1 person has marked this guide "completed." It's you — great job!
Favorites: 0 1
No one has favorited (and subscribed to) this guide. Will you be the first?
1 person has favorited (and subscribed to) this guide — and that's you!
Introduction
Go to step 1 ↓Use this guide to remove the rear glass of the Sony Xperia Z5.
Opening the Sony Xperia Z5 will damage the waterproof seals on the device. If you do not replace the adhesive seals, your phone will function normally but will lose its water protection.
You’ll need replacement adhesive to reattach components when reassembling the device.
What you need
Parts
Tools


-
-
-
Before you begin, switch off your phone.
-
Apply a heated iOpener to the edges on the back of the phone to loosen the adhesive beneath the rear glass. Apply the iOpener for at least two minutes.
 Ask FixBot
-
-
-
Secure a suction handle to the bottom of the rear glass, as close to the edge as possible.
-
Pull up the suction handle to generate a gap.
-
Insert an opening pick into the gap to further separate the rear glass from the phone assembly.
-
-
-


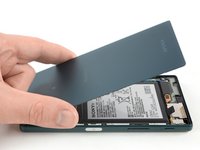
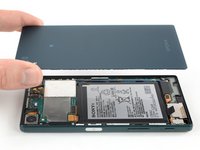
Secure the new back cover with pre-cut adhesive or double-sided adhesive tape after cleaning the according areas with isopropyl alcohol (>90%).
To reassemble your device, follow these instructions in reverse order.
Repair didn’t go as planned? Check out our Answers community for troubleshooting help.


