Free Shipping on Domestic Orders $75+

Samsung Galaxy Book Pro 15" Secondary SSD Replacement

What you need

  1. Samsung Galaxy Book Pro 15" Secondary SSD Replacement, Remove the rubber feet: step 1, image 1 of 3 Samsung Galaxy Book Pro 15" Secondary SSD Replacement, Remove the rubber feet: step 1, image 2 of 3 Samsung Galaxy Book Pro 15" Secondary SSD Replacement, Remove the rubber feet: step 1, image 3 of 3
    • Before you begin, power down your laptop and unplug it.

    • There are two kinds of rubber feet along the top and bottom of the rear case. Keep track of their position as you remove them.

    • Insert an opening pick between the rubber foot and the rear case.

    • Pry up with the opening pick to release the clips securing the foot.

    • Remove the foot.

    • Repeat this procedure for the three remaining feet.

    • During reassembly, press the feet into their correct slot to reinsert them. Mismatched feet won't fit correctly.

    Ask FixBot

    Add Comment

  2. Samsung Galaxy Book Pro 15" Secondary SSD Replacement, Unfasten the rear case: step 2, image 1 of 2 Samsung Galaxy Book Pro 15" Secondary SSD Replacement, Unfasten the rear case: step 2, image 2 of 2
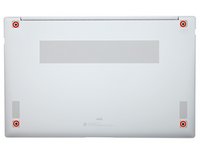
    • Use a Phillips screwdriver to remove the four 4.5 mm-long screws securing the rear case.

    Ask FixBot

    Add Comment

  3. Samsung Galaxy Book Pro 15" Secondary SSD Replacement, Insert an opening pick: step 3, image 1 of 3 Samsung Galaxy Book Pro 15" Secondary SSD Replacement, Insert an opening pick: step 3, image 2 of 3 Samsung Galaxy Book Pro 15" Secondary SSD Replacement, Insert an opening pick: step 3, image 3 of 3
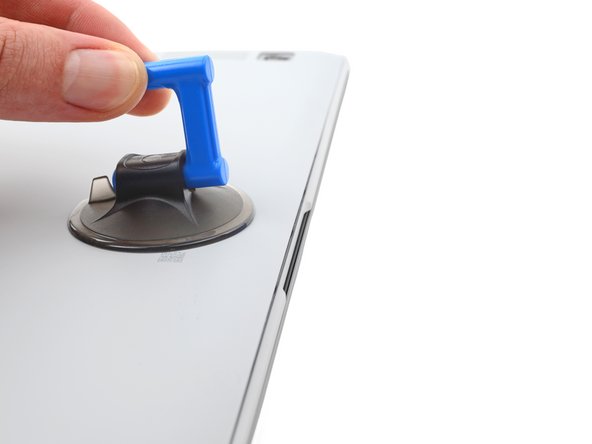
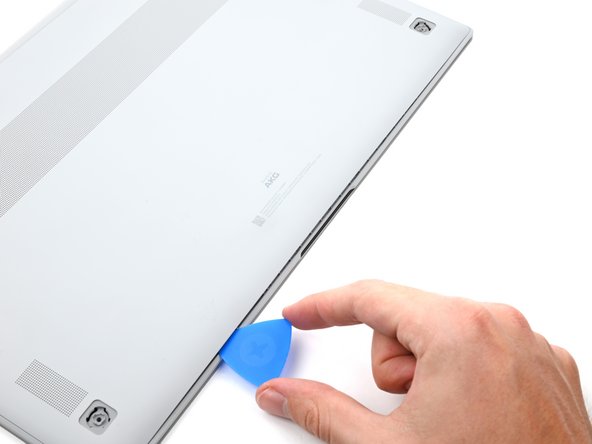
    • Apply a suction cup to the rear case, as close to the center of the bottom edge as possible.

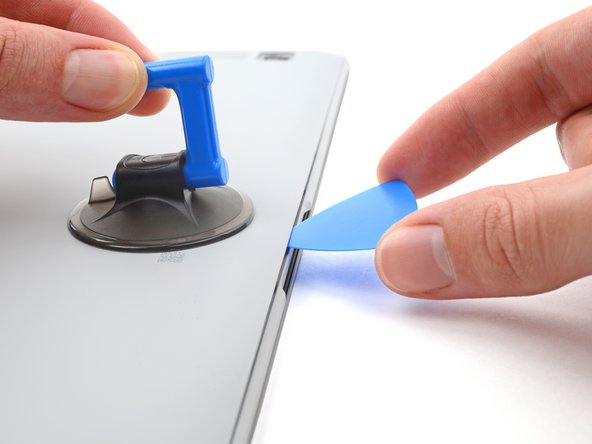
    • Pull up on the suction cup with strong, steady force to create a gap between the rear case and the frame.

    • Insert an opening pick into the gap.

    Ask FixBot

    Add Comment

  4. Samsung Galaxy Book Pro 15" Secondary SSD Replacement, Release the clips: step 4, image 1 of 3 Samsung Galaxy Book Pro 15" Secondary SSD Replacement, Release the clips: step 4, image 2 of 3 Samsung Galaxy Book Pro 15" Secondary SSD Replacement, Release the clips: step 4, image 3 of 3
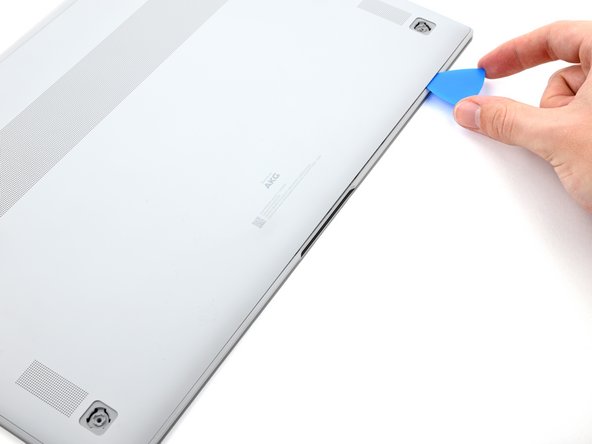
    • Slide the pick along the bottom edge of the rear case to release its plastic clips.

    • Repeat this process for the left and right edges, but stop before reaching the top edge.

    Ask FixBot

    Add Comment

  5. Samsung Galaxy Book Pro 15" Secondary SSD Replacement, Remove the rear case: step 5, image 1 of 3 Samsung Galaxy Book Pro 15" Secondary SSD Replacement, Remove the rear case: step 5, image 2 of 3 Samsung Galaxy Book Pro 15" Secondary SSD Replacement, Remove the rear case: step 5, image 3 of 3
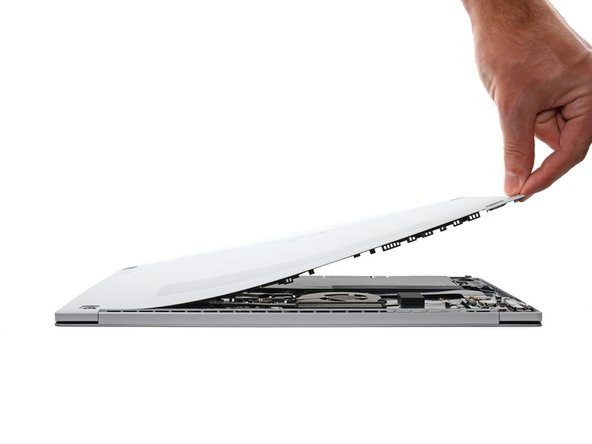
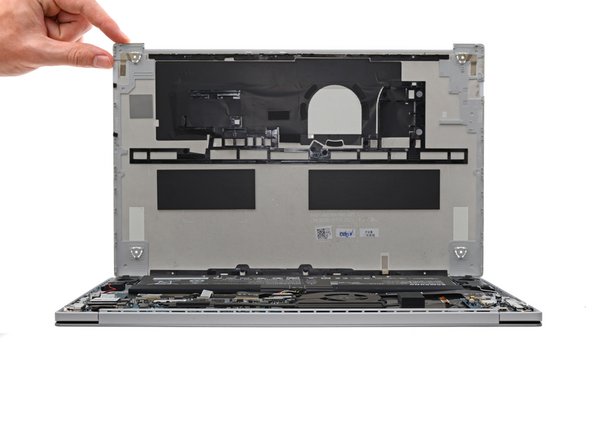
    • The top edge of the rear case is lightly adhered to the frame.

    • Pull the top of the rear case away from the frame to separate the adhesive and release the remaining clips.

    • If you're having trouble separating the adhesive, use an iOpener, hair dryer, or heat gun to soften it.

    • Remove the rear case.

    • During reassembly, perform the following:

    • If you're using a using a genuine Samsung replacement rear case, be sure to peel off any adhesive liners from the rear case before securing the top edge's clips.

    • If you're reusing your rear case, you can use some pre-cut adhesive to re-adhere the top edge if your existing adhesive is no longer sticky.

    • This is a good point to power on your laptop and test all functions before sealing it up. Be sure to power your laptop back down completely before you continue working.

    Ask FixBot

    Add Comment

  6. Samsung Galaxy Book Pro 15" Secondary SSD Replacement, Disconnect the battery: step 6, image 1 of 2 Samsung Galaxy Book Pro 15" Secondary SSD Replacement, Disconnect the battery: step 6, image 2 of 2
    • Insert a spudger between the frame and the bottom of the battery cable connector.

    • Pry up and disconnect the battery cable connector.

    Ask FixBot

    Add Comment

  7. Samsung Galaxy Book Pro 15" Secondary SSD Replacement, Unfasten the SSD: step 7, image 1 of 2 Samsung Galaxy Book Pro 15" Secondary SSD Replacement, Unfasten the SSD: step 7, image 2 of 2
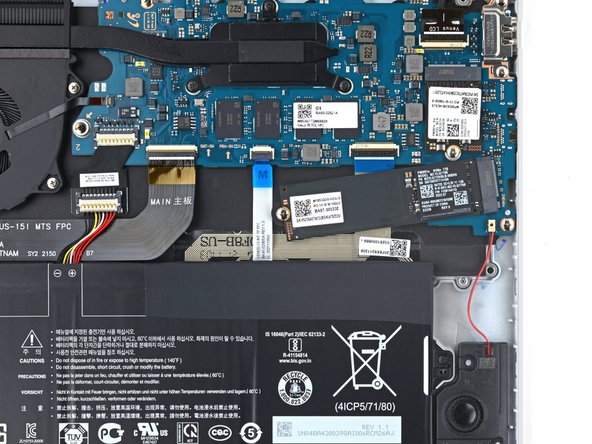
    • If your Galaxy Book doesn't have a 2280 SSD, skip the next two steps.

    • Use a Phillips screwdriver to remove the 3.5 mm-long screw securing the SSD.

    Ask FixBot

    Add Comment

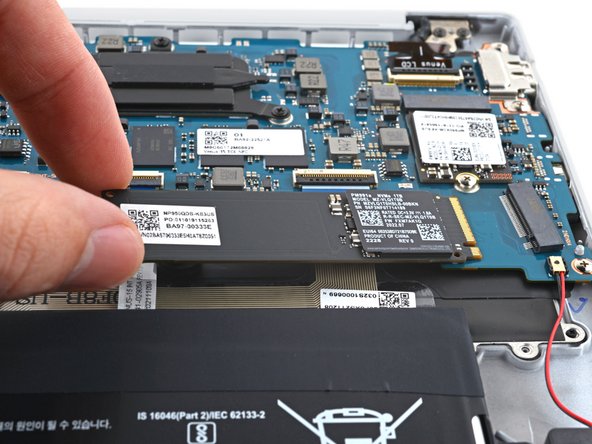
  8. Samsung Galaxy Book Pro 15" Secondary SSD Replacement, Remove the SSD: step 8, image 1 of 3 Samsung Galaxy Book Pro 15" Secondary SSD Replacement, Remove the SSD: step 8, image 2 of 3 Samsung Galaxy Book Pro 15" Secondary SSD Replacement, Remove the SSD: step 8, image 3 of 3
    • Lift the free end of the SSD up slightly and pull the SSD straight out of its socket on the motherboard.

    Ask FixBot

    Add Comment

Conclusion

To reassemble your device, follow the instructions in reverse order and perform the opposite actions, e.g., "reattach" instead of "removing." Skip steps that use heating and prying, and pay close attention to the 📌 bullets as you work through the steps.

Take your e-waste to an R2 or e-Stewards certified recycler.

Repair didn’t go as planned? Check out our Answers community for troubleshooting help.

Cancel: I did not complete this guide.

2 other people completed this guide.

Alex Diaz-Kokaisl

Member since: 01/16/22

241,247 Reputation

1,180 Guides authored

Team

iFixit Member of iFixit

Staff

122 Members

26,617 Guides authored

4 Guide Comments

It’s possible to add a second SSD for the book 5 360 pro?

Rubén Rodríguez Cueto - Reply Share

For the Samsung Galaxy Book Pro 360 15", you can add a second SSD! Just make sure it's the same dimensions (M.2 2280) as the first one.

Alex Diaz-Kokaisl - Reply Share
galaxy book 5 not the pro version

15.6 inch full hd display has two m.2 nvme ssd slot it's can fit full size 2280 ssd

Sandeep Vishwakarma - Reply Share

i just fitted for a customer

Sandeep Vishwakarma - Reply Share

Add Comment

View Statistics:

Past 24 Hours: 4

Past 7 Days: 19

Past 30 Days: 93

All Time: 4,219