Introduction
This guide shows how to safely disconnect and remove the integrated laptop camera modules (front and back) using standard FPC ribbon connectors.
What you need
-
-
-
Before continuing, disconnect the battery to prevent electrical damage. (guide to remove back cover: Panasonic Toughbook CF-XZ6 SSD Replacement)
-
The battery connector is located under the SSD and has multiple colored wires. Carefully peel back the thermal tape covering the connector. Gently pull the connector straight out of the socket, pushing evenly from both sides. It may be slightly stiff due to the wire tension.
-
Once disconnected, press and hold the power button on the right side for about 5 seconds to discharge any remaining power.
 Ask FixBot
-
-
-
-
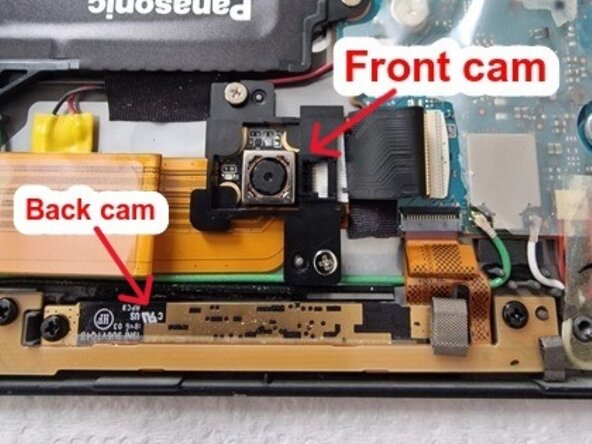
The laptop contains front (and, if applicable, rear) camera modules located along the top edge of the display assembly.
-
These modules are connected to the motherboard via flat flexible printed circuit (FPC) ribbon cables.
-
-
-
If the ribbon cables are under tension, first unscrew the camera modules to relieve strain, especially near any cable folds. This makes handling the connector easier and reduces the risk of damage.
-
Once the modules are free, locate the ZIF connector on the motherboard. Gently lift the small locking latch on the connector, then carefully slide the FPC cable out without bending or forcing it.
-
-



To reinstall or replace the camera modules, reinsert the FPC cable into the connector, secure the latch, and reattach the modules by following these steps in reverse order.
Cancel: I did not complete this guide.
One other person completed this guide.

