
Logitech MX Keys disassembly guide

Marts and 10 other contributors
Last updated on Jan 7, 2025
Views: 85K
View statistics:
- Past 24 Hours:
- 58
- Past 7 Days:
- 409
- Past 30 Days:
- 1,615
- All Time:
- 85,066
Comments: 28
9 comments on steps, 19 guide comments.
Go to guide commentsCompleted: 21 22
21 people have marked this guide "completed." Will you be next?
22 people have marked this guide "completed." Including you — great job!
Favorites: 5 6
5 people have favorited (and subscribed to) this guide. Will you be next?
6 people have favorited (and subscribed to) this guide — including you!
Bullets!
Better coordination with markups and the color/type of bullets will help make this guide more clear!
Community-Contributed Guide
An awesome member of our community made this guide. It was not created by iFixit staff.
Introduction
Go to step 1 ↓- Remove the rubber gliders on the backside:
The three gliders on the top are necessary in this step, but you will remove the bottom three later anyway so best to do all six at the same time. - Unscrew the three screws behind the top rubber gliders:
In my case the glue/adhesive covered them - Use the iFixit toolkit / picks to open the cover
- Remove the battery:
Unplug and remove, It’s lightly glued on the backside - Unscrew the little black screw on the PCB which clamps the antenna cable
- Unscrew the PCB:
Three kind of big silver head screws - Remove the PCB
- Unplug data cable:
Lift the adhesive tape, then the white part / connector pulls up to release the cable - Remove all silver and black screws
- The backplate cover:
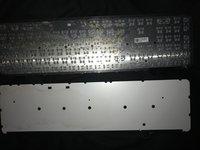
Start in the left top and lift / pull very slowly until you completely remove it. It’s pretty robust, but the adhesive is very strong, so take your time on this step. - Unscrew all the little black screws and the remove the metal baseplate
I have uploaded pictures, so please take a look at them if needed
Hope this helps and thanks to all the guys that helped
What you need
Tools

-
-
-
Remove the rubber-feet from the underside
-
Unscrew the three screws behind the top rubber feet
-
Note the leftmost screw is offset to the right, and not in the center
-
Use a plastic opener to remove the cover
 Ask FixBot
-
-
-
Remove the battery. Note it's lightly glued on the underside.
-
Unscrew two (slightly larger, silver) phillips screws that secure the PCB
-
Unscrew the last small black PCB screw on the top right corner
-
Remove the orange tape securing the serial cable (put it to one side, you'll need to put it back if reassembling)
-
Remove the small jumper with twisted red/black wires coming from it
-
Remove PCB
-
-
-


To reassemble your device, follow these instructions in reverse order.
Cancel: I did not complete this guide.
21 other people completed this guide.

19 Guide Comments
Do you know how I can turn the keyboard backlight so it stays on, even if if t runs down the battery faster.
I really need that back light. I am willing to risk breaking my keyboard for the reward of having the light. If I am really lucky changing the circuit to add a manual switch for that dang back light :)
I have basic skills and I am still learning...
Thank to all the Content Makers and Fix-It guide makers...!
perhaps I could find the correct voltage for the light and prob with a test light to find the circuit for the back light with out damaging something important, like the old days_?
Put a cover over the right top LED (green when turned on) - this is also the "window" for the ambient light sensor. By making it "dark", the backlight will be fully on when your hands are close to the keyboard.
