Introduction
Screen replacement guide for Kindle Paperwhite 4 (10th Generation)
What you need
-
-
With the splungers, split the top case from the rest of the body.
-
The case is glued to the screen, optionally use a hair dryer or heat gun to soften the glue
 Ask FixBot
-
-
-
With a T5 Torx Screwdiver, unscrew the 10 screws holding the frame with the back case
-
After that, with the opening tool, split the back case from the main body
-
-
Tool used on this step:Tweezers$4.99
-
With the tweezers, disconnect the wires from the motherboard. Start with the battery and then remove the 3 connections from the screen
-
Unscrew 2 T5 Torx holding the motherboard to the frame
-
Remove the motherboard from the frame
-
(optionally) remove the battery from the frame
-
-
-
-
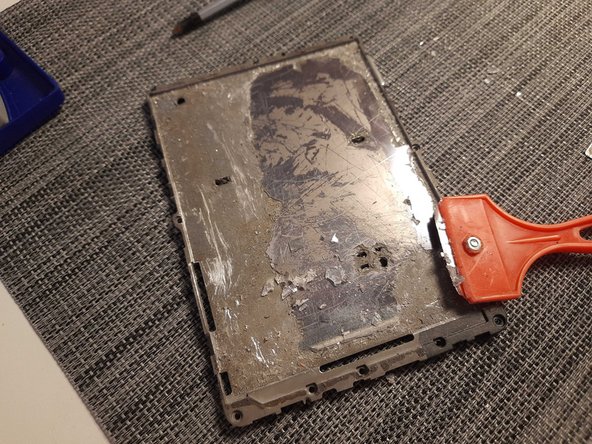
with the help of a heat gun or hairdryer and a razor blade, remove the screen from the frame (this step will take significant time)
-
After all the glass is fully removed from the frame, use alcohol or a dissolver to clean the remaining glue
-
-
-
Attach the new screen to the frame
-
1st, verify it fits well. Once that is done, remove the adhesive tape from the back of the screen and attach the screen to the frame - apply light pressure to fully glue it to the frame.
-
-
-
Put back the motherboard in the frame.
-
Place the motherboard in the plastic spacers provided. After it fits, screw the 2 T5 Torx holding the motherboard to the frame
-
Connect all wires to the motherboard (3 from the screen, 1 battery)
-
-
-
Re-attach the frame with the back case, making sure it clicks and sits right in
-
Screw the 10 T5 Torx screws attaching the frame to the case
-
Finally, put in the front case and hold it tight together for the glue to apply.
-
(optionally) if there are places where the glue was removed, dissassemble again the top frame and add extra in the adhesive side of the top case.
-


Cancel: I did not complete this guide.
One other person completed this guide.

6 Guide Comments
Any suggestions to quicken the screen removal step? I've been trying to remove mine with the iOpener and a hair dryer, and it's taken me about 1h30min to remove 1/6 of the screen, and it's really tough still. Am I not heating it enough?
Edit: Step 4 to clarify
I found a razor blade to be helpful. Metallic objects to pry, trying to get the screen lifted up/split from the glue.
Nevertheless, it was a long process for me as well. About 3-4 hours for the whole screen - it was really glued in
Is it possible for you to do one to replace the charging port? And have the part for the repair?
I have not needed to replace the charging port. Up until step 3 it should all be the same.
However, I recall the charging port was integrated / soldered. So you'd either need to replace the whole motherboard or desolder the connector and replace it. Although not exactly the same model, this guide might help Kindle Paperwhite 2nd Generation Charging Port Replacement
!!!!DO NOT follow this guide!!!! That is NOT the Kindle Paperwhite 4 (10gen) in the picture
The digitizer is fused to the top case, you will 100% break and destroy the screen if you follow this guide.
My Kindle died so yours doesn't have to.
The author should take this down or update the guide with the correct model.