Introduction
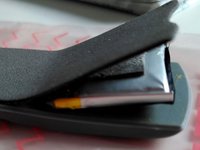
After about a year of intensive usage, I noticed the battery was swollen. I don't know whether it was caused by lying on it, storing it where it was bumped by other stuff, or just bad luck, but I figured this was repairable.
What you need
-
-
-
Just like when charging the device, take out the Bluetooth module from the headband and disconnect it from the speakers.
 Ask FixBot
-
-
-
The back cover is glued in place. It's not a very tough glue, so the cover may have already shifted a bit from its place, and it shouldn't be too hard to remove.
-
-
-
The module has two compartments, one for the battery and one for the circuit board. Remove both from their rubbery shell.
-
-
-
-
You may be able to cleanly remove the two wires from the beige clip, but I wasn't confident I would be able to reconnect them, so I cut them near the battery, so I had plenty of wire to attach the new battery to.
-
-
-
The original battery is a prismatic LiPo 3.7 V 330mAh with dimensions 4x28x26 mm
-
The connector used on the battery is a HIROSE DF57(AH), 1.2mm pitch, 2-position. They can be found on DigiKey along with their header and pins.
-
I wasn't able to find one of that exact size, but since it fit even in its swollen state, I figured I could go for a thicker 6x28x23 mm battery
-
-
-
Solder or twist together the old and new battery wires
-
Cover the exposed parts with electrical tape
-
-
-
You can test your repairs without replacing everything into its protective cover first. This can save you some frustration when it doesn't work on the first try, but requires a bit more caution when handling the circuit board.
-
Long press the central button on the circuit board to turn it on. Does the red LED blink on?
-
Does it connect to your device?
-
Attach the speakers and try to play some audio
-
Attach a charger. Does the charging light come on?
-
-
-
You can look at the opening for the USB port to check the orientation (this is one place where USB-C would be a disadvantage)
-
It might take some patience to guide the wires through the opening between the two compartments. In my case it was easier to turn the battery sideways.
-
-
-
In my case, it remained sticky enough to not require new glue, even after several disassemblies.
-
-




Cancel: I did not complete this guide.
2 other people completed this guide.

5 Guide Comments
I ended up removing the bad battery connector altogether from the battery wires. Then I soldered the negative side to the capacitor just below the connector on the board, and the positive side to the positive pin in the board connector. Finally I managed to get some glue gun glue on it.
I had the problem of loose battery connector terminals happen on the SleepPhones Effortless as well. Same solution: Solder the battery to the boar. There is an unpopulated capacitor one case use if the wires are long enough. Otherwise, carefully solder to the connector terminals. Photo: https://imgur.com/a/6uOM8CR
For anyone who finds this in the future, here is the information about the connector. It is a HIROSE DF57(AH). 1.2mm pitch. Took a long time to figure this one out, and this post was the first Google result that I really wish had the answer.
Here is what you need.
2. The pins
3. (Optional - if you need to replace the header) The header
You'll need a crimping tool for the pins. You can find a generic one on amazon for cheap. Don't look at the ones by Romex or HIROSE; they're priced to be part of a huge corporate budget. 28 gauge wire.
