Free Shipping on Domestic Orders $75+

ASUS ROG Strix G15 G513 Screen Replacement

What you need

Featured Document

Preview of the first page of this document
ASUS ROG Strix G15 G513 Service Manual

Log in to view the full document

Log In
    1. ASUS ROG Strix G15 G513 Screen Replacement, Screen: step 1, image 1 of 3 ASUS ROG Strix G15 G513 Screen Replacement, Screen: step 1, image 2 of 3 ASUS ROG Strix G15 G513 Screen Replacement, Screen: step 1, image 3 of 3
      • Firstly prepare your laptop, your tools and your new Screen

      • Unplug your laptop

      Ask FixBot

      Add Comment

    2. ASUS ROG Strix G15 G513 Screen Replacement: step 2, image 1 of 1
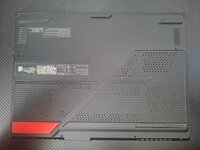
      • Turn your laptop upside down

      • Start unscrewing all 10 blue and orange screws with a Philips #1 screwdriver

      • The blue and orange screws are different length

      • Unscrew the red screw always last and screw it in always first

      Ask FixBot

      Add Comment

    3. ASUS ROG Strix G15 G513 Screen Replacement: step 3, image 1 of 3 ASUS ROG Strix G15 G513 Screen Replacement: step 3, image 2 of 3 ASUS ROG Strix G15 G513 Screen Replacement: step 3, image 3 of 3
      • Keep your screws organized, you can use some screw holders, brackets or small magnets

      Ask FixBot

      Add Comment

    4. ASUS ROG Strix G15 G513 Screen Replacement: step 4, image 1 of 3 ASUS ROG Strix G15 G513 Screen Replacement: step 4, image 2 of 3 ASUS ROG Strix G15 G513 Screen Replacement: step 4, image 3 of 3
      • Insert a plastic guitar pick or a plastic card to start peeling the back cover off

      • Start by putting one in the bottom right corner

      • Then slowly peel until you reach bottom left and top right corners

      • Put a guitar pick in each of those corners as well

      • For more detail check the official service guide manual in the attached documents section

      Ask FixBot

      Add Comment

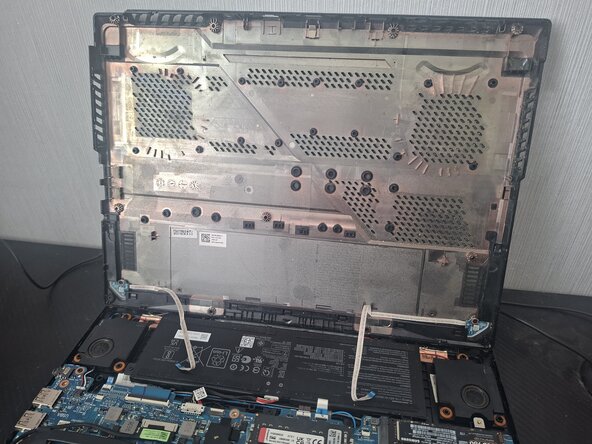
    5. ASUS ROG Strix G15 G513 Screen Replacement: step 5, image 1 of 3 ASUS ROG Strix G15 G513 Screen Replacement: step 5, image 2 of 3 ASUS ROG Strix G15 G513 Screen Replacement: step 5, image 3 of 3
      • Start by peeling from the bottom right corner slowly until the entire back cover comes off

      • Rotate your laptop

      • Beware of 2 thin LED ribbon cables that are still attached

      Ask FixBot

      Add Comment

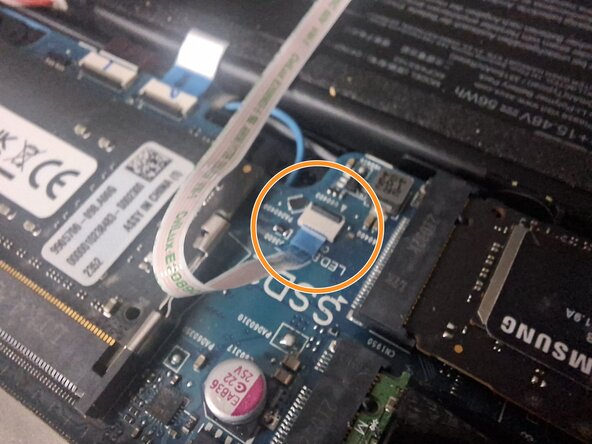
    6. ASUS ROG Strix G15 G513 Screen Replacement: step 6, image 1 of 3 ASUS ROG Strix G15 G513 Screen Replacement: step 6, image 2 of 3 ASUS ROG Strix G15 G513 Screen Replacement: step 6, image 3 of 3
      • Now you need to unplug them

      • Start by lifting the small black part of the connector up

      • Then just pull the cable away

      Ask FixBot

      Add Comment

    7. ASUS ROG Strix G15 G513 Screen Replacement: step 7, image 1 of 3 ASUS ROG Strix G15 G513 Screen Replacement: step 7, image 2 of 3 ASUS ROG Strix G15 G513 Screen Replacement: step 7, image 3 of 3
      • Do the same for the other cable connector

      Ask FixBot

      Add Comment

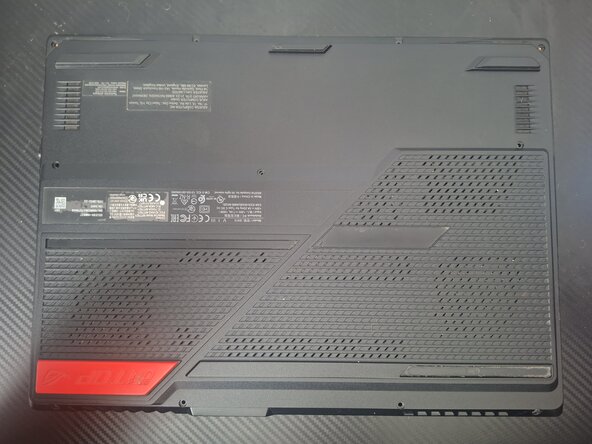
    8. ASUS ROG Strix G15 G513 Screen Replacement: step 8, image 1 of 1
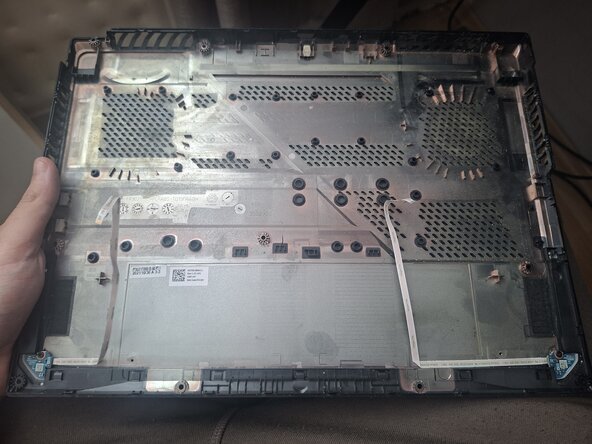
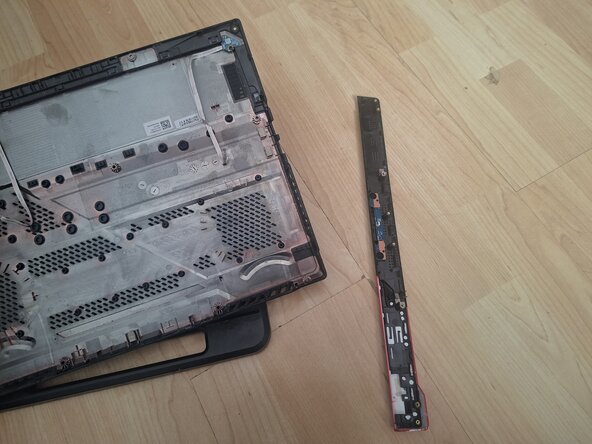
      • Now remove the back cover completely

      Ask FixBot

      Add Comment

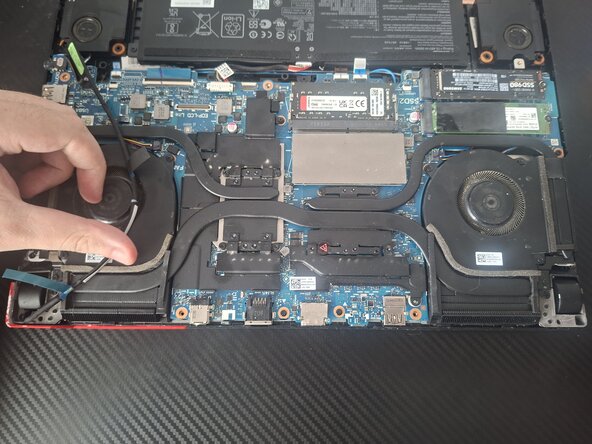
    9. ASUS ROG Strix G15 G513 Screen Replacement: step 9, image 1 of 3 ASUS ROG Strix G15 G513 Screen Replacement: step 9, image 2 of 3 ASUS ROG Strix G15 G513 Screen Replacement: step 9, image 3 of 3
      • Now you need to disconnect the battery

      • Locate the connector

      • Pull the top tin lock away from you as seen on image 1 vs 2

      • Then disconnect the battery connector by supporting it from sides and lifting it up

      Ask FixBot

      Add Comment

    10. ASUS ROG Strix G15 G513 Screen Replacement: step 10, image 1 of 1
      • Rotate your laptop again

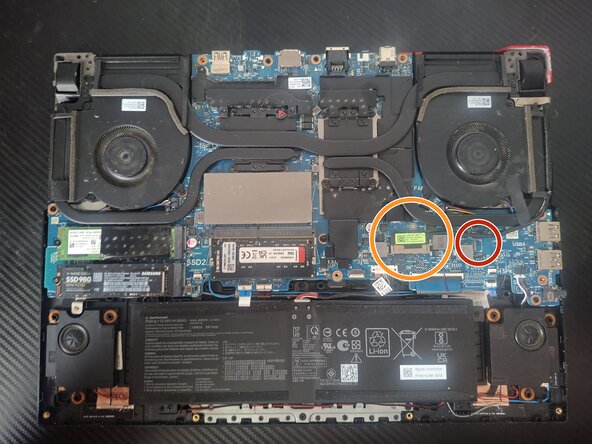
      • Locate your EDP cable connector

      • If you have a better model you will have an additional connector the EDP cable won't have 2 connectors but 4 ones that go together everywhere, the second pair of connectors is for the asus rog logo lighting on the screen back cover

      Ask FixBot

      Add Comment

    11. ASUS ROG Strix G15 G513 Screen Replacement: step 11, image 1 of 2 ASUS ROG Strix G15 G513 Screen Replacement: step 11, image 2 of 2
      • Unscrew these 4 screws and disconnect your EDP cable

      Ask FixBot

      Add Comment

    12. ASUS ROG Strix G15 G513 Screen Replacement: step 12, image 1 of 3 ASUS ROG Strix G15 G513 Screen Replacement: step 12, image 2 of 3 ASUS ROG Strix G15 G513 Screen Replacement: step 12, image 3 of 3
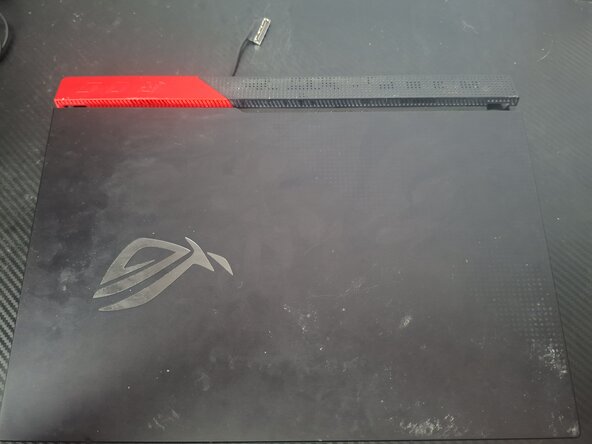
      • Rotate your laptop

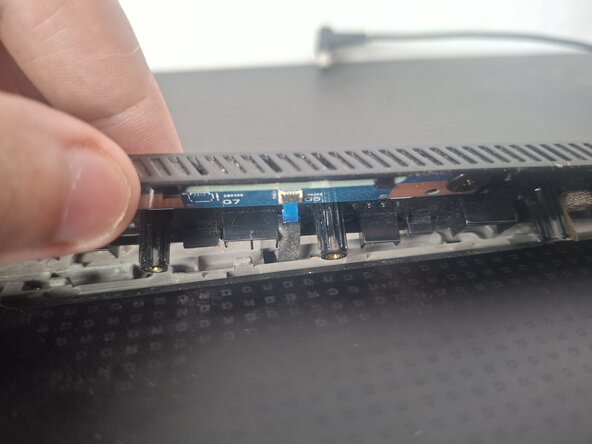
      • Try to lift/pry that colorful small panel if it is interchangeable if it's not, lift the whole panel

      • Be careful under the panel is a small board that has a small connector

      Ask FixBot

      Add Comment

    13. ASUS ROG Strix G15 G513 Screen Replacement: step 13, image 1 of 3 ASUS ROG Strix G15 G513 Screen Replacement: step 13, image 2 of 3 ASUS ROG Strix G15 G513 Screen Replacement: step 13, image 3 of 3
      • Carefully lift the small black rectangle latch up to disconnect the small ribbon cable and disconnect the cable

      • You can put away the panel now

      Ask FixBot

      Add Comment

    14. ASUS ROG Strix G15 G513 Screen Replacement: step 14, image 1 of 1
      • If you do have the interchangeable version there will be a VERY, VERY small screw here!

      Ask FixBot

      Add Comment

    15. ASUS ROG Strix G15 G513 Screen Replacement: step 15, image 1 of 3 ASUS ROG Strix G15 G513 Screen Replacement: step 15, image 2 of 3 ASUS ROG Strix G15 G513 Screen Replacement: step 15, image 3 of 3
      • Unscrew these 6 screws

      • Unscrew these 2 screws as well

      • Rotate your laptop carefully

      Ask FixBot

      Add Comment

    16. ASUS ROG Strix G15 G513 Screen Replacement: step 16, image 1 of 3 ASUS ROG Strix G15 G513 Screen Replacement: step 16, image 2 of 3 ASUS ROG Strix G15 G513 Screen Replacement: step 16, image 3 of 3
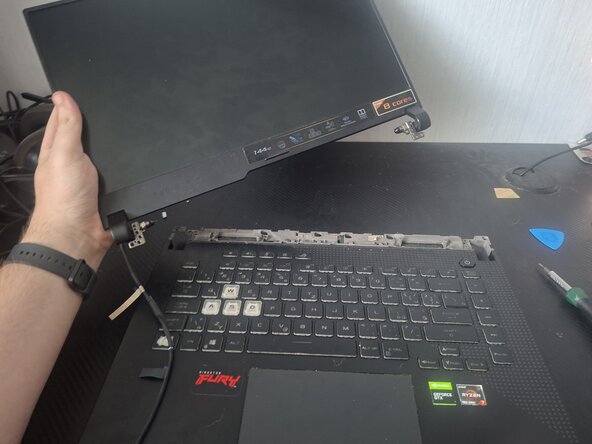
      • Slowly lift your whole screen

      • The hinges will come off

      • Tread the EDP cable through the hinge and out

      Ask FixBot

      Add Comment

    17. ASUS ROG Strix G15 G513 Screen Replacement: step 17, image 1 of 3 ASUS ROG Strix G15 G513 Screen Replacement: step 17, image 2 of 3 ASUS ROG Strix G15 G513 Screen Replacement: step 17, image 3 of 3
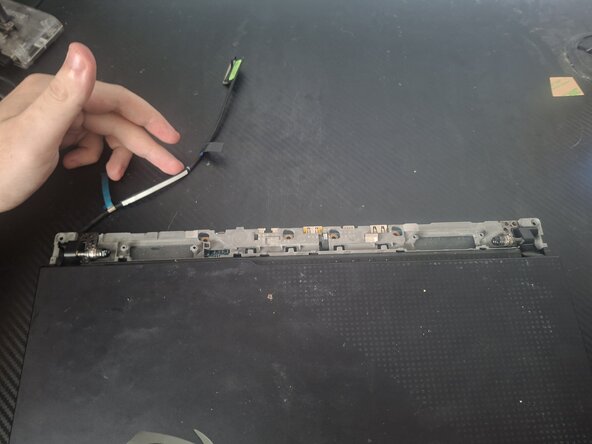
      • Now you can remove your screen completely

      • Prepare your new screen

      • Start putting your new screen in

      Ask FixBot

      Add Comment

    18. ASUS ROG Strix G15 G513 Screen Replacement: step 18, image 1 of 3 ASUS ROG Strix G15 G513 Screen Replacement: step 18, image 2 of 3 ASUS ROG Strix G15 G513 Screen Replacement: step 18, image 3 of 3
      • Pull your EDP cable where the hinge goes and insert the hinges into place

      • Screw these 6 screws back in

      • Screw these 2 screws in as well

      Ask FixBot

      Add Comment

    19. ASUS ROG Strix G15 G513 Screen Replacement: step 19, image 1 of 3 ASUS ROG Strix G15 G513 Screen Replacement: step 19, image 2 of 3 ASUS ROG Strix G15 G513 Screen Replacement: step 19, image 3 of 3
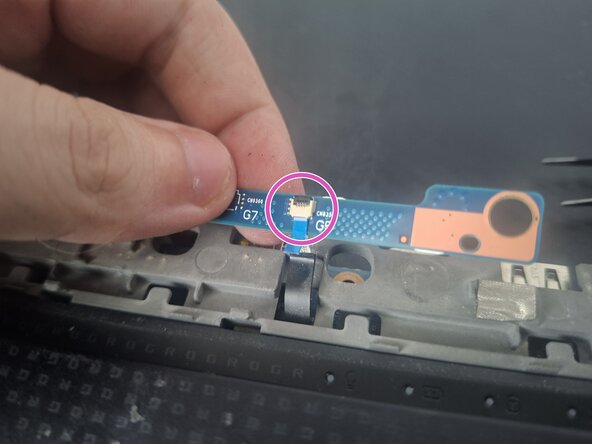
      • Now we should put this panel back in, but you are going to notice how hard it is to connect that small ribbon connector

      • Instead, unscrew that small board from that panel

      Ask FixBot

      Add Comment

    20. ASUS ROG Strix G15 G513 Screen Replacement: step 20, image 1 of 2 ASUS ROG Strix G15 G513 Screen Replacement: step 20, image 2 of 2
      • Next connect the ribbon cable to that small board and secure it in the connector

      • Then, from an angle screw those 2 screws back in

      Ask FixBot

      Add Comment

    21. ASUS ROG Strix G15 G513 Screen Replacement: step 21, image 1 of 3 ASUS ROG Strix G15 G513 Screen Replacement: step 21, image 2 of 3 ASUS ROG Strix G15 G513 Screen Replacement: step 21, image 3 of 3
      • Screw these 4 screws back in

      • Rotate your laptop

      Ask FixBot

      Add Comment

    22. ASUS ROG Strix G15 G513 Screen Replacement: step 22, image 1 of 3 ASUS ROG Strix G15 G513 Screen Replacement: step 22, image 2 of 3 ASUS ROG Strix G15 G513 Screen Replacement: step 22, image 3 of 3
      • Snug this piece in DEEP so that it's in there and won't fall out

      • Put the tape there

      • Put this piece really deep as well so it can't fall out

      • Use the tape that is on this piece of cable on the bottom and tape it snugly in there

      Ask FixBot

      Add Comment

    23. ASUS ROG Strix G15 G513 Screen Replacement: step 23, image 1 of 3 ASUS ROG Strix G15 G513 Screen Replacement: step 23, image 2 of 3 ASUS ROG Strix G15 G513 Screen Replacement: step 23, image 3 of 3
      • Tape it in there

      • Connect the EDP cable to the connector

      • Connect the logo lighting cable in here if you have it

      • Now rotate the laptop

      Ask FixBot

      Add Comment

    24. ASUS ROG Strix G15 G513 Screen Replacement: step 24, image 1 of 3 ASUS ROG Strix G15 G513 Screen Replacement: step 24, image 2 of 3 ASUS ROG Strix G15 G513 Screen Replacement: step 24, image 3 of 3
      • Now reconnect the battery connector

      • Push it down and secure it with the steel latch

      Ask FixBot

      Add Comment

    25. ASUS ROG Strix G15 G513 Screen Replacement: step 25, image 1 of 1
      • Put the back cover against a wall so that you can reconnect the LED flex cables without the need of holding it

      Ask FixBot

      Add Comment

    26. ASUS ROG Strix G15 G513 Screen Replacement: step 26, image 1 of 2 ASUS ROG Strix G15 G513 Screen Replacement: step 26, image 2 of 2
      • Push the left cable in until you can barely see the white line on the blue part of the cable

      • Secure it by pressing the black latch down

      Ask FixBot

      Add Comment

    27. ASUS ROG Strix G15 G513 Screen Replacement: step 27, image 1 of 3 ASUS ROG Strix G15 G513 Screen Replacement: step 27, image 2 of 3 ASUS ROG Strix G15 G513 Screen Replacement: step 27, image 3 of 3
      • Do the same for the right cable

      Ask FixBot

      Add Comment

    28. ASUS ROG Strix G15 G513 Screen Replacement: step 28, image 1 of 3 ASUS ROG Strix G15 G513 Screen Replacement: step 28, image 2 of 3 ASUS ROG Strix G15 G513 Screen Replacement: step 28, image 3 of 3
      • Now put the back cover back on and pat it down so that everything clicks and holds in place

      Ask FixBot

      Add Comment

    29. ASUS ROG Strix G15 G513 Screen Replacement: step 29, image 1 of 3 ASUS ROG Strix G15 G513 Screen Replacement: step 29, image 2 of 3 ASUS ROG Strix G15 G513 Screen Replacement: step 29, image 3 of 3
      • Rotate it one last time

      • With a Philips #1 screwdriver screw the bottom right screw first

      • Then screw in the rest

      Ask FixBot

      Add Comment

    30. ASUS ROG Strix G15 G513 Screen Replacement: step 30, image 1 of 2 ASUS ROG Strix G15 G513 Screen Replacement: step 30, image 2 of 2
      • Now plug in your laptop

      • Now check if your new screen is working, not flickering and works at all angles :)

      Ask FixBot

      Add Comment

Conclusion

Hopefully your new screen works great, try different angles to see if it works without freezing or stuttering.
Thanks for reading my guide :3

Cancel: I did not complete this guide.

One other person completed this guide.

Attached Documents

Nimbyte

Member since: 06/09/26

591 Reputation

5 Guides authored

0 Guide Comments

Add Comment

View Statistics:

Past 24 Hours: 7

Past 7 Days: 48

Past 30 Days: 190

All Time: 190