Free Shipping on Domestic Orders $75+

Introduction

Go to step 1 ↓

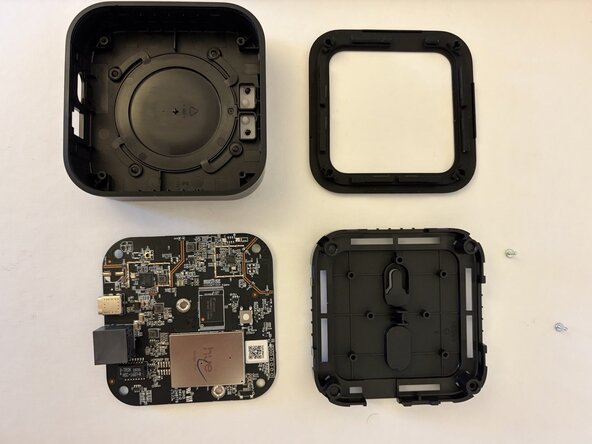
The Philips Hue Pro is remarkably easy to disassemble. Unlike many modern devices, nothing is glued in place, and it is held together by just two screws. These screws are not treated with thread-locking compound, which means you can open the unit without worrying about breaking anything or voiding the warranty. This guide will walk you step by step through the process, showing how simple it is to access the internal components for inspection, repair, or modification.

What you need

Tools

This teardown is not a repair guide. To repair your Philips Hue Bridge Pro, use our service manual.

    1. Philips Hue Bridge Pro, Philips Hue Bridge Pro: step 1, image 1 of 1
      • 1. Pry off the bottom rubber with your fingernail (no sharp tools).

      • 2. Remove the two screws in the corners.

      • 3. Lift off the bottom plate.

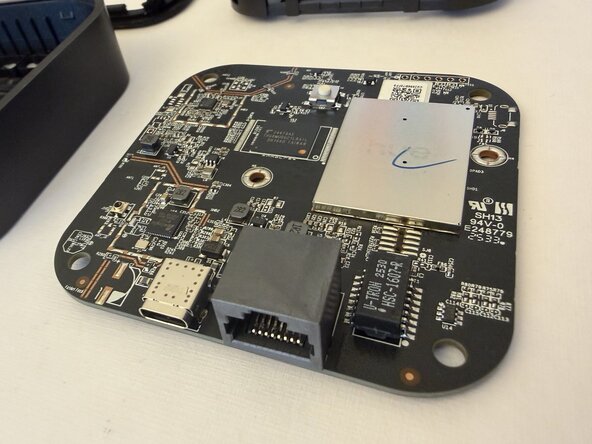
      • 4. Gently flip the main board upward to access it. Safe and simple.

      Ask FixBot

      Add Comment

    2. Philips Hue Bridge Pro: step 2, image 1 of 1
      • Hier Anweisungen einfügen.

      Ask FixBot

      Add Comment

    3. Philips Hue Bridge Pro: step 3, image 1 of 1
      • .

      Ask FixBot

      Add Comment

    4. Philips Hue Bridge Pro: step 4, image 1 of 1
      • Hier Anweisungen einfügen.

      Ask FixBot

      Add Comment

      • Hier Anweisungen einfügen.

      Ask FixBot

      Add Comment

fussi37

Member since: 11/04/25

121 Reputation

1 Guide authored

3 Guide Comments

Thanks for the teardown. So does it have a Thread radio, or not?

Mike - Reply Share

I dont know.

fussi37 - Reply Share

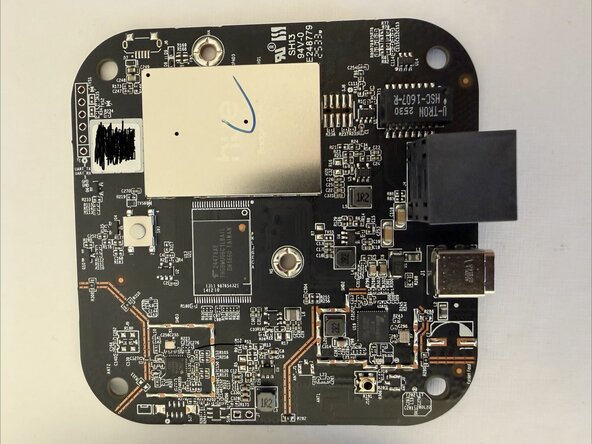
Maybe could you include a more detailed photo of the black square chips near ANT1 and ANT2? If it were possible to read the chip markings, it might solve the mystery :)

Mike - Reply Share

Add Comment

View Statistics:

Past 24 Hours: 4

Past 7 Days: 38

Past 30 Days: 121

All Time: 1,119