
Free Shipping on Domestic Orders $75+

This teardown is not a repair guide. To repair your Logitech M650 L, use our service manual.

  1. Logitech M650 L  Mouse Teardown, The Start: step 1, image 1 of 1
    • Remove the back plate and the battery with the receiver

  2. Logitech M650 L  Mouse Teardown, The Start: step 2, image 1 of 3 Logitech M650 L  Mouse Teardown, The Start: step 2, image 2 of 3 Logitech M650 L  Mouse Teardown, The Start: step 2, image 3 of 3
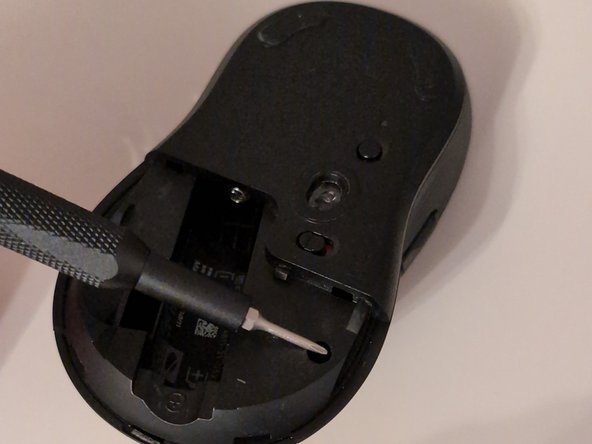
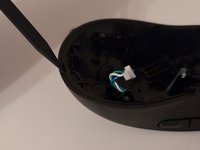
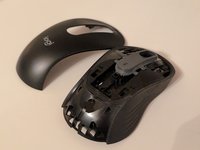
    • Use your Phillips 00 screwdriver to unscrew the 2 screws as shown in the image. Be careful when removing the bottom part of the mouse because there is a cable you have to disconnect.

  3. Logitech M650 L  Mouse Teardown, Bottom Part: step 3, image 1 of 3 Logitech M650 L  Mouse Teardown, Bottom Part: step 3, image 2 of 3 Logitech M650 L  Mouse Teardown, Bottom Part: step 3, image 3 of 3
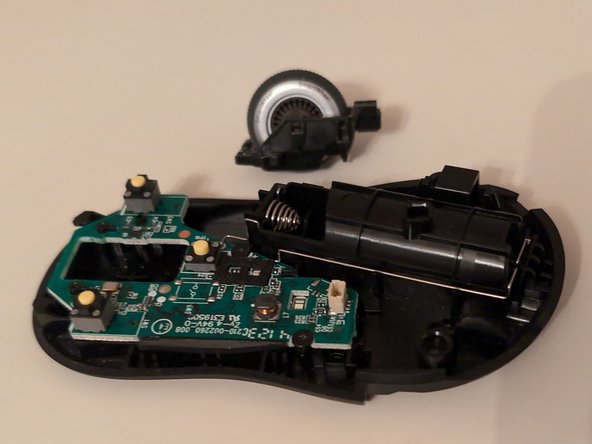
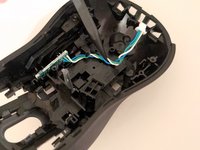
    • Using your Phillips 000 screwdriver or bit, unscrew the 2 screws holding down the scroll wheel.

  4. Logitech M650 L  Mouse Teardown, The Bottom: step 4, image 1 of 3 Logitech M650 L  Mouse Teardown, The Bottom: step 4, image 2 of 3 Logitech M650 L  Mouse Teardown, The Bottom: step 4, image 3 of 3
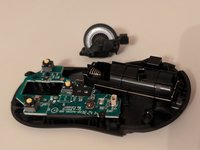
    • Now, using the same bit, unscrew the 2 screws holding the board down.

  5. Logitech M650 L  Mouse Teardown, The Top: step 5, image 1 of 1
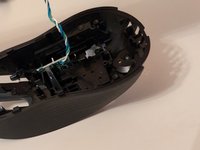
    • Now, on the top side of the mouse, you're going unscrew the screw at the back

  6. Logitech M650 L  Mouse Teardown, The Top: step 6, image 1 of 1
    • Next, you're going to use your Phillips 00 screwdriver or bit and unscrew the screw on the tiny board.

  7. Logitech M650 L  Mouse Teardown, The Top: step 7, image 1 of 2 Logitech M650 L  Mouse Teardown, The Top: step 7, image 2 of 2
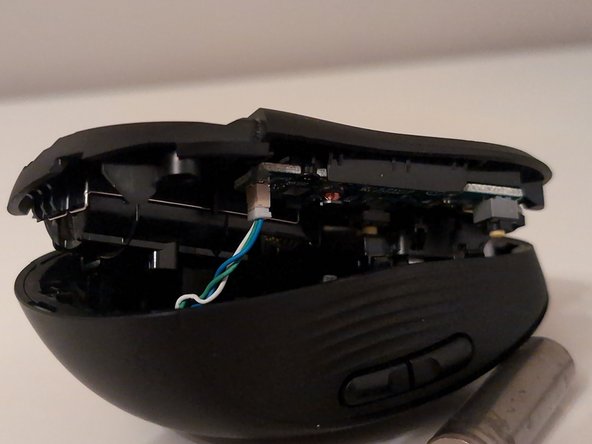
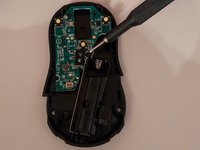
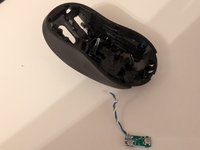
    • Now using a spudger or your hand, your going to pull and pry at the back of the mouse to remove the upper layer

  8. Logitech M650 L  Mouse Teardown, The Tiny Board: step 8, image 1 of 3 Logitech M650 L  Mouse Teardown, The Tiny Board: step 8, image 2 of 3 Logitech M650 L  Mouse Teardown, The Tiny Board: step 8, image 3 of 3
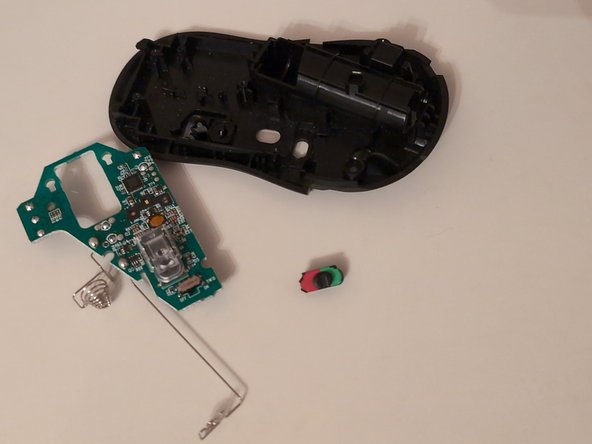
    • Finally you can remove the tiny board. First remove the cable, then pull up on the cable to remove the board

  9. Logitech M650 L  Mouse Teardown, You're Done!!!: step 9, image 1 of 1
    • Hooray! You're done. Now put it back together.

Benjamin

Member since: 01/04/25

169 Reputation

1 Guide authored

1 Guide Comment

정말 잘 보고 갑니다. 덕분에 분해 잘했습니다😁

NightFox - Reply Share

Add Comment

View Statistics:

Past 24 Hours: 6

Past 7 Days: 46

Past 30 Days: 167

All Time: 2,580