Introduction
The FitBit One is part of the family of fitness devices from FitBit Inc, designed to track your movement throughout the day and display the data via a website dashboard.
FitBit One is a wearable device that keeps track of the number and rate of steps you take and stairs you climb, and it uses this information to calculate various metrics like distance covered and calories burned. The device periodically sends the data it gathers to FitBit's servers via wireless communication with internet connected smartphones, iPads, or a PC with dongle.
There are a number of interesting features that warrant the teardown. It has a rechargeable battery that should power the device for about two weeks. It has a haptic alarm for time of day reminders. It has a bright LED display that shows the current statistics, and it is claimed to be sweat proof and rain proof, but not water proof. it also claims to remember minute-by-minute movement stats for up to seven days, and a summary of movement data for much longer.
Time to open it up and see what's inside this mighty machine.
What you need
-
-
-
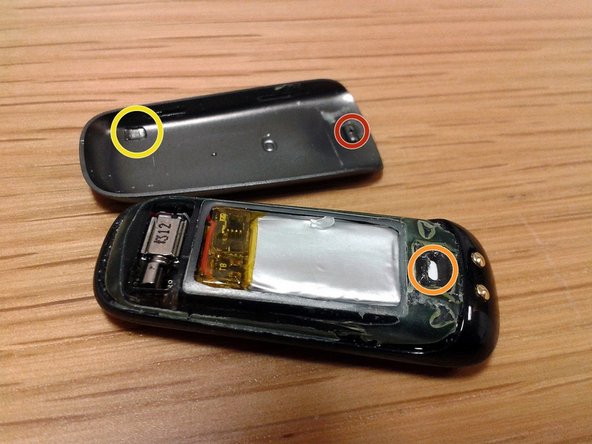
Removing the metal backplate is simple. This is just stuck on with some flexible glue. So prise something under and off it pops.
-
Inside you can see a number of large cut outs in the rear of the plastic casing.
-
Note the small pinhole in the metal backplate that aligns with the rubber sealed hole in the plastic casing - more on that later.
-
There is also a very small ground out area inside the metal backplate that appears to align with the rotating mass of the vibrator.
 Ask FixBot
-
-
-
The plastic casing is made up of two parts stuck together. Using a precision utility knife, carefully cut along the seam.
-
There are plastic clips at each end that are easy to cut through inadvertently if you go too deep.
-
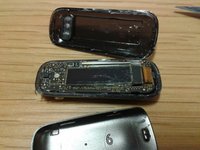
The front now lifts away cleanly.
-
-
-
Inside the front cover you see the LCD display, attached by ribbon cable and stuck firmly onto the PCB.
-
Above the display, running down the right hand side of the device front, is the BLE antenna.
-
Lifting the LCD glass just results in destroying it, and there is nothing interesting underneath anyway.
-
-
-
-
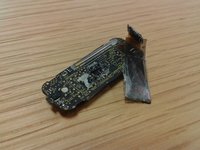
The PCB lifts out from the back of the plastic housing easily.
-
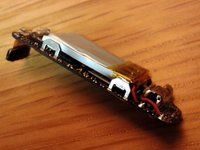
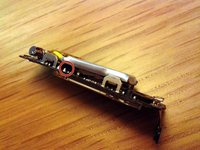
Notice how the battery is supported on stand-offs from the rear of the PCB.
-
The battery is held in place with a small foam block adhering to the battery and PCB. Cut that away and the battery lifts off.
-
-
-
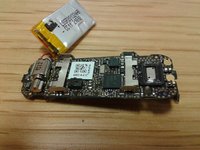
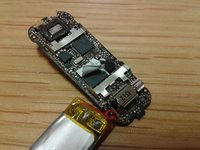
Now we get to see some more interesting parts.
-
The SoC has a QR code sticker, likely for inventory control, so take that off to see what we have underneath.
-
You can also see the spring-loaded paddles at the bottom of the PCB that connect to the device charging pins.
-
The power control module for the battery is wrapped up near the battery terminals.
-
-
-
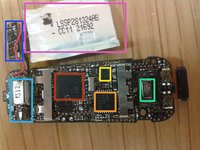
Here we get a good view of what's inside:
-
STMicroelectronics STM32L 151 ARM-based SoC microcontroller
-
Nordic Semiconductor nRF8001Bluetooth chip
-
Accelerometer labelled 8304 AE D42 oW
-
Measurement specialities MS5607-02BA03 altimeter
-
Protection circuit module for battery
-
Polymer Li-Ion Battery
-
PCB mounted vibration motor
-
-
-
The air pressure hole, required for the altimeter, is protected by a piece of paper held in place by a foam collar.
-
In turn, the inside of the plastic cover presses onto a foam collar around the altimeter on the PCB.
-
This makes the device sweat proof, but not water tight.
-
-
-
Too bad the display was damaged during teardown.
-
Looks like a tidy, well-designed bit of tech!
-
Conclusion is that the FitBit One is not an easily repairable device.
-
The device is not designed to be opened, so you will do some damage by cutting it open
-
Taking things apart will compromise the water resistance of the device, and the LCD display is easily broken by any flexing or attempts to modify.
-
-













27 Guide Comments
Are there any markings indicating the controller interface for the LED display? Its a nice display, and I'd be curious if the module in my broken Fitbit could be repurposed.
My Fitbit went through the clothes washer attached to my jeans. When it came out I was amazed it was still working, but after 2 days the display went blank, and it was dead to the world. I tried unsuccesfully to dry it out in rice for a week, but that didn't help at all. I then took the decision to carefully open it as in this guide. I found quite a lot of sulphate corrosion at various places on the board, plus some water droplets inside the case. I cleaned the board with an ear bud dipped in methylated spirits to remove the corrosion, and I dried the water drops carefully with hair dryer. After gluing it together, and charging, it is working perfectly again - I guess not as water tight as before, but I can live with that - so long as it doesn't go through the washer again :P
What type of glue did you use?
