Introduction
Blink Mini 2K+ Teardown
-
-
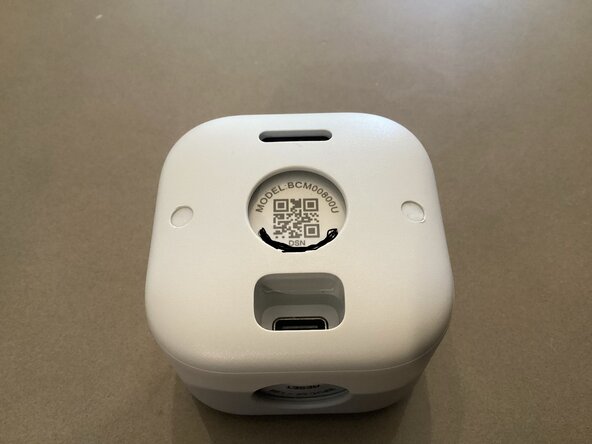
This is a Blink Mini 2K+ Indoor/Outdoor security camera. It retails for $39.99 down to $25.99 as of 2026, and has decent quality for its price. It also is IP-65 water resistant against rain.
-
It features night-vision capabilities, 2K video quality, AI smart detection, noice cancellation, and much more.
-
It also is quite small too, I expect very small chips across multiple crammed PCB’s.
-
You do also have to download an app with the camera, which still works without a subscription, but doesn’t have full AI and cloud software features unless you purchase the full subscription plan.
-
-
-
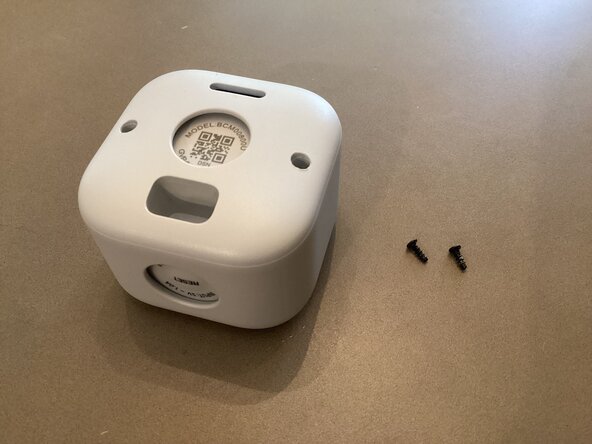
To begin disassembly of your camera, use some tweezers or a toothpick to slowly push out the small rubber inserts covering the two screws.
-
Use a long Philips head screwdriver to unscrew the 2 screws. Make sure to keep track of both the screws and rubber inserts as they are quite small, and easy to loose.
-
-
-
Once both screws are removed, use an opening pick/flathead, or something that can wedge in between the case of the camera.
-
There is an O-ring gasket in between the two sides of the case. Make sure it stays on the front part to ensure it’s IP-65 water resistant rating if you do reassemble this camera.
-
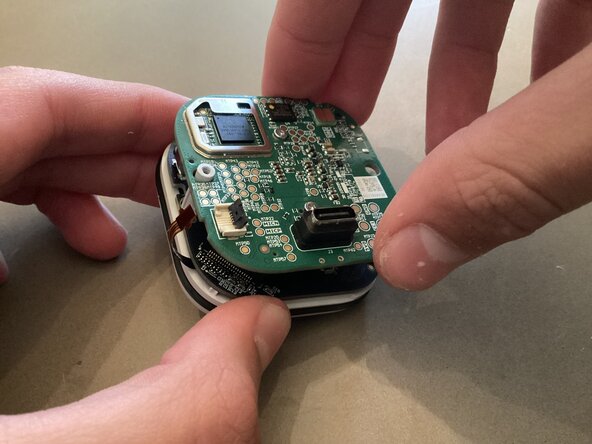
As expected the PCBA module and camera is very tightly compacted…
-
I will remove the RF shields, but not the actual camera to see the CMOS sensor, as I want to put this back together.
-
-
-
-
Under the RF shields, the Main processor powering this little camera is an Immedia (Amazon acquired company) SoC in a BGA format, allowing for such a small space. I can’t find that much info on it, but here are some images of it. The numbers are small and poorly imprinted. My camera doesn’t help this at all either.
-
The other chip has no branding on it, as it is in the CSP wafer-scale packaging type to maximize space. I believe that it is responsible for Bluetooth connectivity and interaction/transmission, with the main device the camera is broadcasting footage to.
-