Introduction
This guide will help you open an Amazon Luna controller, whether to diagnose an internal issue, replace a modular component or clean from the inside.
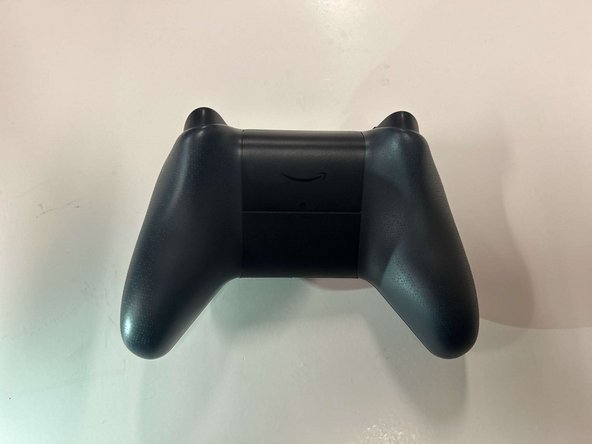
The Amazon Luna controller is available from Amazon's website. Although the controller is not required to use the Luna streaming service, it is highly recommended to be used along with the service because the controller can connect directly to Amazon's game servers using Wi-Fi Cloud Direct connection, reducing latency while providing a familiar and complete input experience.
Much like other popular modern controllers, the Amazon Luna controller contains many plastic, moving or electrical parts that may fail under frequent use, such as the battery terminals, the face buttons, USB-C port, analog sticks or the rumble motors.
What you need
-
-
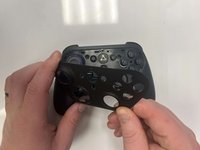
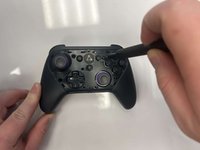
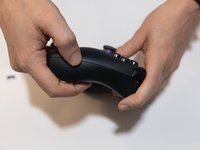
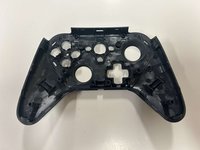
Flip the controller over to its front and locate the seam where the front plate connects to the rest of the body.
-
-
-
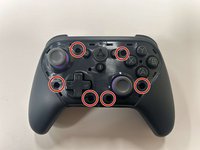
Remove the six 8 mm screws securing the controller's body using a TR9 Torx screwdriver.
-
-
-
-
Gently pull the joystick thumbstick straight up to remove it from the controller.
-
-
-
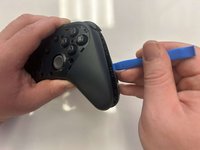
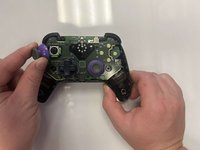
Gently grab the controller's circuitry and hold the bottom shell.
-
Pull the circuitry gently out from the shell.
-
-
-
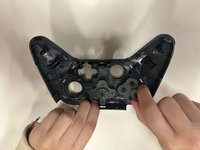
Once the clips are finally unbound, the top piece will pry off, with the face and home buttons intact.
-
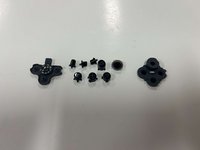
The plastic D-pad piece can be pulled off of a black cylindrical post along with a rubber membrane to interface between the plastic and the microswitches on the motherboard.
-
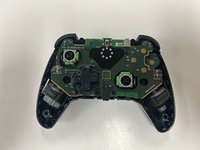
Interestingly, the Amazon Luna has a daughter board that holds the analog sticks, B button and the hall-effect sensors for the analog triggers.
-
-
-
The side of the analog stick reads: 2124IC.
-
The analog sticks are frictionless and use green potentiometers, not sure if these are ALPS potentiometers similar to those in the Xbox series controllers.
-
The blue circle next to this stick is the trigger's hall-effect sensor which senses the magnet installed on the side of the trigger. The other sensor is mounted similarly on the opposite side of the board near the B button.
-
The middle of the daughter board has an adhesive strip covering some of the solder joints and a few test points. Perhaps some isoprophyl alcohol can soften the adhesive to remove the black strip if necessary.
-
-
-
The motherboard is held tightly to the black plastic midframe by plastic clips, and rumble motor wires are soldered to the motherboard on both sides.
-
The blue circle is the plastic midframe piece holding the motherboard in place.
-
The yellow piece is a routing clip for the rumble motor wires.
-
The motors need to be moved to cleanly access the back of the motherboard, either by desoldering the motor wires, or softening the adhesive on the motors with isoprophyl alcohol.
-
Once the motor wires are removed, pry back the plastic pieces of the midframe on each end of the controller and pull up on the motherboard to remove it.
-
-
-
This is the otherside of the motherboard lifted out of the midframe.
-
The chip closest to the USB-C port reads: "LP5036" "T1 188" "A805 G4"
-
-
-
The USB-C port on top reads: "LUXSHARE" "22042330"
-
There is a large component near the face buttons that reads "KO" "337" "6K" "121"
-
-
-
Hopefully, with the large number of clips and little number of screws that need to be reinstalled, reassembly should be simple. But some notes:
-
Within the orange circle is the magnet that pivots from the spring inside the trigger, which will approach the hall effect sensor on the corner of the daughterboard.
-
The bumpers can swing up on a pivot which can make it easier to remove the motherboard. But when trying to put the controller back together, the bumpers may get stuck. Before the main pieces are combined back together, swing the bumpers up and pull down the trigger to give the bumper room to swing down into position. Release the trigger and test.
-
The bottom piece by the handles have a long sleeve surrounded by a spring where it holds a long post from the top piece. Start realignment of the controller at the bottom, ensuring that these posts fall into the sleeves, then slowly close the controller at the bottom along the headphone jack, then
-


3 Guide Comments
After putting it together, did your B button work again? I can't get mines to function anymore. The joysticks are also moving around a lot on their on.