Free Shipping on Domestic Orders $75+

This translation was generated by a machine and has not been reviewed by a person yet. Speak this language? Review it.

why! V540TU Webcam Replacement

What you need

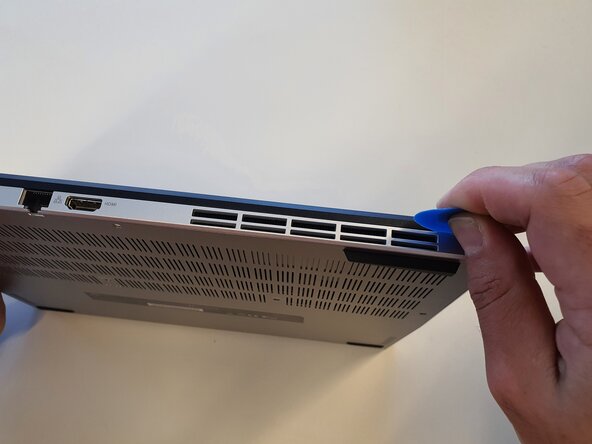
    1. why! V540TU Webcam Replacement, Lower housing 1: step 1, image 1 of 3 why! V540TU Webcam Replacement, Lower housing 1: step 1, image 2 of 3 why! V540TU Webcam Replacement, Lower housing 1: step 1, image 3 of 3
      • Unscrew the screws circled in red.

      • Insert the opening pick into the gap and slide it all the way around.

      Ask FixBot

      Add Comment

    2. why! V540TU Webcam Replacement, Lower housing 2: step 2, image 1 of 3 why! V540TU Webcam Replacement, Lower housing 2: step 2, image 2 of 3 why! V540TU Webcam Replacement, Lower housing 2: step 2, image 3 of 3
      • Unclip the housing at the corners.

      • Lift the cover.

      Ask FixBot

      Add Comment

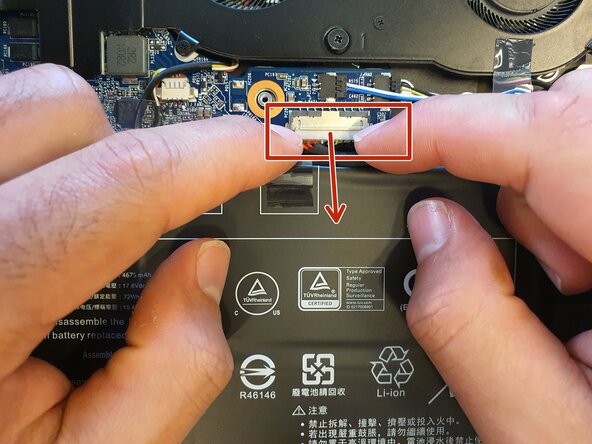
    1. why! V540TU Webcam Replacement, Battery cable: step 3, image 1 of 1
      • Unplug the cable.

      Ask FixBot

      Add Comment

    1. why! V540TU Webcam Replacement, Screen separation 1: step 4, image 1 of 2 why! V540TU Webcam Replacement, Screen separation 1: step 4, image 2 of 2
      • Unplug the cable connected to the motherboard.

      • Remove the adhesives.

      • Unscrew the screws circled in green.

      Ask FixBot

      Add Comment

    2. why! V540TU Webcam Replacement, Screen separation 2: step 5, image 1 of 2 why! V540TU Webcam Replacement, Screen separation 2: step 5, image 2 of 2
      • Lift the clutch hinge.

      • Remove the cable.

      Ask FixBot

      Add Comment

    3. why! V540TU Webcam Replacement, Screen separation 3: step 6, image 1 of 2 why! V540TU Webcam Replacement, Screen separation 3: step 6, image 2 of 2
      • Remove the adhesive.

      • Unscrew the screws circled in green.

      • Reinstall the clutch hinge.

      • Unplug the cable.

      Ask FixBot

      Add Comment

    4. why! V540TU Webcam Replacement, Screen separation 4: step 7, image 1 of 1
      • Release the screen from the lower assembly.

      Ask FixBot

      Add Comment

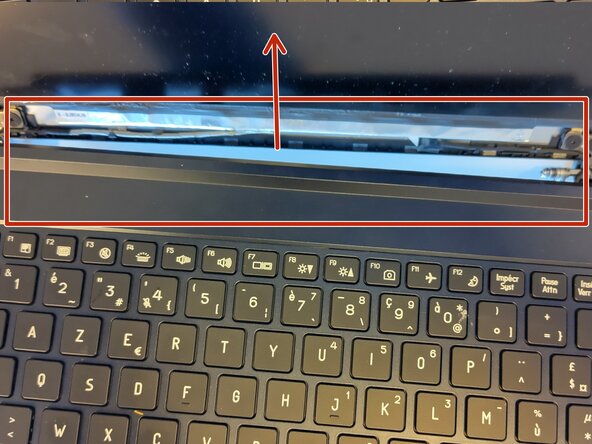
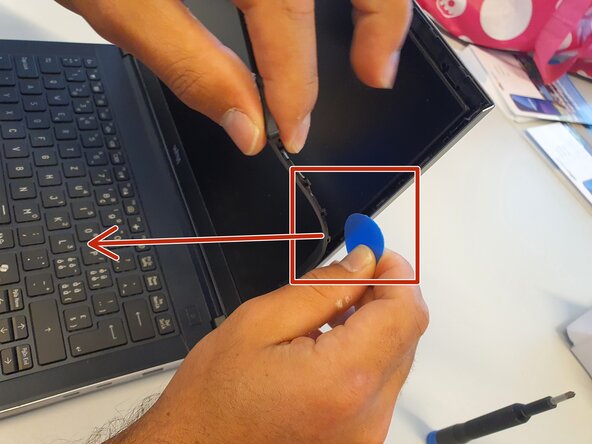
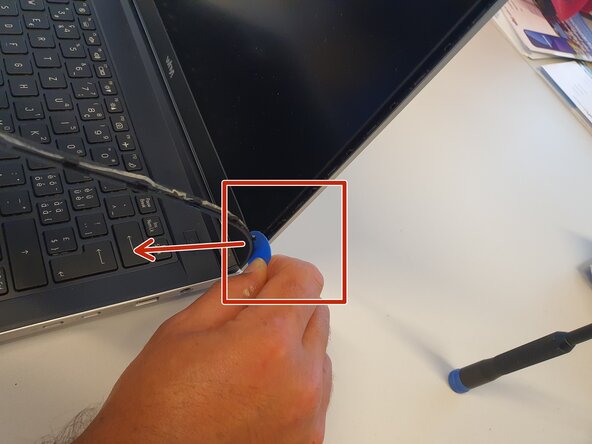
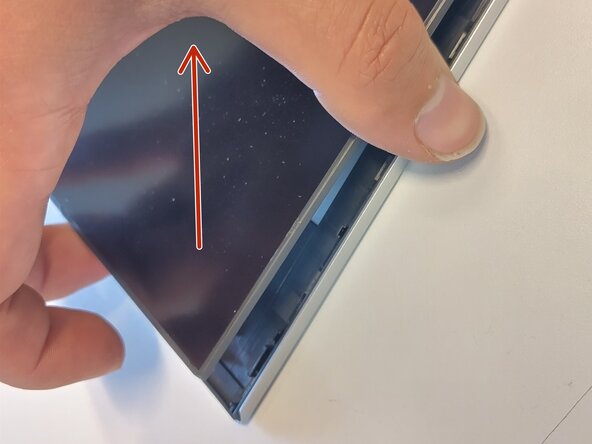
    1. why! V540TU Webcam Replacement, Upper Frame 1: step 8, image 1 of 3 why! V540TU Webcam Replacement, Upper Frame 1: step 8, image 2 of 3 why! V540TU Webcam Replacement, Upper Frame 1: step 8, image 3 of 3
      • Insert the opening pick into the gap in the frame and slide it along the entire length.

      • Unclip the top of the frame, being careful of the adhesive.

      • Unclip one side of the frame, being careful of the adhesive.

      Ask FixBot

      Add Comment

    2. why! V540TU Webcam Replacement, Upper Frame 2: step 9, image 1 of 3 why! V540TU Webcam Replacement, Upper Frame 2: step 9, image 2 of 3 why! V540TU Webcam Replacement, Upper Frame 2: step 9, image 3 of 3
      • Unclip the other side of the frame, being careful of the adhesive.

      • Unclip the bottom of the frame, being careful of the adhesive.

      • Remove the frame.

      Ask FixBot

      Add Comment

    1. why! V540TU Webcam Replacement, Screen 1: step 10, image 1 of 2 why! V540TU Webcam Replacement, Screen 1: step 10, image 2 of 2
      • Pull the adhesive on one of the sides of the screen. Be careful not to break it.

      Ask FixBot

      Add Comment

    2. why! V540TU Webcam Replacement, Screen 2: step 11, image 1 of 2 why! V540TU Webcam Replacement, Screen 2: step 11, image 2 of 2
      • Pull the adhesive from the other side of the screen. Be careful not to break it.

      Ask FixBot

      Add Comment

    3. why! V540TU Webcam Replacement, Display 3: step 12, image 1 of 3 why! V540TU Webcam Replacement, Display 3: step 12, image 2 of 3 why! V540TU Webcam Replacement, Display 3: step 12, image 3 of 3
      • Lift the display.

      • Disconnect the display cable from the back.

      Ask FixBot

      Add Comment

    1. why! V540TU Webcam Replacement, Webcam 1: step 13, image 1 of 3 why! V540TU Webcam Replacement, Webcam 1: step 13, image 2 of 3 why! V540TU Webcam Replacement, Webcam 1: step 13, image 3 of 3
      • Unclip the connector without removing it.

      • Detach the webcam.

      • Remove the connector and take out the webcam.

      Ask FixBot

      Add Comment

Conclusion

To reassemble your device, follow the instructions in reverse order.

Cancel: I did not complete this guide.

Felice Suglia

Member since: 06/15/13

33,634 Reputation

283 Guides authored

0 Guide Comments

Add Comment

View Statistics:

Past 24 Hours: 2

Past 7 Days: 15

Past 30 Days: 53

All Time: 161