This translation was generated by a machine and has not been reviewed by a person yet. Speak this language? Review it.

why! Tablet Front Camera Replacement

Felice Suglia and one other contributor
Last updated on Sep 2, 2026
Views: 222
View statistics:
- Past 24 Hours:
- 2
- Past 7 Days:
- 15
- Past 30 Days:
- 81
- All Time:
- 222
Comments: 0
No one has left comments on this guide. Will you be first?
Go to guide commentsCompleted: 0 1
No one has marked this guide "completed." Will you be the first?
1 person has marked this guide "completed." It's you — great job!
Favorites: 0 1
No one has favorited (and subscribed to) this guide. Will you be the first?
1 person has favorited (and subscribed to) this guide — and that's you!
Community-Contributed Guide
An awesome member of our community made this guide. It was not created by iFixit staff.
Introduction
Go to step 1 ↓This guide shows you how to replace the why! tablet's front camera, for example if it is malfunctioning during video calls or when taking selfies.
What you need
Tools

-
-
-
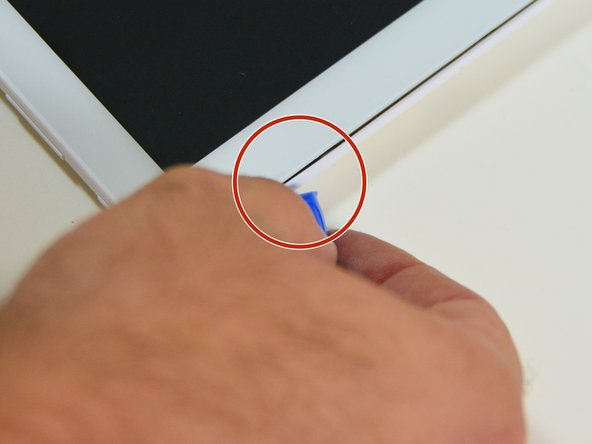
Using a plastic opening tool, insert the tip into the corner of the tablet, between the screen and the rear case.
-
Gently pry to start separating the rear case at this corner.
 Ask FixBot
-
-
-
Slide the opening tool along the edge of the tablet to release the rear case fasteners, reinserting the tool at other points along the perimeter as needed.
-
Once the perimeter is clear, lift and remove the rear case to access the internal components (motherboard, battery).
-
-
-
-
-
Locate the two connectors shown on the motherboard, near the camera module.
-
Using a screwdriver, remove the screw near the battery.
-
Remove the screw on the edge of the housing, next to the cable.
-
-
-
Remove the screw near the corner of the battery.
-
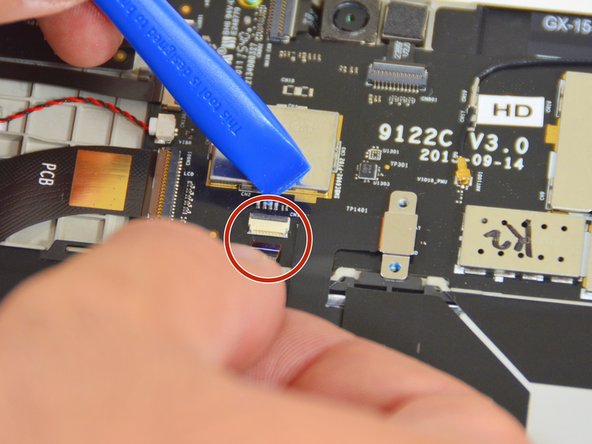
Using the opening tool, disconnect the connector located near the edge of the motherboard, next to the camera module.
-
Disconnect the connector on the left edge of the motherboard.
-
-
-
Disconnect the small white connector in the center of the motherboard.
-
Disconnect the connector on the left edge, near the battery label.
-
Disconnect the battery connector, in the upper right corner of the motherboard.
-
-
-
-
Disconnect the last connector on the edge of the motherboard.
-
Gently lift the battery to free it from its recess, then remove it from the tablet.
-
-
-
-
-
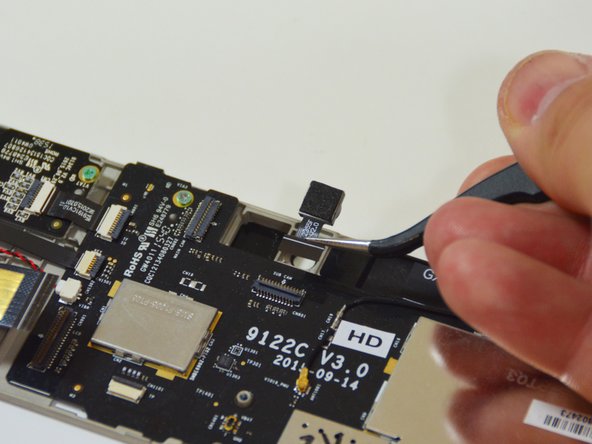
Locate the front camera module connector on the motherboard and disconnect it using the opening tool.
-
Gently remove the front camera module from its housing.
-
-








To reassemble your device, follow the instructions in reverse order.

