Free Shipping on Domestic Orders $75+

why! N650DU The LCD screen

What you need

    1. why! N650DU The LCD screen, The Batteries: step 1, image 1 of 3 why! N650DU The LCD screen, The Batteries: step 1, image 2 of 3 why! N650DU The LCD screen, The Batteries: step 1, image 3 of 3
      • Unlock the button without spring

      • Slide the battery up while unlocking the button with spring

      Ask FixBot

      Add Comment

    1. why! N650DU The LCD screen, LCD screen: step 2, image 1 of 3 why! N650DU The LCD screen, LCD screen: step 2, image 2 of 3 why! N650DU The LCD screen, LCD screen: step 2, image 3 of 3
      • Remove the two stickers circled in red

      • Unscrew the two screws

      Ask FixBot

      Add Comment

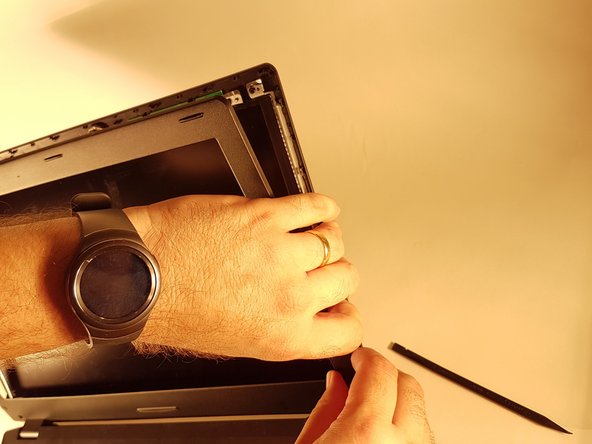
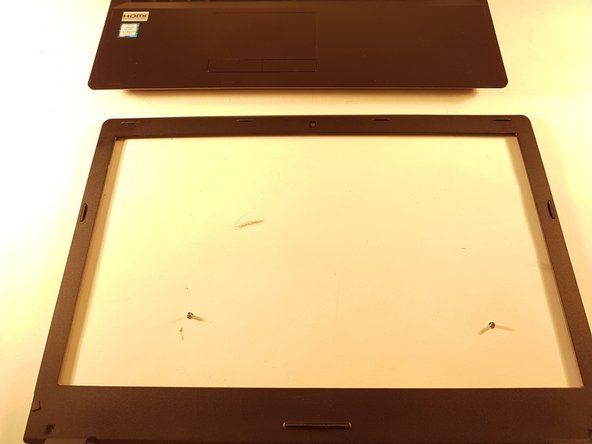
    2. why! N650DU The LCD screen: step 3, image 1 of 3 why! N650DU The LCD screen: step 3, image 2 of 3 why! N650DU The LCD screen: step 3, image 3 of 3
      • Tilt back the screen

      • Remove the frame from the screen

      Ask FixBot

      Add Comment

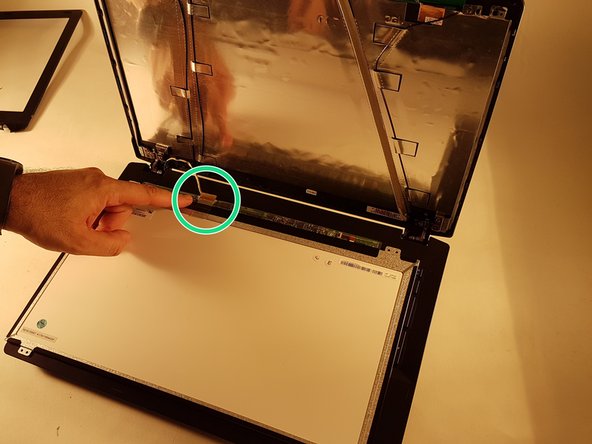
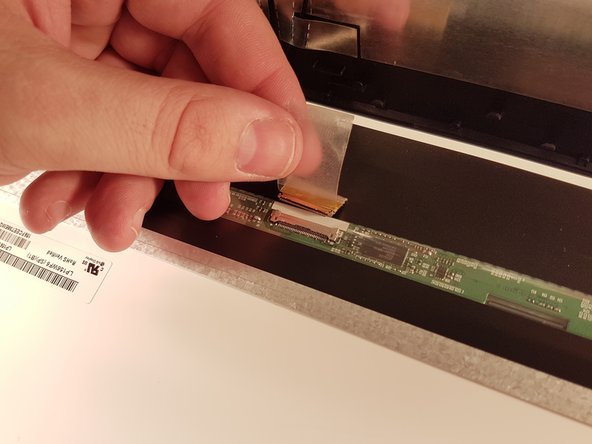
    3. why! N650DU The LCD screen: step 4, image 1 of 3 why! N650DU The LCD screen: step 4, image 2 of 3 why! N650DU The LCD screen: step 4, image 3 of 3
      • Unscrew the four screws circled in red

      • Put the screen gently on the keyboard

      • Remove the piece of tape then disconnect the connector surrounded in green

      Ask FixBot

      Add Comment

Conclusion

To reassemble your device, follow the instructions in reverse order.

Cancel: I did not complete this guide.

Special thanks to these translators:

fr en

100%

Israel is helping us fix the world! Want to contribute?
Start translating ›

Felice Suglia

Member since: 06/15/13

33,634 Reputation

283 Guides authored

0 Guide Comments

Add Comment

View Statistics:

Past 24 Hours: 0

Past 7 Days: 2

Past 30 Days: 20

All Time: 603