This translation was generated by a machine and has not been reviewed by a person yet. Speak this language? Review it.

why! N240JU Replacing SSD M.2 Disk

Felice Suglia and 2 other contributors
Last updated on Sep 2, 2026
Views: 853
View statistics:
- Past 24 Hours:
- 1
- Past 7 Days:
- 14
- Past 30 Days:
- 75
- All Time:
- 853
Comments: 0
No one has left comments on this guide. Will you be first?
Go to guide commentsCompleted: 0 1
No one has marked this guide "completed." Will you be the first?
1 person has marked this guide "completed." It's you — great job!
Favorites: 0 1
No one has favorited (and subscribed to) this guide. Will you be the first?
1 person has favorited (and subscribed to) this guide — and that's you!
Community-Contributed Guide
An awesome member of our community made this guide. It was not created by iFixit staff.
Introduction
Go to step 1 ↓This guide shows you how to replace the M.2 SSD on a why! N240JU laptop.

-
-
-
Start by unlocking the right locking latch.
-
Then, by simultaneously unlocking the left latch, lift the battery out of its socket.
 Ask FixBot
-
-
-
-
-
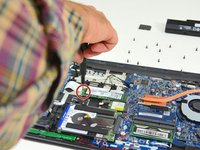
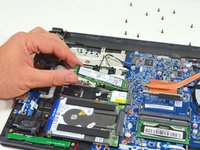
Begin by spotting the dummy memory card.
-
Then, remove it and put it on your workplan.
-
-
-
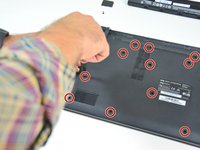
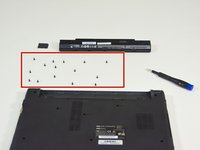
Locate the 15 screws that hold the bottom cover of the device in place.
-
Unscrew them and place them on your work surface.
-
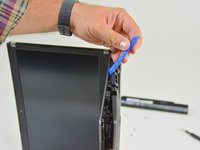
Then, un-clip the bottom cover, starting with the side shown in the third picture.
-
-
-
-
-
-
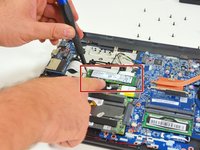
Locate the M.2 SSD in its slot.
-
Unscrew the fastening screw of the latter.
-
Lift and remove the SSD M.2 drive from its connector.
-
-




To reassemble your device, follow the instructions in reverse order.
Special thanks to these translators:
100%

Israel is helping us fix the world! Want to contribute?
Start translating ›

