Free Shipping on Domestic Orders $75+

iRobot Roomba 692 Motherboard Replacement

What you need

  1. iRobot Roomba 692 Motherboard Replacement, Battery: step 1, image 1 of 3 iRobot Roomba 692 Motherboard Replacement, Battery: step 1, image 2 of 3 iRobot Roomba 692 Motherboard Replacement, Battery: step 1, image 3 of 3
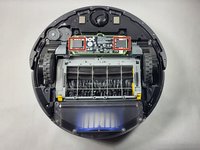
    • To access the iRobot Roomba 692 battery compartment, flip your iRobot Roomba 692 upside down.

    • Using the Phillips #0 screwdriver, remove the 4.0mm screw in the center of the yellow side brush and lift the part out.

    Ask FixBot

    Add Comment

  2. iRobot Roomba 692 Motherboard Replacement: step 2, image 1 of 3 iRobot Roomba 692 Motherboard Replacement: step 2, image 2 of 3 iRobot Roomba 692 Motherboard Replacement: step 2, image 3 of 3
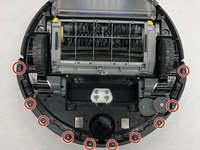
    • Use a Phillips #0 screwdriver to remove the four black 3.5 mm screws on the bottom panel.

    • Remove the bottom panel.

    • Can't find the screws? Refer to the red circles in the Step 1 image.

    Ask FixBot

    Add Comment

  3. iRobot Roomba 692 Motherboard Replacement: step 3, image 1 of 3 iRobot Roomba 692 Motherboard Replacement: step 3, image 2 of 3 iRobot Roomba 692 Motherboard Replacement: step 3, image 3 of 3
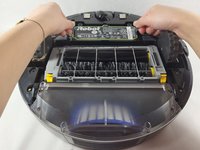
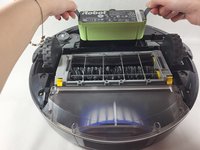
    • Using the black tabs on both short ends of the battery pack, gently pull the battery up and out of its slot.

    Ask FixBot

    Add Comment

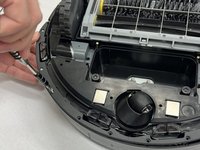
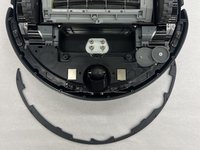
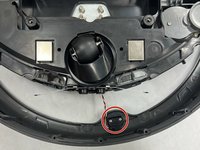
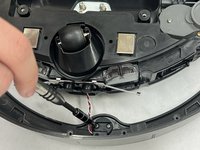
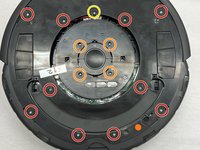
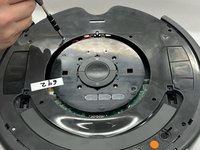
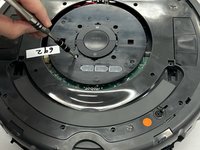
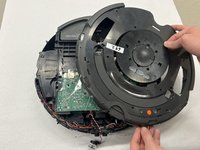
  4. iRobot Roomba 692 Motherboard Replacement, Motherboard: step 4, image 1 of 3 iRobot Roomba 692 Motherboard Replacement, Motherboard: step 4, image 2 of 3 iRobot Roomba 692 Motherboard Replacement, Motherboard: step 4, image 3 of 3
    • Remove the ten 13.3 mm screws with a Phillips #00 screwdriver.

    • Pull off the outer and inner holders.

    Ask FixBot

    Add Comment

  5. iRobot Roomba 692 Motherboard Replacement: step 5, image 1 of 3 iRobot Roomba 692 Motherboard Replacement: step 5, image 2 of 3 iRobot Roomba 692 Motherboard Replacement: step 5, image 3 of 3
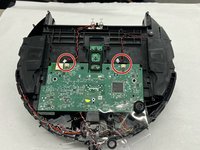
    • Use a Phillips #00 screwdriver to remove the two 7.4 mm screws that secure the sensor.

    • Once screws are removed slide out the sensor to free it from the slide bumper.

    Ask FixBot

    Add Comment

  6. iRobot Roomba 692 Motherboard Replacement: step 6, image 1 of 3 iRobot Roomba 692 Motherboard Replacement: step 6, image 2 of 3 iRobot Roomba 692 Motherboard Replacement: step 6, image 3 of 3
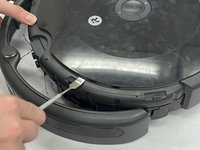
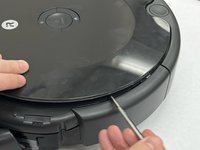
    • Wedge open the top with an opening tool.

    • Wedge the side tabs and middle tabs upward to remove the top lid.

    Ask FixBot

    Add Comment

  7. iRobot Roomba 692 Motherboard Replacement: step 7, image 1 of 3 iRobot Roomba 692 Motherboard Replacement: step 7, image 2 of 3 iRobot Roomba 692 Motherboard Replacement: step 7, image 3 of 3
    • Use a Phillips #00 screwdriver to unscrew and remove the following screws:

    • Ten 9.6 mm screws.

    • Four 9.4 mm screws.

    • One 9.5 mm screw.

    Ask FixBot

    Add Comment

  8. iRobot Roomba 692 Motherboard Replacement: step 8, image 1 of 3 iRobot Roomba 692 Motherboard Replacement: step 8, image 2 of 3 iRobot Roomba 692 Motherboard Replacement: step 8, image 3 of 3
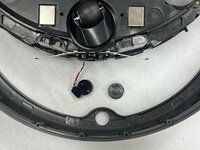
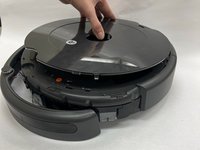
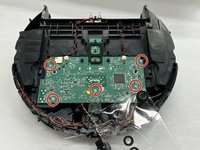
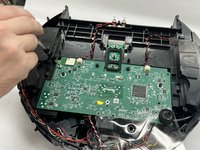
    • Lift up the top cover to access the motherboard.

    • Use the Phillips #00 screwdriver to remove all five 7.6 mm screws that are holding it down.

    Ask FixBot

    Add Comment

  9. iRobot Roomba 692 Motherboard Replacement: step 9, image 1 of 2 iRobot Roomba 692 Motherboard Replacement: step 9, image 2 of 2
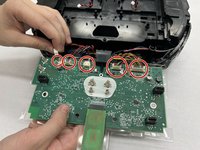
    • Unplug the wiring by pulling it outward.

    • Once all plugs are off the motherboard it can be removed, repaired, or replaced.

    Ask FixBot

    Add Comment

Conclusion

To reassemble your device, follow these instructions in reverse order.

Cancel: I did not complete this guide.

Ruth Oliva

Member since: 11/08/23

217 Reputation

2 Guides authored

Team

IUPUI, Team 1-1, Harley Fall 2023 Member of IUPUI, Team 1-1, Harley Fall 2023

IUPUI-HARLEY-F23S1G1

4 Members

3 Guides authored

0 Guide Comments

Add Comment

View Statistics:

Past 24 Hours: 0

Past 7 Days: 9

Past 30 Days: 38

All Time: 984