Free Shipping on Domestic Orders $75+

iHome iP1 Speaker(s) Replacement

What you need

  1. iHome iP1 Speaker(s) Replacement, Back Cover: step 1, image 1 of 1
    • Orient the iHome upside down with the speakers facing away from you.

    Ask FixBot

    Add Comment

  2. iHome iP1 Speaker(s) Replacement: step 2, image 1 of 2 iHome iP1 Speaker(s) Replacement: step 2, image 2 of 2
    • Remove the four 9.5 mm Phillips #2 screws located on each of the four corners of the iHome's back cover.

    Ask FixBot

    Add Comment

  3. iHome iP1 Speaker(s) Replacement: step 3, image 1 of 1
    • Remove the back cover by grabbing its sides and lifting it off the iHome.

    Ask FixBot

    Add Comment

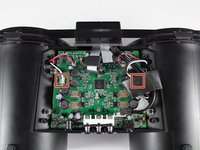
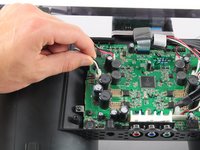
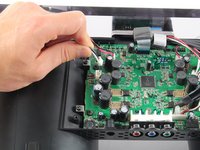
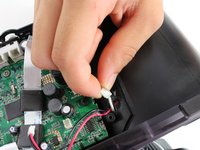
  4. iHome iP1 Speaker(s) Replacement, Speaker(s): step 4, image 1 of 3 iHome iP1 Speaker(s) Replacement, Speaker(s): step 4, image 2 of 3 iHome iP1 Speaker(s) Replacement, Speaker(s): step 4, image 3 of 3
    • Disconnect the white/black wires from the edges of the motherboard by pulling them away from their connection.

    • You may need to remove some black foam tape in order to fully disconnect some of the wires.

    Ask FixBot

    Add Comment

  5. iHome iP1 Speaker(s) Replacement: step 5, image 1 of 1
    • Carefully remove the glue attaching the wires to the housing using a metal spudger kit.

    • The glue is only used to keep the wires in place. It does not affect the function of the iHome.

    • If not all the glue can be removed at this step, remove the remaining glue after Step 8, where you can access the glue from the inside of the speaker housing.

    Ask FixBot

    Add Comment

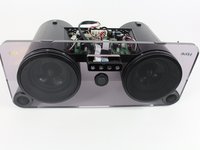
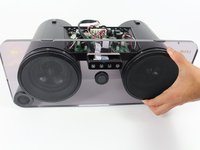
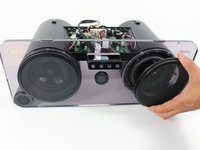
  6. iHome iP1 Speaker(s) Replacement: step 6, image 1 of 3 iHome iP1 Speaker(s) Replacement: step 6, image 2 of 3 iHome iP1 Speaker(s) Replacement: step 6, image 3 of 3
    • Rotate the iHome so that the speakers are facing you.

    • Remove the speaker covers by pulling them off of the faceplate.

    • After this step, this guide only shows how to replace the left speaker. To remove the right speaker, follow the remaining steps as if they are mirrored.

    Ask FixBot

    Add Comment

  7. iHome iP1 Speaker(s) Replacement: step 7, image 1 of 1
    • Remove the four 12.0 mm Phillips #2 screws from the edges of the speaker.

    Ask FixBot

    Add Comment

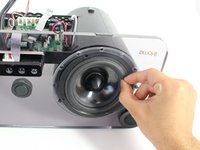
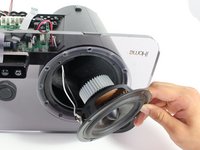
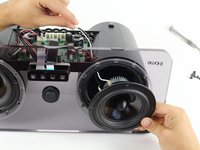
  8. iHome iP1 Speaker(s) Replacement: step 8, image 1 of 2 iHome iP1 Speaker(s) Replacement: step 8, image 2 of 2
    • Remove the speaker from the housing by gripping the rubber ring near the edge of the speaker and pulling it away from the faceplate.

    • Be careful not to tear the rubber. Once the speaker is loose enough, you can remove it from the housing by grabbing the metal speaker edges.

    Ask FixBot

    Add Comment

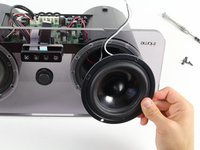
  9. iHome iP1 Speaker(s) Replacement: step 9, image 1 of 3 iHome iP1 Speaker(s) Replacement: step 9, image 2 of 3 iHome iP1 Speaker(s) Replacement: step 9, image 3 of 3
    • Remove the speaker from the iHome by feeding the black/white wires through the hole on the opposite side of the housing.

    Ask FixBot

    Add Comment

Conclusion

To reassemble your device, follow these instructions in reverse order.

Cancel: I did not complete this guide.

3 other people completed this guide.

Joshua Tran

Member since: 10/06/16

161 Reputation

1 Guide authored

Team

Cal Poly, Team 20-1, Livingston Fall 2016 Member of Cal Poly, Team 20-1, Livingston Fall 2016

CPSU-LIVINGSTON-F16S20G1

4 Members

7 Guides authored

0 Guide Comments

Add Comment

View Statistics:

Past 24 Hours: 2

Past 7 Days: 6

Past 30 Days: 59

All Time: 1,375