Free Shipping on Domestic Orders $75+

iHome iD95 Speakers Replacement

What you need

    1. iHome iD95 Speakers Replacement, Backup Battery: step 1, image 1 of 1
      • Before taking apart the iD95, disconnect the AC cord from the wall socket and AC adapter from the DC jack. Remove any iPods, iPhones, and iPads attached to the device.

      • Flip over the iD95 so the bottom cover is visible and the LCD screen is facing you.

      Ask FixBot

      Add Comment

    2. iHome iD95 Speakers Replacement: step 2, image 1 of 1
      • Remove the 10 mm-length, 5 mm-head screw using a Phillips #1 screwdriver.

      Ask FixBot

      Add Comment

    3. iHome iD95 Speakers Replacement: step 3, image 1 of 1
      • Use a plastic opening tool to take out the backup battery.

      Ask FixBot

      Add Comment

    1. iHome iD95 Speakers Replacement, Bottom Cover: step 4, image 1 of 1
      • Unscrew five 17 mm-length, 6 mm-head screws using a Phillips #1 screwdriver.

      Ask FixBot

      Add Comment

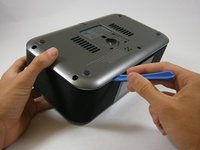
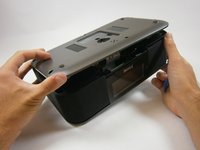
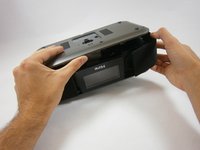
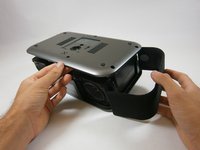
    2. iHome iD95 Speakers Replacement: step 5, image 1 of 2 iHome iD95 Speakers Replacement: step 5, image 2 of 2
      • The bottom cover is attached to the back cover by two plastic clips. Don't use excessive force.

      • Insert a plastic opening tool between the edge of the bottom cover and the main body.

      • Gently pry the bottom cover from the body. Start anywhere along the front side of the iD95 and work your way around.

      • Grip the bottom portion of the device and gently lift the front part of the bottom cover a couple centimeters up.

      Ask FixBot

      Add Comment

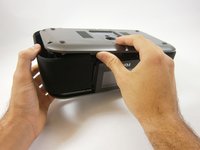
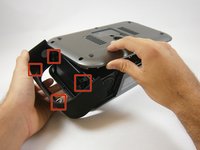
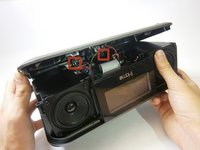
    3. iHome iD95 Speakers Replacement: step 6, image 1 of 2 iHome iD95 Speakers Replacement: step 6, image 2 of 2
      • Potential for device damage: Be careful not to use too much force or you might break the plastic rings holding the side panels in place.

      • Lift up the bottom cover. Pull the side panel up first, out, and away from the device.

      • The side panels have plastic rings that will need to be lifted up and off the cylinders they are placed around.

      Ask FixBot

      Add Comment

    4. iHome iD95 Speakers Replacement: step 7, image 1 of 2 iHome iD95 Speakers Replacement: step 7, image 2 of 2
      • Apply the same techniques from the previous step to remove the remaining side panel.

      Ask FixBot

      Add Comment

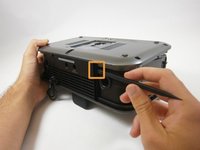
    5. iHome iD95 Speakers Replacement: step 8, image 1 of 3 iHome iD95 Speakers Replacement: step 8, image 2 of 3 iHome iD95 Speakers Replacement: step 8, image 3 of 3
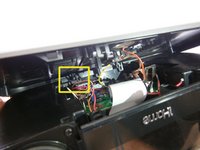
      • Locate the two plastic clips holding the bottom and back cover together.

      • Which clip you remove first is up to you. Rotate the device 90 degrees either left or right. Insert the flat end of a spudger horizontally between the back speaker and the back cover.

      • Place the flat end of the spudger behind one clip and pry it open. This may take repeated attempts.

      • This is the hardest step because the angle is awkward and the visibility is poor. If possible, have someone hold the device or provide lighting.

      • Once a clip has been removed, hold the bottom cover open so the clip will not fall back into place. One clip remains to be removed; you are almost there!

      Ask FixBot

      Add Comment

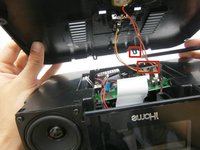
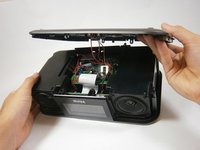
    6. iHome iD95 Speakers Replacement: step 9, image 1 of 2 iHome iD95 Speakers Replacement: step 9, image 2 of 2
      • Use the same steps to remove the remaining clip.

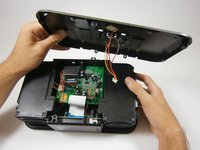
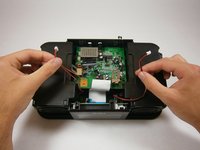
      • The bottom cover is still connected to the motherboard by wiring.

      Ask FixBot

      Add Comment

    7. iHome iD95 Speakers Replacement: step 10, image 1 of 2 iHome iD95 Speakers Replacement: step 10, image 2 of 2
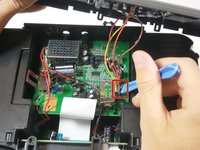
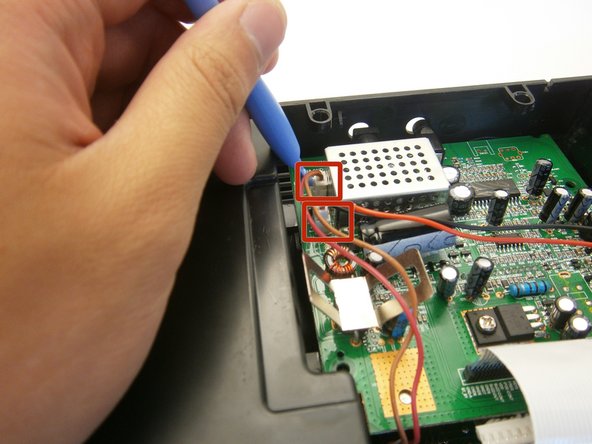
      • Use a plastic opening tool to pry off the white ZIF connector joining the wires to the motherboard.

      • Don't pull the wires. Take your time using a plastic opening tool.

      Ask FixBot

      Add Comment

    1. iHome iD95 Speakers Replacement, Speakers: step 11, image 1 of 1
      • Take out four 14 mm screws using a Phillips #1 screwdriver.

      Ask FixBot

      Add Comment

    2. iHome iD95 Speakers Replacement: step 12, image 1 of 3 iHome iD95 Speakers Replacement: step 12, image 2 of 3 iHome iD95 Speakers Replacement: step 12, image 3 of 3
      • Use a plastic opening tool to lift the two speaker zip connectors from the logic board.

      • Do not pull on the speaker wires directly. Continue to use a plastic opening tool.

      Ask FixBot

      Add Comment

    3. iHome iD95 Speakers Replacement: step 13, image 1 of 1
      • Lift and remove both speakers.

      Ask FixBot

      Add Comment

Conclusion

To reassemble your device, follow these instructions in reverse order.

Cancel: I did not complete this guide.

2 other people completed this guide.

Craig Cary

Member since: 04/18/13

52 Reputation

1 Guide authored

Team

Cal Poly, Team 12-37, Amido Spring 2013 Member of Cal Poly, Team 12-37, Amido Spring 2013

CPSU-AMIDO-S13S12G37

4 Members

84 Guides authored

0 Guide Comments

Add Comment

View Statistics:

Past 24 Hours: 7

Past 7 Days: 28

Past 30 Days: 74

All Time: 1,400