
Free Shipping on Domestic Orders $75+

bObi Pet Edge Sensors Replacement

What you need

  1. bObi Pet Edge Sensors  Replacement, Turn bObi Pet Off: step 1, image 1 of 3 bObi Pet Edge Sensors  Replacement, Turn bObi Pet Off: step 1, image 2 of 3 bObi Pet Edge Sensors  Replacement, Turn bObi Pet Off: step 1, image 3 of 3
    • Before we get started, turn bObi Pet OFF and flip her over onto a flat surface.

    • Next, remove bObi Pet's dustbin. Grip the small tab on the back of the bin, and pull to remove.

    Ask FixBot

    Add Comment

  2. bObi Pet Edge Sensors  Replacement, Remove the Front Wheel: step 2, image 1 of 2 bObi Pet Edge Sensors  Replacement, Remove the Front Wheel: step 2, image 2 of 2
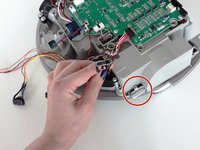
    • Grip the front wheel and pull straight up, using the screwdriver for leverage.

    • The wheel will pop out and you will see two screws beneath it.

    • There is a larger screw set deeper in the wheel compartment. Use the screwdriver to remove it.

    • Remember to keep all screws and parts removed from bObi Pet safely aside during the repair. They may be needed for re-assembly.

    Ask FixBot

    Add Comment

  3. bObi Pet Edge Sensors  Replacement, Remove the Dustbin's Holders: step 3, image 1 of 3 bObi Pet Edge Sensors  Replacement, Remove the Dustbin's Holders: step 3, image 2 of 3 bObi Pet Edge Sensors  Replacement, Remove the Dustbin's Holders: step 3, image 3 of 3
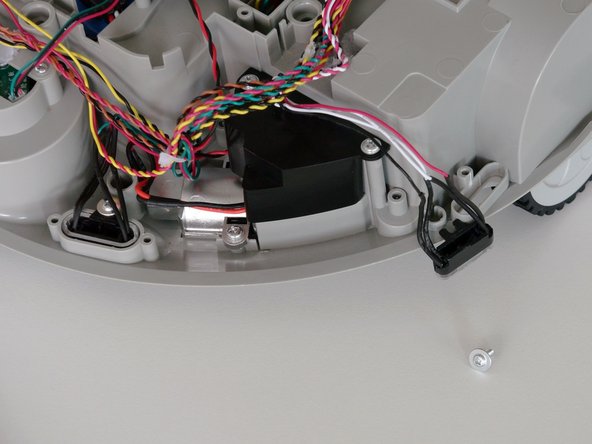
    • Remove the screws on both sides of bObi Pet’s dustbin. Then, remove the corner pieces that were held down by the screws.

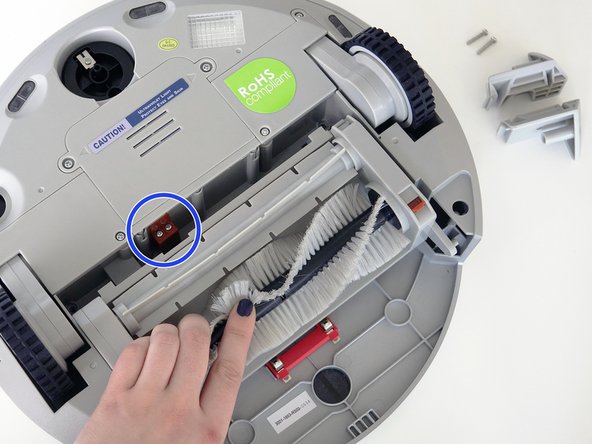
    • Grip the brush compartment and pull down to reveal two screws on a red fastener.

    • Remove them with the screwdriver.

    Ask FixBot

    Add Comment

  4. bObi Pet Edge Sensors  Replacement, Remove the Main Brush Attachment: step 4, image 1 of 3 bObi Pet Edge Sensors  Replacement, Remove the Main Brush Attachment: step 4, image 2 of 3 bObi Pet Edge Sensors  Replacement, Remove the Main Brush Attachment: step 4, image 3 of 3
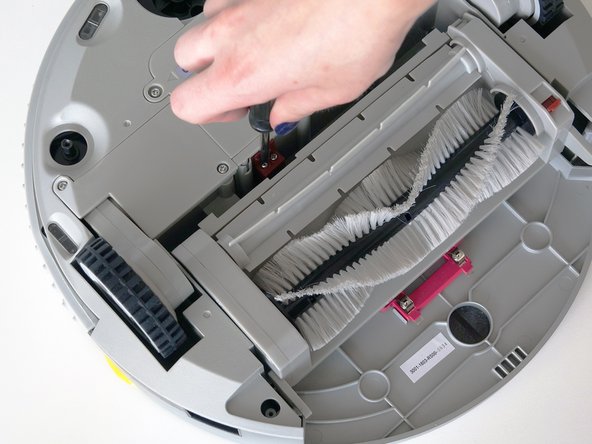
    • Pull the brush compartment up until the fastener is freed from bObi Pet. Then, detach the brush compartment's circuit plug and set it aside.

    • Remove the 4 screws located beneath the brush compartment.

    Ask FixBot

    Add Comment

  5. bObi Pet Edge Sensors  Replacement, Remove the Cover Screws: step 5, image 1 of 2 bObi Pet Edge Sensors  Replacement, Remove the Cover Screws: step 5, image 2 of 2
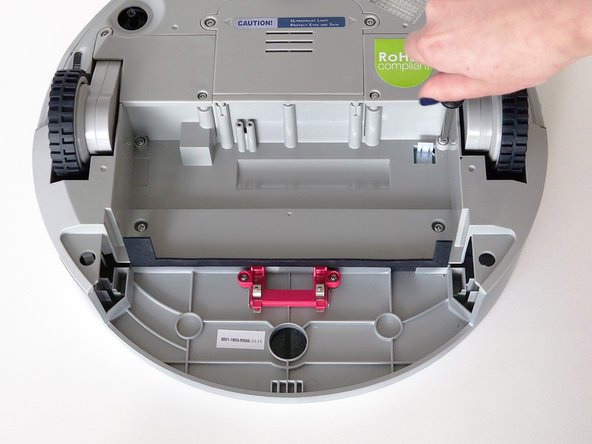
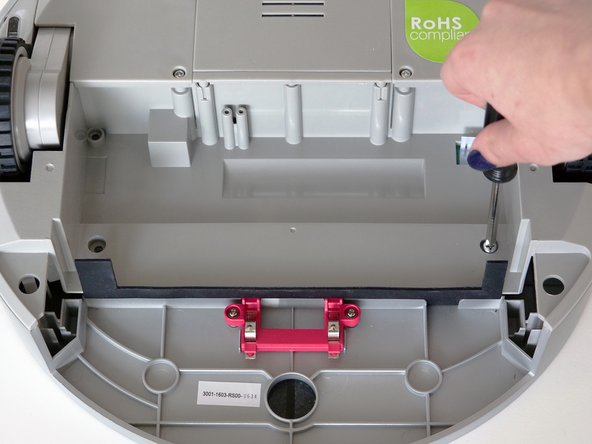
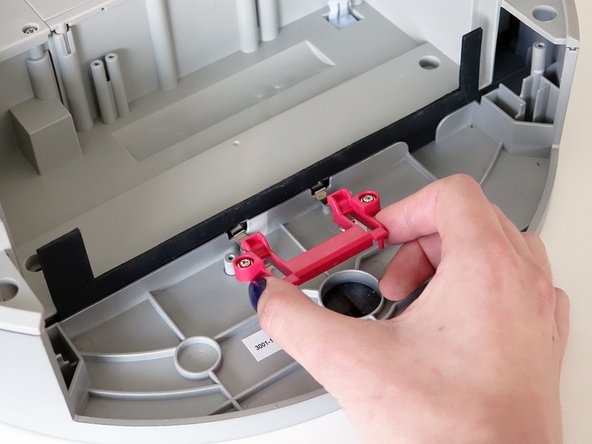
    • Remove the 2 screws on the dustbin’s red fastener.

    • Remove the fastener and set it aside for reassembly.

    • The cover is no longer secured, so carefully flip bObi Pet onto her wheels.

    Ask FixBot

    Add Comment

  6. bObi Pet Edge Sensors  Replacement, Detach the Cover: step 6, image 1 of 3 bObi Pet Edge Sensors  Replacement, Detach the Cover: step 6, image 2 of 3 bObi Pet Edge Sensors  Replacement, Detach the Cover: step 6, image 3 of 3
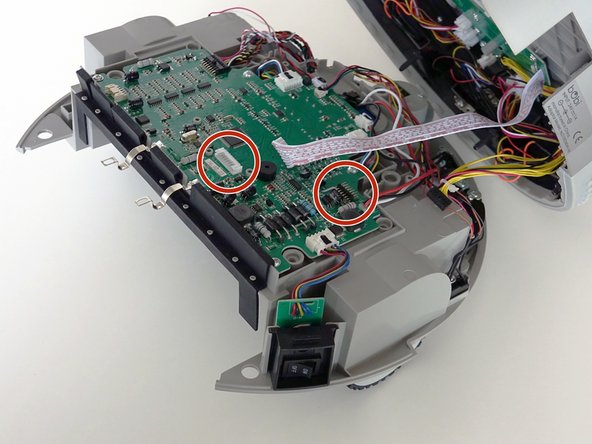
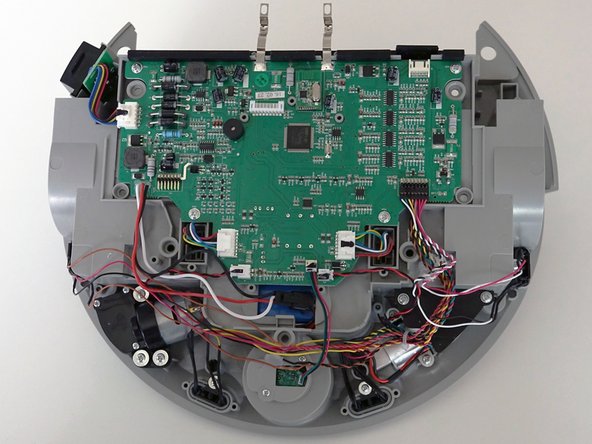
    • Lift the cover to reveal the main board underneath.

    • Remove the two circuit plugs connecting the lid to the mainboard.

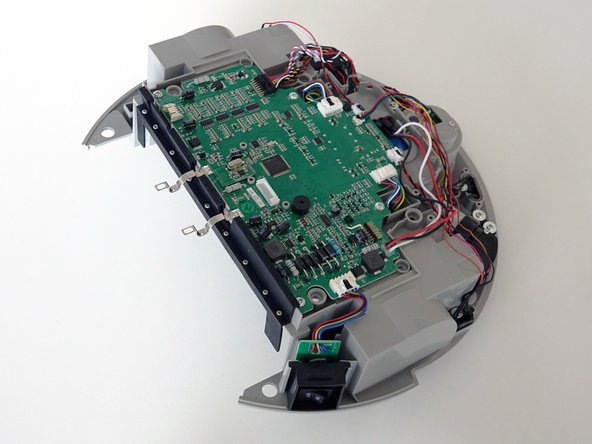
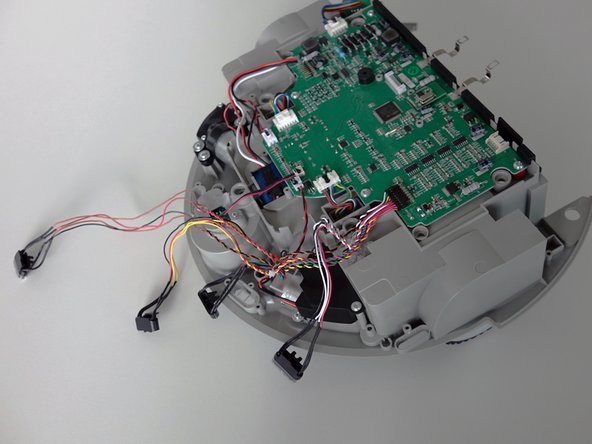
    • bObi Pet's cover is entirely separated, and you may now access any of her internal parts for replacement.

    Ask FixBot

    Add Comment

  7. bObi Pet Edge Sensors  Replacement, Unplug the Edge Sensors: step 7, image 1 of 2 bObi Pet Edge Sensors  Replacement, Unplug the Edge Sensors: step 7, image 2 of 2
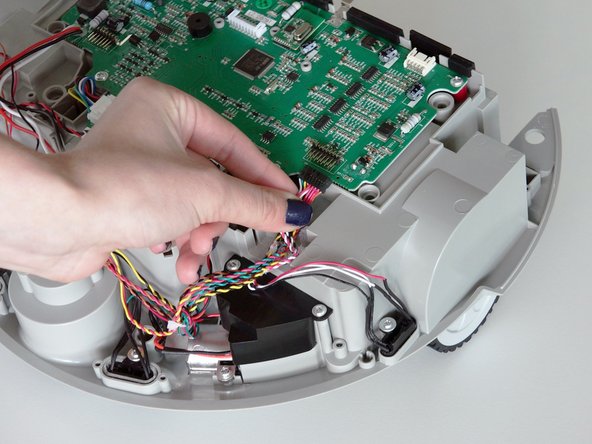
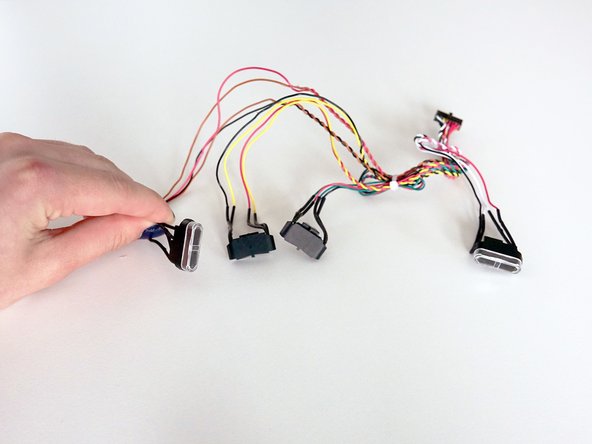
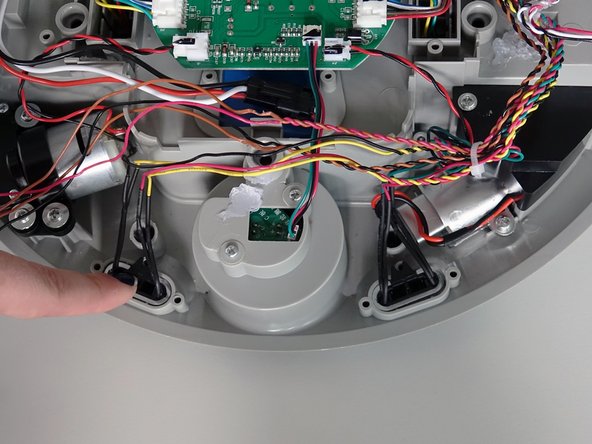
    • bObi Pet has 4 edge sensors along her front edge.

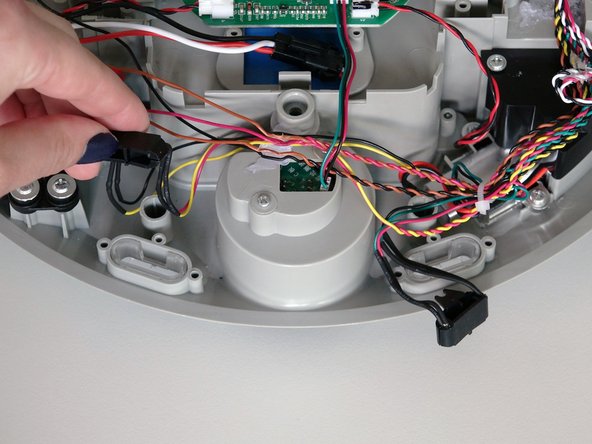
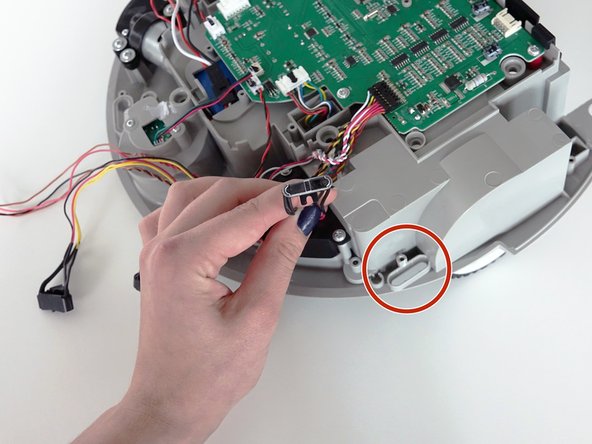
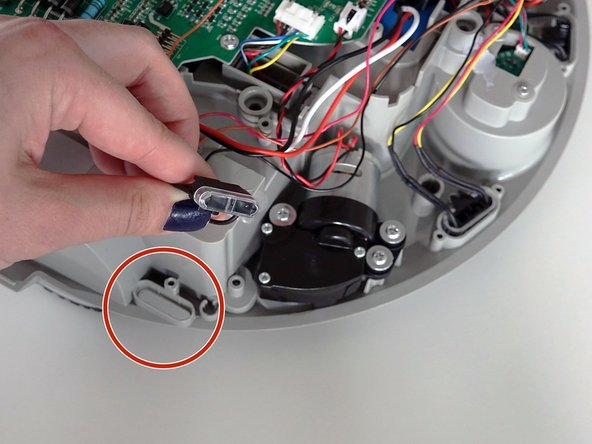
    • They attach to the left side of her mainboard. Pull to remove the circuit plug.

    • If there is glue holding down the wires, you may scrape it off using your screwdriver.

    Ask FixBot

    Add Comment

  8. bObi Pet Edge Sensors  Replacement, Remove the Sensor Screws: step 8, image 1 of 3 bObi Pet Edge Sensors  Replacement, Remove the Sensor Screws: step 8, image 2 of 3 bObi Pet Edge Sensors  Replacement, Remove the Sensor Screws: step 8, image 3 of 3
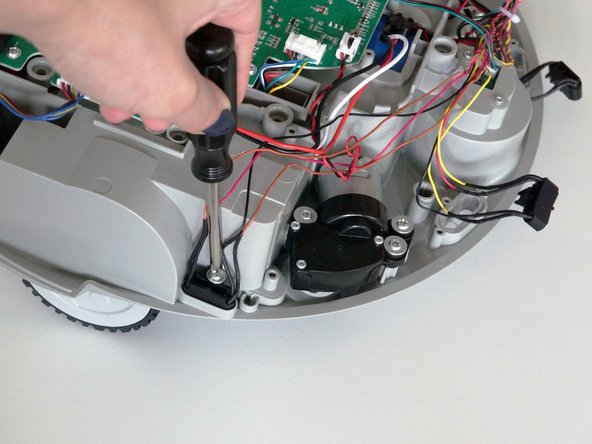
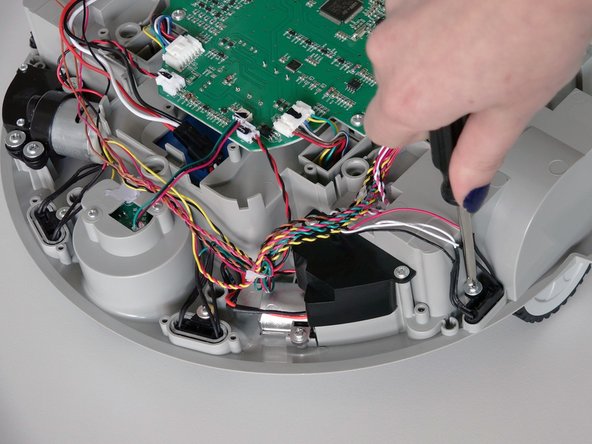
    • There is one screw holding each edge sensor in place. Remove all four screws and keep them aside for reassembly.

    Ask FixBot

    Add Comment

  9. bObi Pet Edge Sensors  Replacement, Remove the Sensors: step 9, image 1 of 3 bObi Pet Edge Sensors  Replacement, Remove the Sensors: step 9, image 2 of 3 bObi Pet Edge Sensors  Replacement, Remove the Sensors: step 9, image 3 of 3
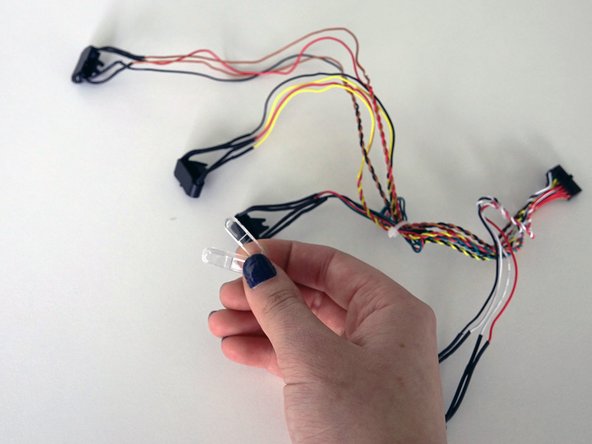
    • Do not remove the clear covers from the two sensors closest to bObi Pet's front wheel. If they get stuck to the sensors, simply replace them on bObi Pet.

    • Lift each of the sensor pieces out, and you'll be ready to install your new ones.

    Ask FixBot

    Add Comment

  10. bObi Pet Edge Sensors  Replacement, Attach the Covers: step 10, image 1 of 3 bObi Pet Edge Sensors  Replacement, Attach the Covers: step 10, image 2 of 3 bObi Pet Edge Sensors  Replacement, Attach the Covers: step 10, image 3 of 3
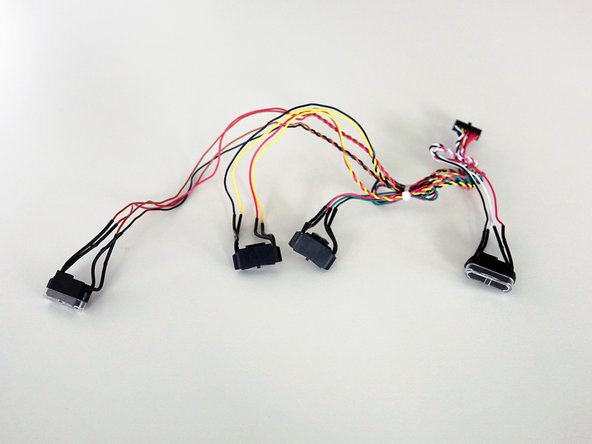
    • The outer two sensors will have smaller clear covers attached. Make sure to remove these two covers and attach them to the outer sensors on your replacement part.

    • One cover will fit on the sensor with red and white wires.

    • The other should be placed on the sensor with red and brown wires.

    Ask FixBot

    Add Comment

  11. bObi Pet Edge Sensors  Replacement, Connect the New Sensors: step 11, image 1 of 3 bObi Pet Edge Sensors  Replacement, Connect the New Sensors: step 11, image 2 of 3 bObi Pet Edge Sensors  Replacement, Connect the New Sensors: step 11, image 3 of 3
    • Attach the sensors’ circuit plug to the mainboard. You should be able to tell where each sensor sits on bObi Pet by the length of its wires.

    • The sensor with the shortest wire goes in front of bObi Pet's left wheel.

    Ask FixBot

    Add Comment

  12. bObi Pet Edge Sensors  Replacement, Place the New Sensors: step 12, image 1 of 3 bObi Pet Edge Sensors  Replacement, Place the New Sensors: step 12, image 2 of 3 bObi Pet Edge Sensors  Replacement, Place the New Sensors: step 12, image 3 of 3
    • The sensor with a green wire goes beside it. Then the yellow-wired sensor is next.

    • Then the final sensor and its cover will fit in front of bObi Pet's right wheel.

    Ask FixBot

    Add Comment

  13. bObi Pet Edge Sensors  Replacement, Secure the Sensors: step 13, image 1 of 3 bObi Pet Edge Sensors  Replacement, Secure the Sensors: step 13, image 2 of 3 bObi Pet Edge Sensors  Replacement, Secure the Sensors: step 13, image 3 of 3
    • Re-install one screw onto each sensor.

    • You may add glue or electrical tape to the new circuit plug for a more secure hold.

    • Be sure to tuck any protruding wires into the crevices around the mainboard and you’re ready to close the cover.

    • For help closing the cover, refer to the re-assembly guide: Assemble bObi Pet Post-Repair

    Ask FixBot

    Add Comment

Conclusion

Congratulations on replacing bObi Pet's edge sensors! To finish off this repair, you'll want to close bObi Pet's cover. Find the guide here: Assemble bObi Pet Post-Repair

Cancel: I did not complete this guide.

Chelsea

Member since: 09/24/14

2,278 Reputation

31 Guides authored

0 Guide Comments

Add Comment

View Statistics:

Past 24 Hours: 0

Past 7 Days: 9

Past 30 Days: 27

All Time: 366