
Zoomer Show Pony Sensor Replacement

Cedric Bossa and 2 other contributors
Last updated on Jun 25, 2018
Views: 1.4K
View statistics:
- Past 24 Hours:
- 2
- Past 7 Days:
- 14
- Past 30 Days:
- 73
- All Time:
- 1,351
Comments: 0
No one has left comments on this guide. Will you be first?
Go to guide commentsCompleted: 1 2
1 person has marked this guide "completed." Will you be next?
2 people have marked this guide "completed." Including you — great job!
Favorites: 0 1
No one has favorited (and subscribed to) this guide. Will you be the first?
1 person has favorited (and subscribed to) this guide — and that's you!
Introduction
Go to step 1 ↓This guide will go step by step showing you how to get to and replace the sensors inside the body of your Zoomer Show Pony. You will have to open up the pony's main chassis and disconnect the wires on the pony's motherboard. All of the triangle head screws in this guide are the same size, so no worries about keeping each screw separated.
What you need
Tools

-
-
-
Flip over your pony and find the screws marked in red.
-
Remove these screws with a 3.0 Triangle screw bit. Don't worry about keeping them seperated because they are all the same size.
 Ask FixBot
-
-
-
Remove the wires connecting the head and leg sections. We will disconnect all of the wire connections in this step and they will need to be re-connected at the end, so be careful when disconnecting.
-
Now that the wires have been disconnected, the head and back legs should be free to place aside
-
Remove the black bar by unscrewing the two triangle screws marked in yellow. These screws are recessed into the black bar so you may need an extender for your triangle bit.
-
-
-
-
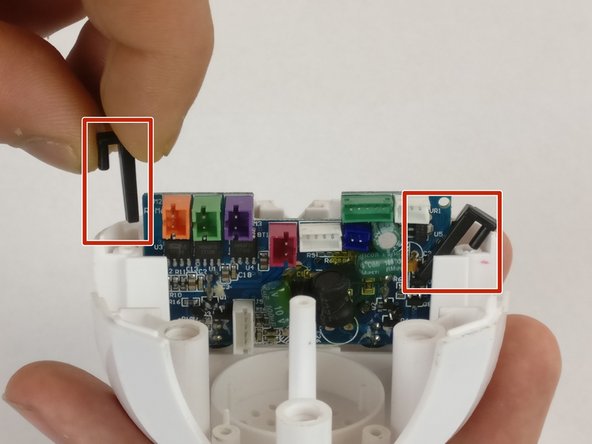
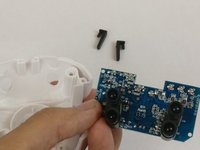
Take out the two clips keeping the motherboard in place but applying upwards pressure on them.
-
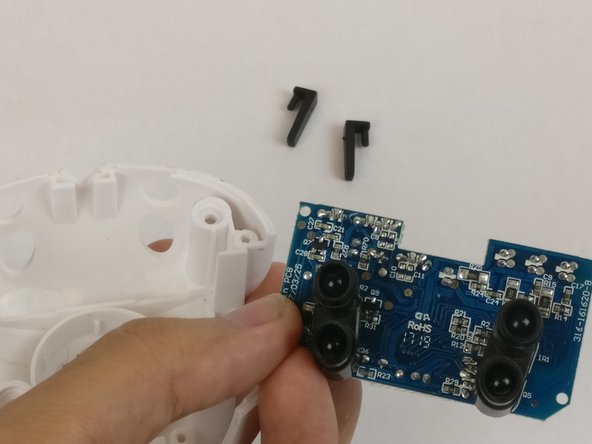
Remove the motherboard and replace. The sensors are soldered on to the motherboard so the whole board must be replaced.
-
-


To reassemble your device, follow these instructions in reverse order.
Cancel: I did not complete this guide.
One other person completed this guide.

Team

USF Tampa, Team S20-G5, Passmore Spring 2018 Member of USF Tampa, Team S20-G5, Passmore Spring 2018
USFT-PASSMORE-S18S20G5
4 Members
60 Guides authored
