Introduction
Follow this guide to perform a hull replacement on a V3 Zerotow Boogie.
What you need
-
-
Remove the battery from the Boogie
-
Place the Boogie on the trolley. This helps support and protect the motor
-
Inflate the Boogies hull to 1-2psi
-
Fully open the zip
 Ask FixBot
-
-
-
Remove GPS from back of the control Box.
-
It is held in place with 3M dual lock velcro and can be pulled of with out tools
-
Be careful to no tug on the GPS cable as it is fragile
-
-
-
Use a #1 Phillips screwdriver to loosen the screws and then lift off the case.
-
-
-
Wiggle to top plate from side to side to remove it.
-
The top plate it is not held down with any screws.
-
If the bearings stay on the shafts that is ok, they can be removed later.
-
Do not unplug the top plate.
-
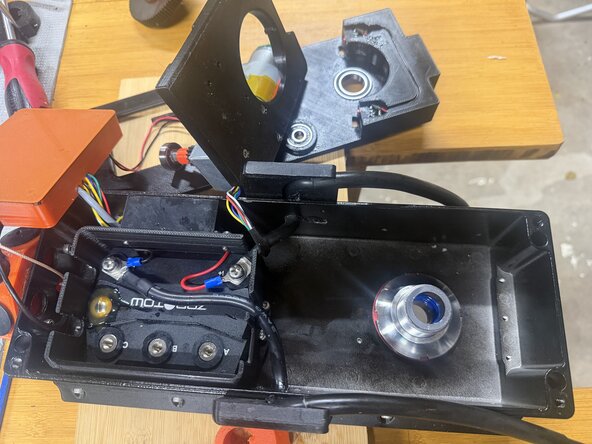
Remove the the extra cable in the slot so you have room to move the top plate to the side.
-
-
-
Use a quality 5mm allen key with a long arm to remove the allen bolt
-
This is done up very tight, an electric impact driver makes this job a lot easier. Remove the bolt completely.
-
If the bolt breaks it can be replaced with a M6 x 35mm tight tensile steel bolt.
-
Use a small flat head screwdriver and hammer to wedge the slot apart slightly. This makes removing the gear from the shaft easier.
-
Leave the screwdriver in place to make reinstallation easier
-
-
-
-
Remove the Idle gear
-
The idle gear can be lift out with out any tools.
-
-
-
Remove both orange cable guides
-
Remove the tube from the cable guide
-
-
-
Lift away the control PCB and place upside down
-
Do not unplug anything from the control PCB
-
Unscrew the three motor phase cables
-
-
-
Lift the three cables and the breather tube though the slot
-
Once the cables are inside the slot, the motor can be dropped out of the bottom of the Boogie and put to the side.
-
-
-
Unscrew the M4x10 screw using a 3mm allen key
-
The steering motor lifts out of the case and can be put to the side
-
The steering motor assembly can be difficult to lift out. It is only held down by the single M4 screw. Wiggle and rock forward and back to lift out.
-
Do not unplug any cables
-
Do not remove the motor from the 3D printed base plate.
-
-
-
Use the supplied tool to loosen the castle nut
-
Remove the nut and fiber washer completly
-
Push the baseplate down out of the Boogie
-
Once the base plate is removed, the hull can be deflated and the control case slid forward and out of the Boogie hull.
-
-
-
The orange spacer ring has been updated to make reassembly easier
-
Remove and discard this spacer ring.
-
-
-
Follow the steps in reverse to reinstall the new hull
-
The new supplied spacer ring gets installed before placing the red fiber washer.
-
The spacer rings needs to be flush with the case
-
When installing the motor, support it from underneath using the trolly cross bar. There should be no gap below the motor and the hull.
-
-
-
The steering will self calibrate using the limit switches, just make sure that the motor is approximately centered.
-