Free Shipping on Domestic Orders $75+

Zeki TBQG884B Digitizer Touch Screen

What you need

  1. Zeki TBQG884B Digitizer Touch Screen, Rear Case: step 1, image 1 of 2 Zeki TBQG884B Digitizer Touch Screen, Rear Case: step 1, image 2 of 2
    • Remove the two screws from the end of the device where the ports are located using a Phillips #1 screwdriver.

    Ask FixBot

    Add Comment

  2. Zeki TBQG884B Digitizer Touch Screen: step 2, image 1 of 1
    • Place the tablet down so that the screen is facing away from you.

    • Insert the tip of your opening tool into the small gap between the gray and white plastic covering. Pry it open and you should hear the clips opening up.

    • Gently work your way around the perimeter of the tablet's edge.

    Ask FixBot

    Add Comment

  3. Zeki TBQG884B Digitizer Touch Screen: step 3, image 1 of 2 Zeki TBQG884B Digitizer Touch Screen: step 3, image 2 of 2
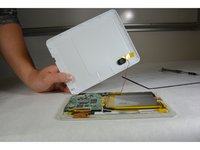
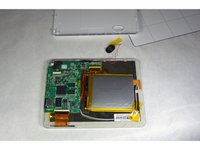
    • Remove the back cover

    • Remove any tape on the speaker and detach the speaker from the back plate.

    • The speaker is connected to the motherboard by two soldered wires. Don't break them when you remove the speaker.

    Ask FixBot

    Add Comment

  4. Zeki TBQG884B Digitizer Touch Screen, Motherboard: step 4, image 1 of 1
    • Disconnect the Wi-Fi antenna cable from the motherboard.

    Ask FixBot

    Add Comment

  5. Zeki TBQG884B Digitizer Touch Screen: step 5, image 1 of 1
    • Using the Phillips #1 screwdriver, remove the three screws from the motherboard..

    Ask FixBot

    Add Comment

  6. Zeki TBQG884B Digitizer Touch Screen: step 6, image 1 of 1
    • Open the ZIF connector. Then, remove the ribbon that connects the motherboard and the screen.

    Ask FixBot

    Add Comment

  7. Zeki TBQG884B Digitizer Touch Screen: step 7, image 1 of 1
    • Disconnect the other ZIF connector on the opposite side of the motherboard.

    Ask FixBot

    Add Comment

  8. Zeki TBQG884B Digitizer Touch Screen: step 8, image 1 of 1
    • Remove the motherboard and now reinsert all connectors into a new motherboard.

    • In order to disconnect the battery and speaker wires from the motherboard, soldering is required. Be cautious as the soldering iron is hot.

    Ask FixBot

    Add Comment

  9. Zeki TBQG884B Digitizer Touch Screen, LCD Screen: step 9, image 1 of 1
    • Use an opening tool to detach the clip between the front frame, and the metal loader.

    • There are several clips on each side of the frame. Detach ALL of them before you open the loader.

    Ask FixBot

    Add Comment

  10. Zeki TBQG884B Digitizer Touch Screen: step 10, image 1 of 1
    • Lift the metal loader up and separate it from the LCD screen.

    • Detach each piece slowly to avoid damaging or dropping any fragile parts.

    Ask FixBot

    Add Comment

  11. Zeki TBQG884B Digitizer Touch Screen, Digitizer Touch Screen: step 11, image 1 of 1
    • Separate the display from the digitizer.

    Ask FixBot

    Add Comment

Conclusion

To reassemble your device, follow these instructions in reverse order.

Cancel: I did not complete this guide.

One other person completed this guide.

David Wyman

Member since: 09/16/15

346 Reputation

3 Guides authored

Team

IUPUI, Team 1-3, Harley Fall 2015 Member of IUPUI, Team 1-3, Harley Fall 2015

IUPUI-HARLEY-F15S1G3

5 Members

5 Guides authored

0 Guide Comments

Add Comment

View Statistics:

Past 24 Hours: 1

Past 7 Days: 9

Past 30 Days: 34

All Time: 1,163