
Zebra ZP 450 Power Switch Replacement

Daniel Garmon and 2 other contributors
Last updated on Jun 18, 2021
Views: 552
View statistics:
- Past 24 Hours:
- 3
- Past 7 Days:
- 10
- Past 30 Days:
- 75
- All Time:
- 552
Comments: 0
No one has left comments on this guide. Will you be first?
Go to guide commentsCompleted: 0 1
No one has marked this guide "completed." Will you be the first?
1 person has marked this guide "completed." It's you — great job!
Favorites: 0 1
No one has favorited (and subscribed to) this guide. Will you be the first?
1 person has favorited (and subscribed to) this guide — and that's you!
Better Introduction
Improve this guide by completing or revising its introduction.
Introduction
Go to step 1 ↓If your device isn’t turning on or if the power switch isn’t properly working, it may be time to replace the power switch in the printer. Follow these instructions to replace the power switch in the Zebra ZP 450.
In order to complete this guide, you’ll need to know how to solder. Please visit the How to Solder and Desolder Connections guide for more information on proper soldering technique.
What you need
Tools


-
-
-
Remove the three 12mm screws from the bottom of the printer using a Phillips #1 screwdriver.
-
Using the TR10 Torx screwdriver, remove the four 8mm screws from the bottom of the device.
 Ask FixBot
-
-
-
Remove the single 7mm screw located underneath the outfeed using the same Phillips #1 screwdriver.
-
-
-
Using an opening pick, pry the plastic covering from around the power button and accessory ports.
-
-
-
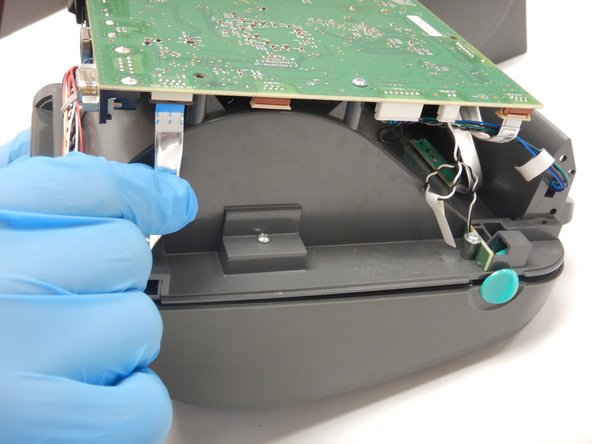
After lifting the plastic casing from the device, use the Phillips #1 screwdriver to remove the single 5mm screw securing the motherboard.
-
Remove all connections to the motherboard.
-
-
-
-
-
-
Using the soldering iron, unsolder the joints on the back of the motherboard connecting the power switch to the motherboard.
-
For more information on proper soldering technique, please visit the How to Solder and Desolder Connections guide.
-
-




To reassemble your device, follow these instructions in reverse order.

Team

The Citadel Military College of South Carolina, Team S1-G6, Eggleston Spring 2021 Member of The Citadel Military College of South Carolina, Team S1-G6, Eggleston Spring 2021
CMCSC-EGGLESTON-S21S1G6
2 Members
36 Guides authored
