Free Shipping on Domestic Orders $75+

ZTE Maven 2 Daughterboard Replacement

What you need

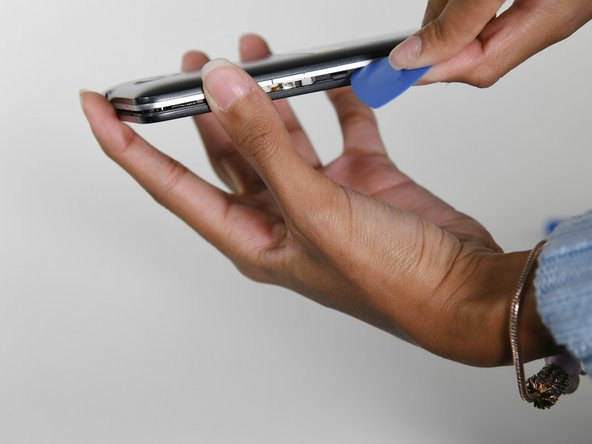
    1. ZTE Maven 2 Daughterboard Replacement, Back Cover: step 1, image 1 of 3 ZTE Maven 2 Daughterboard Replacement, Back Cover: step 1, image 2 of 3 ZTE Maven 2 Daughterboard Replacement, Back Cover: step 1, image 3 of 3
      • Pry off the back cover by inserting an opening tool into the small space on the bottom left between the phone's cover and body.

      • Work your way around the phone with an opening pick to loosen the rest of the back cover.

      • Remove the cover.

      Ask FixBot

      Add Comment

    1. ZTE Maven 2 Daughterboard Replacement, Battery: step 2, image 1 of 1
      • Push in and then up on the bottom of the battery to free it from its compartment.

      • Pull the battery out.

      Ask FixBot

      Add Comment

    1. ZTE Maven 2 Daughterboard Replacement, MicroSD Card: step 3, image 1 of 2 ZTE Maven 2 Daughterboard Replacement, MicroSD Card: step 3, image 2 of 2
      Tool used on this step:
      Tweezers
      $4.99
      Buy
      • Using your fingers or blunt tweezers, carefully pull the memory card out of the slot.

      • A SIM card is used to demonstrate the process for removing the MicroSD card in these images.

      Ask FixBot

      Add Comment

    1. ZTE Maven 2 Daughterboard Replacement, Midframe: step 4, image 1 of 1
      • Remove the twelve 3 mm screws with a Phillips #00 screwdriver.

      Ask FixBot

      Add Comment

    2. ZTE Maven 2 Daughterboard Replacement: step 5, image 1 of 3 ZTE Maven 2 Daughterboard Replacement: step 5, image 2 of 3 ZTE Maven 2 Daughterboard Replacement: step 5, image 3 of 3
      • Wedge the opening tool between the front and side panel to create a gap.

      • Slide the opening pick around the device to detach the midframe.

      Ask FixBot

      Add Comment

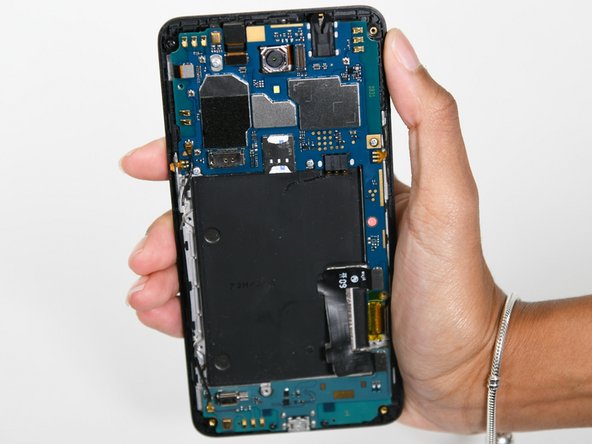
    1. ZTE Maven 2 Daughterboard Replacement, Motherboard: step 6, image 1 of 3 ZTE Maven 2 Daughterboard Replacement, Motherboard: step 6, image 2 of 3 ZTE Maven 2 Daughterboard Replacement, Motherboard: step 6, image 3 of 3
      Tool used on this step:
      Tweezers
      $4.99
      Buy
      • Peel the sticker off the battery compartment, as some of the motherboard components are hidden under it.

      • Remove the six 3 mm screws with a Phillips #00 screwdriver.

      • Using a pair of blunt tweezers, carefully remove the black wire that's attached to the gold plates on the left side of the device.

      Ask FixBot

      Add Comment

    2. ZTE Maven 2 Daughterboard Replacement: step 7, image 1 of 2 ZTE Maven 2 Daughterboard Replacement: step 7, image 2 of 2
      • Using the opening tool, carefully detach the ribbon cables connected to the motherboard.

      Ask FixBot

      Add Comment

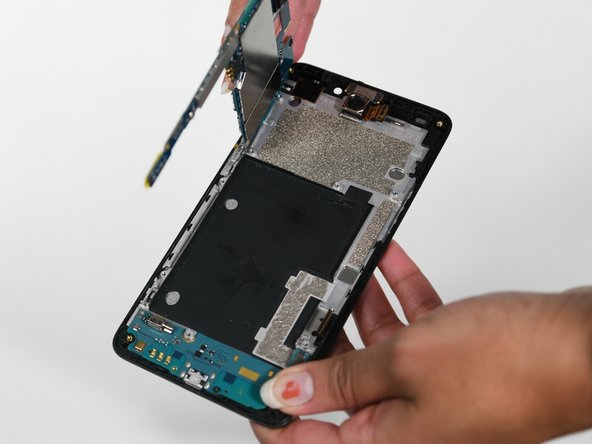
    3. ZTE Maven 2 Daughterboard Replacement: step 8, image 1 of 2 ZTE Maven 2 Daughterboard Replacement: step 8, image 2 of 2
      • Work the opening pick around the edges of the motherboard to loosen it up.

      • The motherboard is glued down with adhesive. Pushing firmly with the pick will help to loosen the components and remove them.

      • Pull the motherboard out of the device.

      Ask FixBot

      Add Comment

    1. ZTE Maven 2 Daughterboard Replacement, Daughterboard: step 9, image 1 of 1
      • Remove the daughterboard containing the charging port.

      Ask FixBot

      Add Comment

Conclusion

To reassemble your device, follow these instructions in reverse order.

Cancel: I did not complete this guide.

Kristen Gismondi

Member since: 11/12/14

108,586 Reputation

271 Guides authored

Team

iFixit Member of iFixit

Staff

123 Members

85,578 Guides authored

0 Guide Comments

Add Comment

View Statistics:

Past 24 Hours: 1

Past 7 Days: 2

Past 30 Days: 13

All Time: 208