
Free Shipping on Domestic Orders $75+

ZOTAC ZBOX MI642 Nano RAM Replacement

What you need

  1. ZOTAC ZBOX MI642 Nano RAM Replacement, RAM: step 1, image 1 of 2 ZOTAC ZBOX MI642 Nano RAM Replacement, RAM: step 1, image 2 of 2
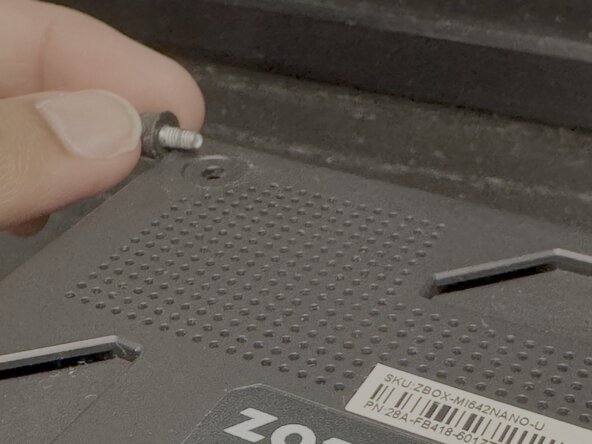
    • Shut down the ZOTAC ZBOX MI642 Nano completely through the operating system; do not simply put it to sleep. Once the device has fully powered off, disconnect the power cable from the rear of the unit.

    • Turn the ZBOX MI642 Nano upside-down and place it on a soft, clean surface such as a cloth mat or folded towel.

    • This protects the top panel from scratches and gives you stable access to the four thumbscrews on the bottom panel.

    Ask FixBot

    Add Comment

  2. ZOTAC ZBOX MI642 Nano RAM Replacement: step 2, image 1 of 2 ZOTAC ZBOX MI642 Nano RAM Replacement: step 2, image 2 of 2
    • Using your fingers, twist the four padded screws until they are removed.

    • The screws may be tight on first removal. Apply steady pressure while turning to avoid stripping the padded heads.

    Ask FixBot

    Add Comment

  3. ZOTAC ZBOX MI642 Nano RAM Replacement: step 3, image 1 of 2 ZOTAC ZBOX MI642 Nano RAM Replacement: step 3, image 2 of 2
    • Lift the bottom panel straight upward from the edges.

    • Do not force the panel. If it resists, double-check that all four screws have been fully removed.

    Ask FixBot

    Add Comment

  4. ZOTAC ZBOX MI642 Nano RAM Replacement: step 4, image 1 of 2 ZOTAC ZBOX MI642 Nano RAM Replacement: step 4, image 2 of 2
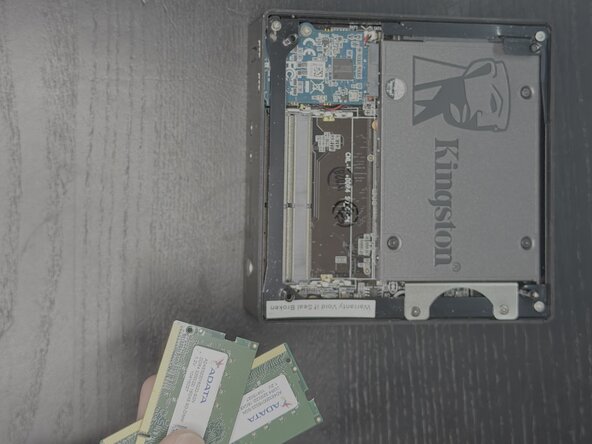
    • The two SO-DIMM RAM slots are positioned horizontally near the top of the motherboard, just beneath the SSD, side by side.

    • If the device is a barebones unit, the slots will be empty. If RAM is already installed, one or both slots will have a module seated in them.

    Ask FixBot

    Add Comment

  5. ZOTAC ZBOX MI642 Nano RAM Replacement: step 5, image 1 of 3 ZOTAC ZBOX MI642 Nano RAM Replacement: step 5, image 2 of 3 ZOTAC ZBOX MI642 Nano RAM Replacement: step 5, image 3 of 3
    • Hold your new DDR4 SO-DIMM module by its edges and orient it so the notch on the gold connector edge aligns with the raised key inside the RAM slot.

    • The module is keyed and can only be inserted in one direction. If the notch does not line up, rotate the module 180 degrees.

    • Confirm your new module is DDR4-2666 or DDR4-2400. The MI642 Nano does not support DDR5. Using an incompatible module will prevent the device from booting.

    Ask FixBot

    Add Comment

  6. ZOTAC ZBOX MI642 Nano RAM Replacement: step 6, image 1 of 3 ZOTAC ZBOX MI642 Nano RAM Replacement: step 6, image 2 of 3 ZOTAC ZBOX MI642 Nano RAM Replacement: step 6, image 3 of 3
    • Insert the module into the slot at a 45-degree angle, pushing it in firmly until it is fully seated in the connector.

    • Press the module down flat toward the motherboard. The two retention clips on either side will snap into place audibly, locking the module flat.

    • If the clips do not snap closed, the module is not fully inserted. Remove it and try again; do not force the clips closed manually.

    Ask FixBot

    Add Comment

  7. ZOTAC ZBOX MI642 Nano RAM Replacement: step 7, image 1 of 3 ZOTAC ZBOX MI642 Nano RAM Replacement: step 7, image 2 of 3 ZOTAC ZBOX MI642 Nano RAM Replacement: step 7, image 3 of 3
    • Align the bottom panel with the device body and press it down gently until it sits flush.

    • Reinstall the four thumbscrews at each corner, tightening them snugly but not over-tightening.

    Ask FixBot

    Add Comment

  8. ZOTAC ZBOX MI642 Nano RAM Replacement: step 8, image 1 of 3 ZOTAC ZBOX MI642 Nano RAM Replacement: step 8, image 2 of 3 ZOTAC ZBOX MI642 Nano RAM Replacement: step 8, image 3 of 3
    • Reconnect the power cable and press the power button to turn on the device.

    • To confirm the new RAM is recognized, access the BIOS by pressing the delete during startup, and check the memory information displayed.

    • Alternatively, once the operating system loads, open System Information (Windows: press Win + Pause/Break) and verify the total RAM matches what you installed.

    • If the device does not boot or does not recognize the new RAM, reseat the module by repeating Step. Ensure the module is fully inserted and the retention clips are locked on both sides.

    Ask FixBot

    Add Comment

Conclusion

You've successfully replaced your RAM on your ZOTAC MI642 NANO Mini PC!

Cancel: I did not complete this guide.

Attached Documents

Syed Nasir

Member since: 01/28/26

157 Reputation

1 Guide authored

0 Guide Comments

Add Comment

View Statistics:

Past 24 Hours: 0

Past 7 Days: 10

Past 30 Days: 38

All Time: 65