
Xbox One Wireless Controller Model 1537 (Left) Bumper Replacement

Cristyne Ramirez and 2 other contributors
Last updated on Apr 21, 2020
Views: 66K
View statistics:
- Past 24 Hours:
- 14
- Past 7 Days:
- 69
- Past 30 Days:
- 340
- All Time:
- 65,561
Comments: 4
1 comment on steps, 3 guide comments.
Go to guide commentsCompleted: 23 24
23 people have marked this guide "completed." Will you be next?
24 people have marked this guide "completed." Including you — great job!
Favorites: 0 1
No one has favorited (and subscribed to) this guide. Will you be the first?
1 person has favorited (and subscribed to) this guide — and that's you!
Introduction
Go to step 1 ↓This replacement consists of learning how to disassemble an Xbox One Wireless Controller and replace the Bumpers. This guide will be showing the replacement of the left bumper but the same steps can be applied to replace the right bumper. It is common for these bumpers to get damaged and lose usability quickly, especially if the controller is used frequently for gaming. Many games require the use of these bumpers in order to perform important tasks pertinent to the game. This replacement guide will walk you through a step-by-step process of disassembling the Xbox controller, removing the bumpers, and replacing them.
What you need
Parts
Tools


-
-
-
Grip the controller firmly to remove the side handle cover.
-
Use a flathead screwdriver or a spudger to wedge between the seams of the front to the side handle of the controller.
-
Move the flathead screwdriver all the way around the side plates seam and push the plate forward.
-
-
-
Use a screwdriver and punch a hole directly in the center label. There you will find a hidden screw.
-
Remove the five 10mm screws located on the back of the controller using a T8 screwdriver.
-
-
-
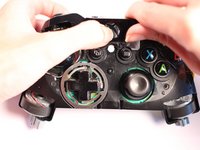
Remove the cover piece surrounding the Xbox button off of its pegs.
-
Firmly hold controller and push cover piece up from the pegs.
-
Press the Xbox button down to assist in the unclipping of the piece.
-
-
-
-
Remove the broken bumper by unclipping it from its pegs.
-
Hold the controller firmly and push the bumper piece up from its pegs to unclip.
-
-
-
Align the replacement bumper onto the pegs, push gently and click into place.
-

 Ask FixBot




To reassemble your device, follow these instructions in reverse order.
Cancel: I did not complete this guide.
23 other people completed this guide.

Team

USF Sarasota-Manatee, Team S1-G1, Stewart Spring 2018 Member of USF Sarasota-Manatee, Team S1-G1, Stewart Spring 2018
USFSM-STEWART-S18S1G1
15 Members
180 Guides authored
3 Guide Comments
Is there a way to do this without removing all of the front and grip.
