
Xbox One Wireless Controller (1697 Model) D-pad Replacement

Ethan S and 4 other contributors
Last updated on Apr 13, 2020
Views: 13K
View statistics:
- Past 24 Hours:
- 5
- Past 7 Days:
- 44
- Past 30 Days:
- 190
- All Time:
- 13,201
Comments: 2
1 comment on steps, 1 guide comment.
Go to guide commentsCompleted: 13 14
13 people have marked this guide "completed." Will you be next?
14 people have marked this guide "completed." Including you — great job!
Favorites: 0 1
No one has favorited (and subscribed to) this guide. Will you be the first?
1 person has favorited (and subscribed to) this guide — and that's you!
Action Shots
Be an action hero! This guide needs images that better demonstrate how to perform specific actions.
Introduction
Go to step 1 ↓If your Xbox One Wireless Controller (model 1697) Directional-pad (D-pad) is not working when your thumb presses the button, then use this guide to replace the D-pad. The D-pad is the raised, “plus-sign” looking button that is located between the left and right thumb sticks that helps the user adjust the focus or other controls of a specific Xbox One game. Before removing the D-pad, make sure to power off your Xbox One controller completely.
What you need


-
-
-
Remove the side handles with the iFixit plastic opening tool by wedging it around the seam of the handles.
 Ask FixBot
-
-
-
Remove the two screws (four total screws) on the top and bottom of each controller handle and one screw underneath the battery pack using the T9 Torx screwdriver.
-
-
-


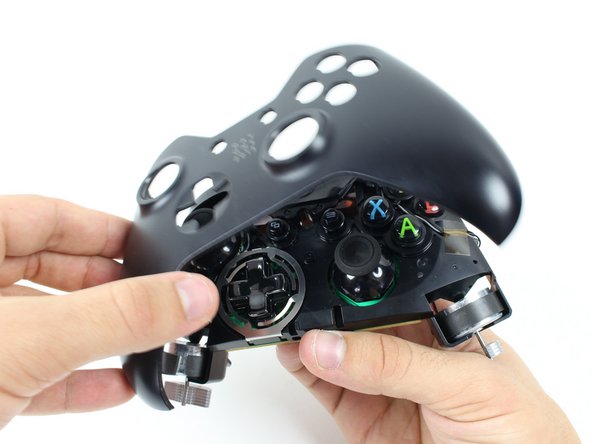


To reassemble your device, follow these instructions in reverse order.
Cancel: I did not complete this guide.
13 other people completed this guide.

Team

Eastern Washington University, Team S2-G1, Munoz Fall 2019 Member of Eastern Washington University, Team S2-G1, Munoz Fall 2019
EWU-MUNOZ-F19S2G1
2 Members
12 Guides authored
1 Guide Comment
Hellow mine has a problem that it doesn't work\turn on with battery or with a cable like its dead
