Free Shipping on Domestic Orders $75+

Xbox One Elite Controller (Model 1698) Daughterboard Replacement

What you need

  1. Xbox One Elite Controller (Model 1698) Daughterboard Replacement, Show me the Screws!: step 1, image 1 of 2 Xbox One Elite Controller (Model 1698) Daughterboard Replacement, Show me the Screws!: step 1, image 2 of 2
    • You can remove the side panels with a pry tool.

    • You don't need to remove the rubber. The rubber on this controller was already bad.

    Ask FixBot
    Add Comment

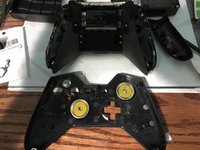
  2. Xbox One Elite Controller (Model 1698) Daughterboard Replacement, Removing the back panel screws: step 2, image 1 of 1
    • Remove the 5 Torx Security Bit (TR9) screws.

    Ask FixBot
    Add Comment

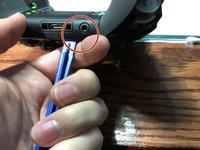
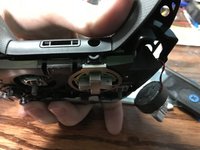
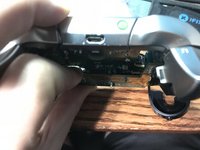
  3. Xbox One Elite Controller (Model 1698) Daughterboard Replacement, Popping that back panel off: step 3, image 1 of 3 Xbox One Elite Controller (Model 1698) Daughterboard Replacement, Popping that back panel off: step 3, image 2 of 3 Xbox One Elite Controller (Model 1698) Daughterboard Replacement, Popping that back panel off: step 3, image 3 of 3
    • Pry the panel next to the 3.5mm port.

    • Be careful to not rip the ribbon shown in the next step.

    Ask FixBot

    Add Comment

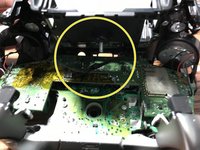
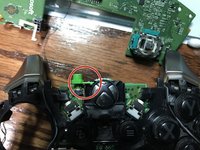
  4. Xbox One Elite Controller (Model 1698) Daughterboard Replacement, Warning Carefully remove the ribbon: step 4, image 1 of 2 Xbox One Elite Controller (Model 1698) Daughterboard Replacement, Warning Carefully remove the ribbon: step 4, image 2 of 2
    • Be careful to not rip the ribbon cable.

    • You can pop the connector up to remove the ribbon easily.

    • Ribbon Cable

    Ask FixBot

    Add Comment

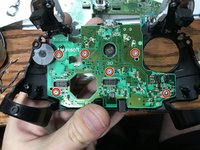
  5. Xbox One Elite Controller (Model 1698) Daughterboard Replacement, Screws on controller motherboard: step 5, image 1 of 1
    • Remove the 2 Torx (T6) screws.

    Ask FixBot

    Add Comment

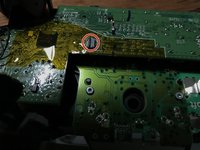
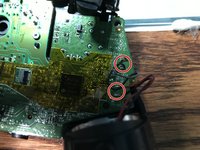
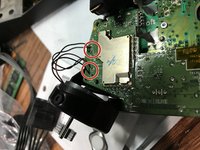
  6. Xbox One Elite Controller (Model 1698) Daughterboard Replacement, Desolder wires from motherboard: step 6, image 1 of 2 Xbox One Elite Controller (Model 1698) Daughterboard Replacement, Desolder wires from motherboard: step 6, image 2 of 2
    • Desolder the 4 wires on each side, these control the vibrations and the RT LT.

    Ask FixBot

    Add Comment

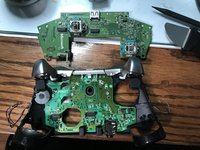
  7. Xbox One Elite Controller (Model 1698) Daughterboard Replacement, Remove the motherboard: step 7, image 1 of 2 Xbox One Elite Controller (Model 1698) Daughterboard Replacement, Remove the motherboard: step 7, image 2 of 2
    • Pull up from the "top" side of the controller on the daughterboard.

    Ask FixBot

    Add Comment

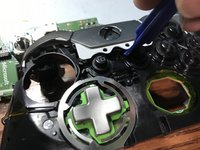
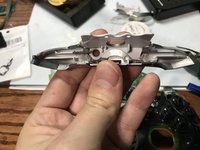
  8. Xbox One Elite Controller (Model 1698) Daughterboard Replacement, Remove the Home Button Cover: step 8, image 1 of 3 Xbox One Elite Controller (Model 1698) Daughterboard Replacement, Remove the Home Button Cover: step 8, image 2 of 3 Xbox One Elite Controller (Model 1698) Daughterboard Replacement, Remove the Home Button Cover: step 8, image 3 of 3
    • Be Careful to not lose the sync button.

    • Pry the middle section up from the home button side.

    • This will also remove the LB and RB which is a single part.

    Ask FixBot

    Add Comment

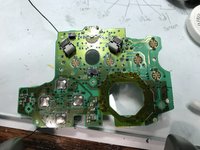
  9. Xbox One Elite Controller (Model 1698) Daughterboard Replacement, Remove the controller daughterboard: step 9, image 1 of 2 Xbox One Elite Controller (Model 1698) Daughterboard Replacement, Remove the controller daughterboard: step 9, image 2 of 2
    • Unscrew the 6 Torx (T6) screws.

    Ask FixBot

    Add Comment

Conclusion

To reassemble your device, follow these instructions in reverse order.

Cancel: I did not complete this guide.

3 other people completed this guide.

EasyAsABC123

Member since: 01/22/10

2,557 Reputation

5 Guides authored

1 Guide Comment

Hola que tal amigo disculpa es posible sustituir esa misma placa por una de un mando one ?

tay redd - Reply Share

Add Comment

View Statistics:

Past 24 Hours: 2

Past 7 Days: 23

Past 30 Days: 92

All Time: 10,640