Introduction
The recommended minimum capacity for USB drives is now 64GB (as of 6/30/2026). This is due to the lack of name-brand 32GB drives at general retailers like Walmart and the prevalence of online counterfeits using low-tier flash that fails under ISO flashing stress. While 32GB remains viable at specialized shops like Micro Center or Best Buy, sticking to 64GB+ is safer for general purchases.
If you are unsure how to write a Windows 10/11 ISO, this guide shows how to use Rufus to bypass Microsoft account (MSA) requirements and create installers for "unsupported" PCs. This focuses on bootable USB drives, as most modern computers lack optical drives.
Choosing a USB Drive
TL;DR: Stick with name-brand USB 3.0 32GB+ drives (e.g., SanDisk) and avoid Amazon. You rarely save more than $1–$2 by choosing generic or smaller drives. USB 2.0 works but is slow; use it only for older PCs with USB 3.0 boot issues.
Thin Budget? Reuse an old 8–16GB name-brand drive rather than buying no-name junk. Your drive must be at least 8GB to be detected.
Note on 8GB: These work but leave little room for drivers. Modern 8GB drives often use failed 16GB chips with the bad half disabled, making them less reliable than higher-capacity options.
Preparation: Erase used drives before using Rufus. While Rufus does this, pre-formatting (NTFS/exFAT/FAT32) makes detection more reliable.
Amazon Purchase Warning
If a drive bought on Amazon has issues out of the box, it is likely counterfeit. If sold by a third party (even via FBA), test it with H2TestW FIRST!
Win11 minimum specification bypass warning:
WARNING: Bypassing requirements makes your PC unsupported by Microsoft; feature updates must be force-installed. If using Rufus tweaks, limit them to these "proven safe" CPUs. If you insist on doing it with the Rufus tweaks, try and limit the machine you choose to the CPUs listed here as these are proven safe (also on Step 5 on this guide):
- AMD: Zen 1 / Zen+
- Intel: 7th-gen
Older CPUs face higher risks of stability issues. You are on your own in the eyes of Microsoft.
Minimum Hardware Floor:
- CPU: Must support SSE 4.2 and PopCnt (Population Count).
- RAM: 4GB absolute minimum; 8–16GB recommended.
What you need
-
-
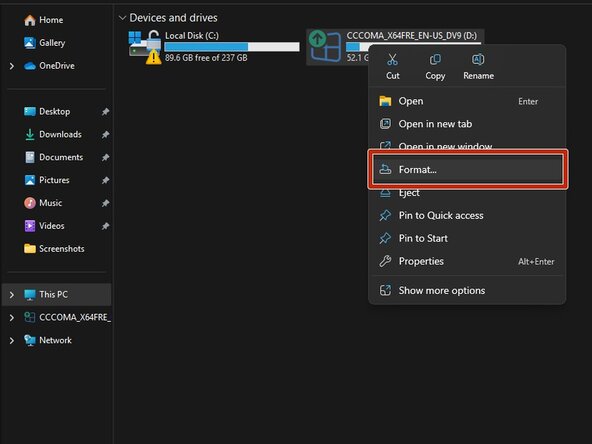
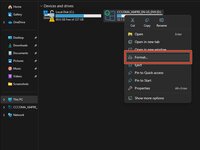
With the USB drive plugged into the computer, go into Windows Explorer, right click Format. For all intents and purposes format type used here does not matter as Rufus does a format before writing the drive image.
-
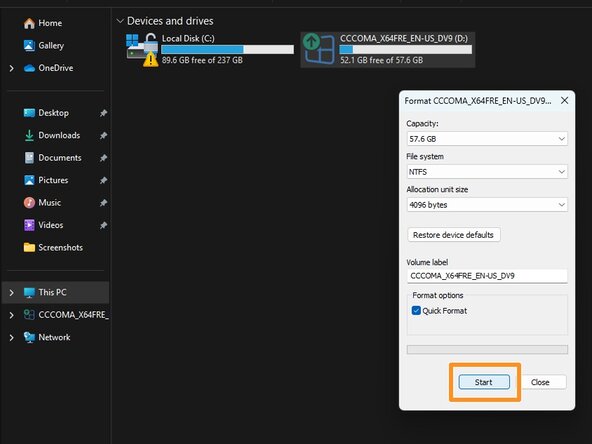
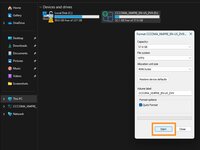
Click on Format and click OK on the data loss warning. Once done the drive is ready to be imaged with Rufus.
 Ask FixBot
-
-
-
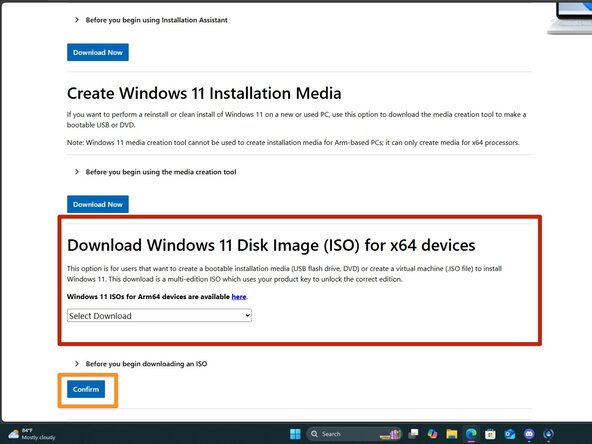
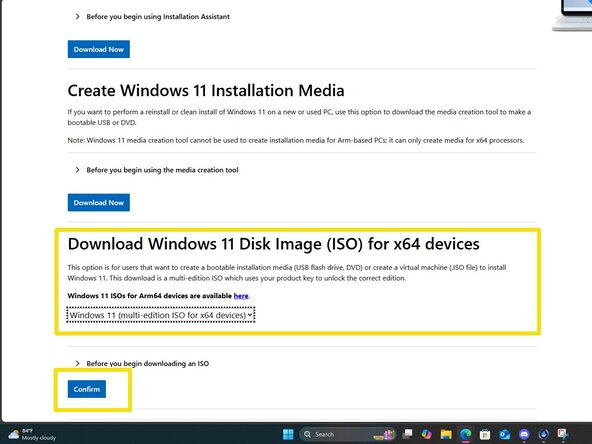
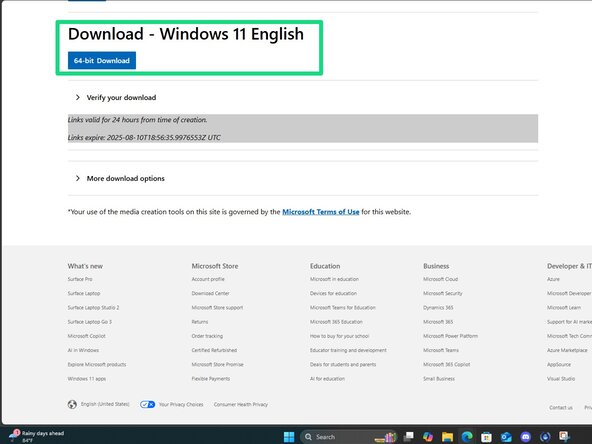
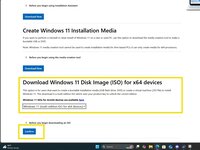
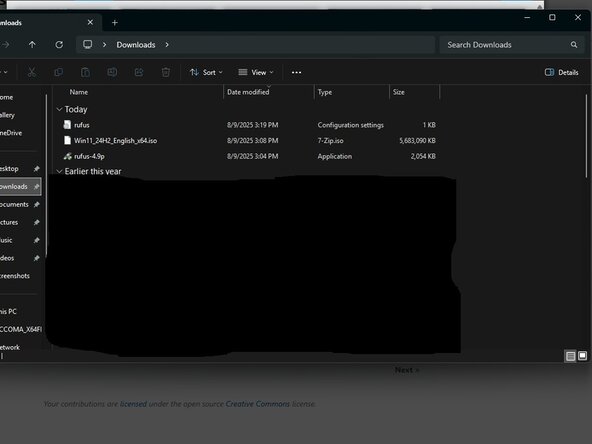
Download a Windows 10 or 11 ISO from Microsoft - do not use other sources unless you trust it.
-
Windows 11: https://www.microsoft.com/en-us/software...
-
Windows 10: https://www.microsoft.com/en-us/software...
-
-
-
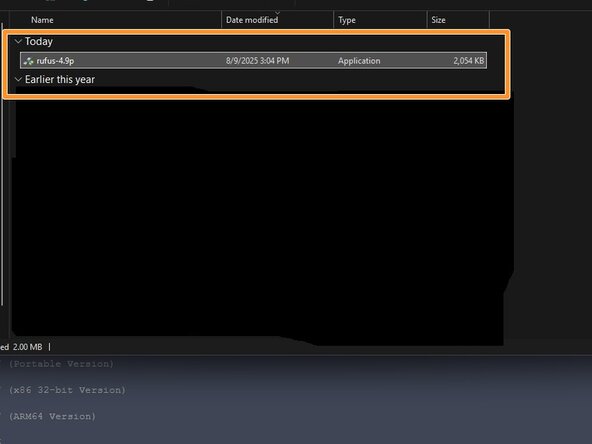
IMPORTANT: make sure to use Rufus 3.x, 4.x or newer — anything older will not work. To write the ISO, download Rufus. Place this somewhere it is easily found.
-
-
-
-
Legacy PCs only: If your device is pre UEFI, most of these struggle with GPT formatted drives. Change it to MBR or you may have issues.
-
Open Rufus and click SELECT. Find the ISO and click Open.
-
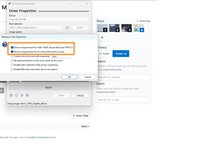
Select the options you want to enable. For most people the defaults are fine, but you can enable and disable options as you desire.
-
After configuring the writing process, click start. Click OK on the formatting warning.
-
-
-
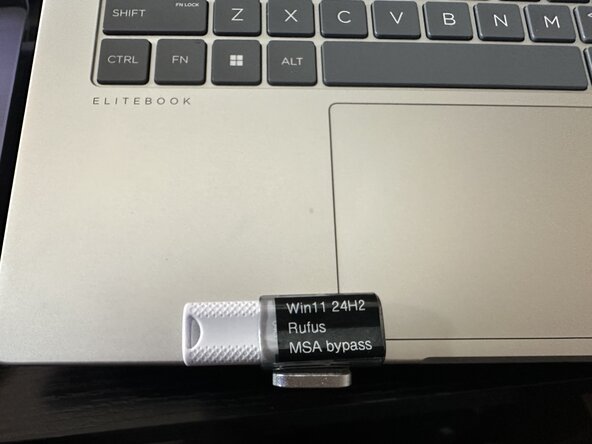
How you do this is up to you, but depending on the drive size -- you might find yourself with little room - in these cases, choose carefully what you put on the drive. If you have a larger drive like this one, you can have a more "full" label.
-
-
-
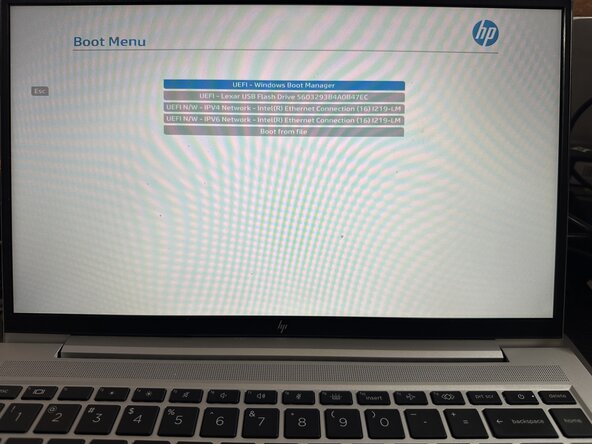
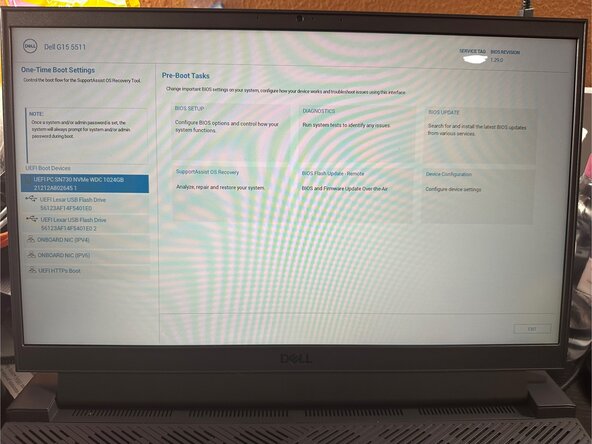
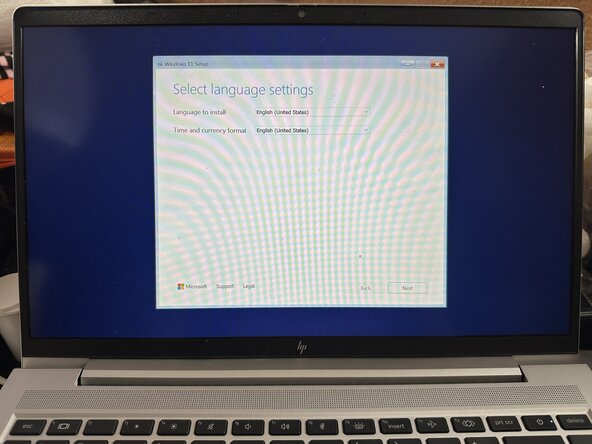
After selecting the drive from the BIOS startup menu, follow the prompts to install Windows 10/11 on your PC.
-


Cancel: I did not complete this guide.
4 other people completed this guide.
