Free Shipping on Domestic Orders $75+

Wiko Rainbow Jam 4G Display Replacement

    1. Wiko Rainbow Jam 4G Display Replacement, Display: step 1, image 1 of 2 Wiko Rainbow Jam 4G Display Replacement, Display: step 1, image 2 of 2
      • Remove the back cover and the battery

      Ask FixBot

      Add Comment

    2. Wiko Rainbow Jam 4G Display Replacement: step 2, image 1 of 3 Wiko Rainbow Jam 4G Display Replacement: step 2, image 2 of 3 Wiko Rainbow Jam 4G Display Replacement: step 2, image 3 of 3
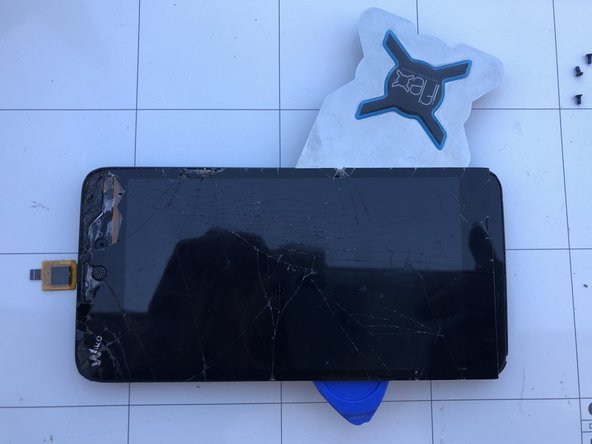
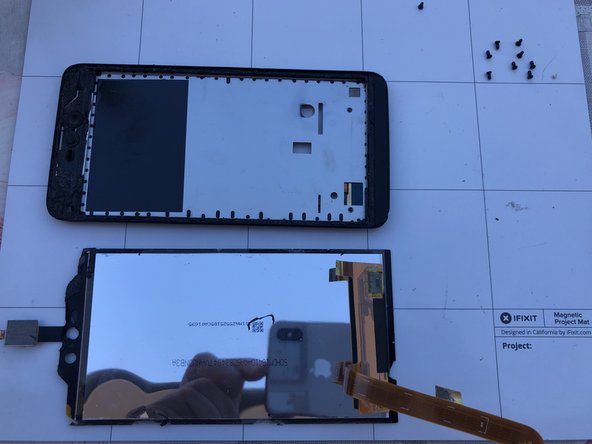
      • Using a Phillips scredriver, remove the screws

      • Using a thin tool or a blade detach the midframe from the the display assembly

      Ask FixBot

      Add Comment

    3. Wiko Rainbow Jam 4G Display Replacement: step 3, image 1 of 3 Wiko Rainbow Jam 4G Display Replacement: step 3, image 2 of 3 Wiko Rainbow Jam 4G Display Replacement: step 3, image 3 of 3
      • Remove the sticker with a heat source, for example using a hair dryer

      • Unplug the marked connector on the motherboard

      • Remove the stickers that holds the flat under the big sticker you removed earlier. Now remove the marked screw that keeps the motherboard in place

      Ask FixBot

      Add Comment

    4. Wiko Rainbow Jam 4G Display Replacement: step 4, image 1 of 3 Wiko Rainbow Jam 4G Display Replacement: step 4, image 2 of 3 Wiko Rainbow Jam 4G Display Replacement: step 4, image 3 of 3
      • Lift the motherboard and unplug the antenna cable

      • Using heat and a blade, remove the adesive holding the volume/power button

      • Remove the motherboard

      Ask FixBot

      Add Comment

    5. Wiko Rainbow Jam 4G Display Replacement: step 5, image 1 of 1
      • Remove the flat cable interconnecting the display and the motherboard. It's glued on the back of the frame.

      Ask FixBot

      Add Comment

    6. Wiko Rainbow Jam 4G Display Replacement: step 6, image 1 of 3 Wiko Rainbow Jam 4G Display Replacement: step 6, image 2 of 3 Wiko Rainbow Jam 4G Display Replacement: step 6, image 3 of 3
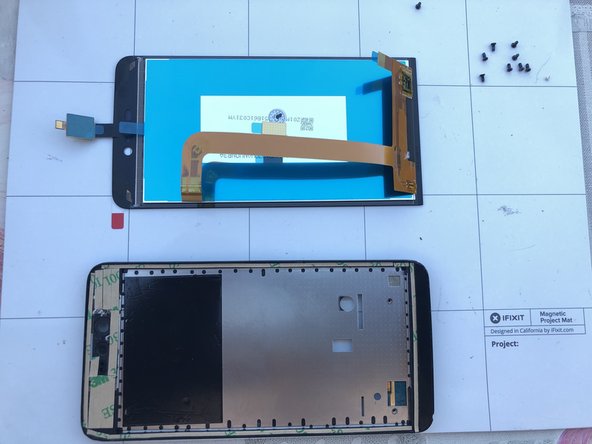
      • Heat the display edges to soften the glue. Gradually insert a thin blade to remove the faulty display.

      • Remove the old adhesive and clean carefully the surface before you apply the new adhesive.

      Ask FixBot

      Add Comment

    7. Wiko Rainbow Jam 4G Display Replacement: step 7, image 1 of 3 Wiko Rainbow Jam 4G Display Replacement: step 7, image 2 of 3 Wiko Rainbow Jam 4G Display Replacement: step 7, image 3 of 3
      • Apply the double sided tape on the edges of the frame so the enclosure is ready for a new display.

      Ask FixBot

      Add Comment

Conclusion

To reassemble your device, follow these instructions in reverse order.

Cancel: I did not complete this guide.

One other person completed this guide.

Special thanks to these translators:

it en

100%

These translators are helping us fix the world! Want to contribute?
Start translating ›

Smilzo

Member since: 11/09/13

12,359 Reputation

39 Guides authored

0 Guide Comments

Add Comment

View Statistics:

Past 24 Hours: 1

Past 7 Days: 4

Past 30 Days: 34

All Time: 919