Free Shipping on Domestic Orders $75+

Wii Balance Board Frame Replacement

Views: 4.9K

View statistics:

Past 24 Hours:
5
Past 7 Days:
32
Past 30 Days:
134
All Time:
4,947
Comments: 10

8 comments on steps, 2 guide comments.

Go to guide comments
Completed: 1

1 person has marked this guide "completed." Will you be next?

Favorites: 1

1 person has favorited (and subscribed to) this guide. Will you be next?

Time Required: 30 - 45 minutes
Difficulty: Moderate
Wii Balance Board Frame Replacement

Introduction

Go to step 1 ↓

This guide will demonstrate how to replace the Power Supply inside the Wii Balance Board.

What you need

Parts

Tools

    1. Wii Balance Board Frame Replacement, Unscrewing the Foot Cover: step 1, image 1 of 1
      • Flip device upside-down so the plastic white board is facing the ground.

      • Locate the four feet in the corners of the Balance Board.

      • Unscrew the three 12.7 mm Phillips screws from each foot cover.

      Ask FixBot

      Add Comment

    2. Wii Balance Board Frame Replacement, Removing the Foot Cover: step 2, image 1 of 1
      • Remove the gray plastic ring from the actual foot by lifting it up.

      Ask FixBot

      Add Comment

    3. Wii Balance Board Frame Replacement, Removing the Foot: step 3, image 1 of 1
      • Separate the loose foot from the device by lifting it up.

      Ask FixBot

      Add Comment

    4. Wii Balance Board Frame Replacement, Removing the Additional Feet: step 4, image 1 of 1
      • Repeat steps two and three on the remaining four feet.

      Ask FixBot

      Add Comment

    1. Wii Balance Board Frame Replacement, Unscrewing the Back Cover: step 5, image 1 of 1
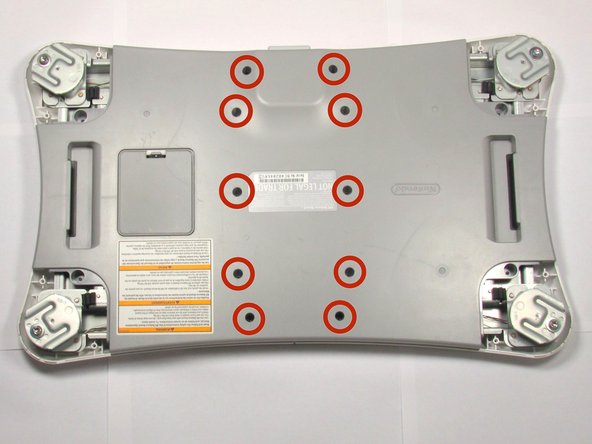
      • Unscrew the ten 12.7 mm Phillips #1 screws.

      Ask FixBot

      Add Comment

    2. Wii Balance Board Frame Replacement, Removing the Back Cover: step 6, image 1 of 1
      • Lift off the gray back cover.

      Ask FixBot

      Add Comment

    1. Wii Balance Board Frame Replacement, Battery Compartment: step 7, image 1 of 2 Wii Balance Board Frame Replacement, Battery Compartment: step 7, image 2 of 2
      • Locate the gray battery compartment.

      • Push the tab on the bottom and lift up completely to remove the cover to the batteries.

      Ask FixBot

      Add Comment

    2. Wii Balance Board Frame Replacement, Removing the Battery Case: step 8, image 1 of 1
      • Unscrew the two 6.35 mm Phillips #1 screws.

      • Slide the battery case out.

      Ask FixBot

      Add Comment

    1. Wii Balance Board Frame Replacement, Unscrewing the Frame: step 9, image 1 of 1
      • Unscrew the four 12.7 mm #1 screws.

      Ask FixBot

      Add Comment

    2. Wii Balance Board Frame Replacement, Removing the Frame: step 10, image 1 of 1
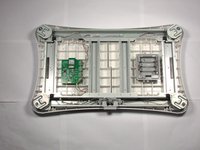
      • Lift the frame, circuit board, and power supply out of the front case. These components are all connected.

      Ask FixBot

      Add Comment

    1. Wii Balance Board Frame Replacement, Removing the Power Supply: step 11, image 1 of 1
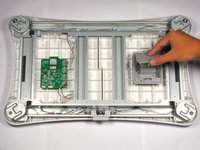
      • Lift out the power supply. It is not screwed in.

      Ask FixBot

      Add Comment

Conclusion

To reassemble your device, follow these instructions in reverse order.

Cancel: I did not complete this guide.

One other person completed this guide.

Cory Olson

Member since: 09/29/14

975 Reputation

4 Guides authored

Team

Cal Poly, Team 13-8, Forte Fall 2014 Member of Cal Poly, Team 13-8, Forte Fall 2014

CPSU-FORTE-F14S13G8

5 Members

60 Guides authored

2 Guide Comments

Top Anleitung, aber wo kann ich die Platine herbekommen? Danke!!!

Dominik - Reply Share

Hi, My batteries leaked over the UART_RX pin and I don't know how to fix it

Julián Rodríguez - Reply Share

Add Comment

View Statistics:

Past 24 Hours: 5

Past 7 Days: 32

Past 30 Days: 134

All Time: 4,947