Free Shipping on Domestic Orders $75+

This translation was generated by a machine and has not been reviewed by a person yet. Speak this language? Review it.

Why! NV41MZ Motherboard Replacement

What you need

    1. Why! NV41MZ Motherboard Replacement, Keyboard: step 1, image 1 of 3 Why! NV41MZ Motherboard Replacement, Keyboard: step 1, image 2 of 3 Why! NV41MZ Motherboard Replacement, Keyboard: step 1, image 3 of 3
      • Unscrew the 2 keyboard screws.

      • Insert an opening pick in the upper part of the keyboard.

      • Slide the pick along the upper edge of the keyboard.

      Ask FixBot

      Add Comment

    2. Why! NV41MZ Motherboard Replacement, Access the Keyboard Connectors: step 2, image 1 of 3 Why! NV41MZ Motherboard Replacement, Access the Keyboard Connectors: step 2, image 2 of 3 Why! NV41MZ Motherboard Replacement, Access the Keyboard Connectors: step 2, image 3 of 3
      • Carefully flip the keyboard over to access the cables.

      Ask FixBot

      Add Comment

    3. Why! NV41MZ Motherboard Replacement, Remove the Keyboard: step 3, image 1 of 3 Why! NV41MZ Motherboard Replacement, Remove the Keyboard: step 3, image 2 of 3 Why! NV41MZ Motherboard Replacement, Remove the Keyboard: step 3, image 3 of 3
      • Flip up the retaining latches then pull the cables straight out from the connectors.

      • Remove the keyboard.

      Ask FixBot

      Add Comment

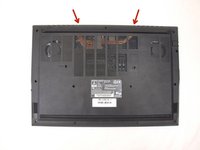
    1. Why! NV41MZ Motherboard Replacement, Bottom Cover: step 4, image 1 of 3 Why! NV41MZ Motherboard Replacement, Bottom Cover: step 4, image 2 of 3 Why! NV41MZ Motherboard Replacement, Bottom Cover: step 4, image 3 of 3
      • Remove the 14 screws securing the bottom case to the laptop.

      • Unclip the case by sliding a plastic spudger into the slots in the case.

      • Remove the bottom case.

      Ask FixBot

      Add Comment

    1. Why! NV41MZ Motherboard Replacement, RAM: step 5, image 1 of 2 Why! NV41MZ Motherboard Replacement, RAM: step 5, image 2 of 2
      • Spread the retaining clips to release the RAM module. It will pop up slightly.

      • Pull the RAM module straight out to remove it.

      Ask FixBot

      Add Comment

    1. Why! NV41MZ Motherboard Replacement, WiFi Card: step 6, image 1 of 3 Why! NV41MZ Motherboard Replacement, WiFi Card: step 6, image 2 of 3 Why! NV41MZ Motherboard Replacement, WiFi Card: step 6, image 3 of 3
      • Remove the Phillips screw securing the WiFi card.

      • Pull the card straight out from the connector.

      • Unclip the antenna wires from the card.

      Ask FixBot

      Add Comment

    1. Why! NV41MZ Motherboard Replacement, Remove the SSD: step 7, image 1 of 2 Why! NV41MZ Motherboard Replacement, Remove the SSD: step 7, image 2 of 2
      • Remove the Phillips screw securing the SSD.

      • The SSD board will pop up slightly once the screw is removed. Lift it to relieve any tension and pull it straight out.

      Ask FixBot

      Add Comment

    1. Why! NV41MZ Motherboard Replacement, Battery: step 8, image 1 of 2 Why! NV41MZ Motherboard Replacement, Battery: step 8, image 2 of 2
      • Remove the five Phillips screws securing the battery.

      • Unplug the cable connecting the battery to the motherboard.

      • Remove the battery.

      Ask FixBot

      Add Comment

    1. Why! NV41MZ Motherboard Replacement, Right CPU Fan: step 9, image 1 of 3 Why! NV41MZ Motherboard Replacement, Right CPU Fan: step 9, image 2 of 3 Why! NV41MZ Motherboard Replacement, Right CPU Fan: step 9, image 3 of 3
      • Remove the two screws securing the right CPU fan to the case.

      • Remove the mounting tape.

      • Unplug the fan cable from the motherboard.

      Ask FixBot

      Add Comment

    1. Why! NV41MZ Motherboard Replacement, Left CPU Fan: step 10, image 1 of 3 Why! NV41MZ Motherboard Replacement, Left CPU Fan: step 10, image 2 of 3 Why! NV41MZ Motherboard Replacement, Left CPU Fan: step 10, image 3 of 3
      • Remove the two Phillips screws securing the left CPU fan to the chassis.

      • Peel off the mounting tape.

      • Unplug the fan cable from the motherboard.

      Ask FixBot

      Add Comment

    1. Why! NV41MZ Motherboard Replacement, Motherboard: step 11, image 1 of 3 Why! NV41MZ Motherboard Replacement, Motherboard: step 11, image 2 of 3 Why! NV41MZ Motherboard Replacement, Motherboard: step 11, image 3 of 3
      • Unscrew the 4 screws and remove the heat sink.

      • Unplug the 4 cables.

      • For the cable outlined in purple, you must first lift the gray part then unplug the cable.

      Ask FixBot

      Add Comment

    2. Why! NV41MZ Motherboard Replacement, Unplug Cables: step 12, image 1 of 3 Why! NV41MZ Motherboard Replacement, Unplug Cables: step 12, image 2 of 3 Why! NV41MZ Motherboard Replacement, Unplug Cables: step 12, image 3 of 3
      • Unplug these two cables.

      Ask FixBot

      Add Comment

    3. Why! NV41MZ Motherboard Replacement, Remove Screws: step 13, image 1 of 1
      • Remove the five Phillips mounting screws securing the motherboard to the case.

      Ask FixBot

      Add Comment

    4. Why! NV41MZ Motherboard Replacement, Peel the Tape: step 14, image 1 of 3 Why! NV41MZ Motherboard Replacement, Peel the Tape: step 14, image 2 of 3 Why! NV41MZ Motherboard Replacement, Peel the Tape: step 14, image 3 of 3
      • Peel off the adhesive tape formerly covered by the RAM module.

      • Peel the tape from the WiFi card cables to keep them from getting in the way.

      Ask FixBot

      Add Comment

    5. Why! NV41MZ Motherboard Replacement, Remove the Motherboard: step 15, image 1 of 3 Why! NV41MZ Motherboard Replacement, Remove the Motherboard: step 15, image 2 of 3 Why! NV41MZ Motherboard Replacement, Remove the Motherboard: step 15, image 3 of 3
      • Carefully lift the motherboard off the chassis.

      Ask FixBot

      Add Comment

Conclusion

To reassemble your device, follow the instructions in reverse order.

Cancel: I did not complete this guide.

Special thanks to these translators:

fr en

100%

Jerry Wheeler is helping us fix the world! Want to contribute?
Start translating ›

Felice Suglia

Member since: 06/15/13

33,634 Reputation

283 Guides authored

0 Guide Comments

Add Comment

View Statistics:

Past 24 Hours: 1

Past 7 Days: 11

Past 30 Days: 39

All Time: 517