Free Shipping on Domestic Orders $75+

Whirlpool Refrigerator Icemaker Auger Assembly Replacement

Views: 1.1K

View statistics:

Past 24 Hours:
2
Past 7 Days:
21
Past 30 Days:
77
All Time:
1,141
Comments: 1

1 comment on steps.

Completed: 0

No one has marked this guide "completed." Will you be the first?

Favorites: 0

No one has favorited (and subscribed to) this guide. Will you be the first?

Time Required: 30 - 45 minutes
Difficulty: Moderate
Whirlpool Refrigerator Icemaker Auger Assembly Replacement

Introduction

Go to step 1 ↓

Use this guide to replace the icemaker auger assembly in your Whirlpool Refrigerator.

The icemaker auger assembly directs water and ice to the dispenser. If your refrigerator isn't dispensing ice or water properly, your icemaker auger assembly might be broken. The assembly consists of an auger motor and solenoid—you can replace the parts individually if you know which specific part is broken.

This guide will work for most Whirlpool refrigerators. This guide is written with a model WRS315SDHW refrigerator. If you have a different model, you may encounter some minor disassembly differences, but the overall repair process will be the same.

Note: Some photos show the doors removed for clarity purposes. Removing them is not required and will not change the procedure.

What you need

Tools

    1. Whirlpool Refrigerator Icemaker Auger Assembly Replacement, Safety precautions: step 1, image 1 of 1
      • Before you begin your repair, perform the following:

      • Turn off your main water supply

      • Unplug your device

      Ask FixBot

      Add Comment

    1. Whirlpool Refrigerator Icemaker Auger Assembly Replacement, Open the doors: step 2, image 1 of 3 Whirlpool Refrigerator Icemaker Auger Assembly Replacement, Open the doors: step 2, image 2 of 3 Whirlpool Refrigerator Icemaker Auger Assembly Replacement, Open the doors: step 2, image 3 of 3
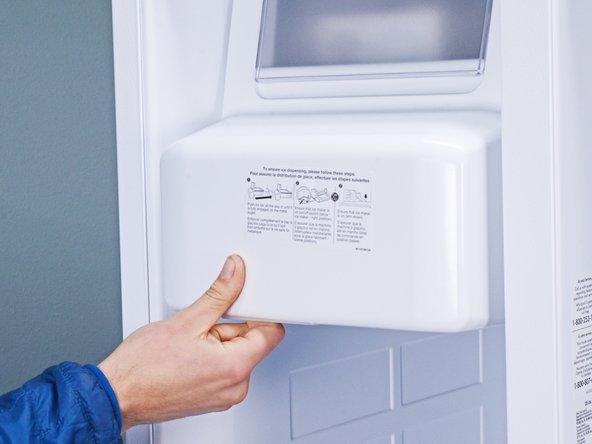
      • Depending on your repair, open one or both doors.

      Ask FixBot

      Add Comment

    1. Whirlpool Refrigerator Icemaker Auger Assembly Replacement, Remove the icemaker tray: step 3, image 1 of 2 Whirlpool Refrigerator Icemaker Auger Assembly Replacement, Remove the icemaker tray: step 3, image 2 of 2
      • Pull the icemaker tray completely out of its slot in the chassis.

      Ask FixBot

      Add Comment

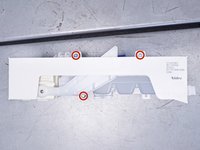
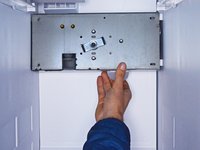
    2. Whirlpool Refrigerator Icemaker Auger Assembly Replacement, Unfasten the icemaker assembly: step 4, image 1 of 2 Whirlpool Refrigerator Icemaker Auger Assembly Replacement, Unfasten the icemaker assembly: step 4, image 2 of 2
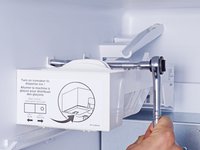
      • Remove the screw(s) securing the icemaker assembly.

      • The second photo shows the potential screw locations in a removed icemaker assembly.

      Ask FixBot
      Add Comment

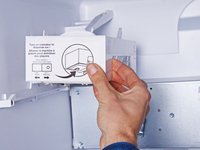
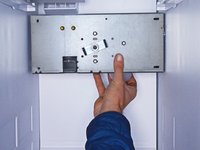
    3. Whirlpool Refrigerator Icemaker Auger Assembly Replacement, Reposition the icemaker assembly: step 5, image 1 of 3 Whirlpool Refrigerator Icemaker Auger Assembly Replacement, Reposition the icemaker assembly: step 5, image 2 of 3 Whirlpool Refrigerator Icemaker Auger Assembly Replacement, Reposition the icemaker assembly: step 5, image 3 of 3
      • Pull the icemaker assembly off its slot in the chassis.

      • Let the assembly hang to access its connectors.

      Ask FixBot
      Add Comment

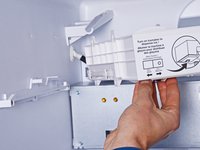
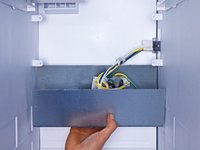
    4. Whirlpool Refrigerator Icemaker Auger Assembly Replacement, Disconnect the icemaker assembly: step 6, image 1 of 3 Whirlpool Refrigerator Icemaker Auger Assembly Replacement, Disconnect the icemaker assembly: step 6, image 2 of 3 Whirlpool Refrigerator Icemaker Auger Assembly Replacement, Disconnect the icemaker assembly: step 6, image 3 of 3
      • Disconnect any connectors attached to the icemaker assembly.

      Ask FixBot
      Add Comment

    5. Whirlpool Refrigerator Icemaker Auger Assembly Replacement, Remove the icemaker assembly: step 7, image 1 of 1
      • Remove the icemaker assembly.

      Ask FixBot

      Add Comment

    1. Whirlpool Refrigerator Icemaker Auger Assembly Replacement, Unfasten the icemaker auger assembly: step 8, image 1 of 1
      • Remove the screw(s) securing the icemaker auger assembly.

      Ask FixBot

      Add Comment

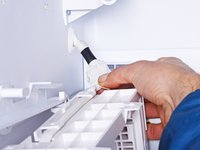
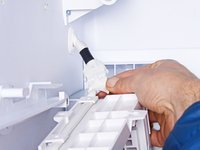
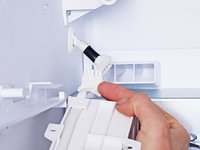
    2. Whirlpool Refrigerator Icemaker Auger Assembly Replacement, Reposition the icemaker auger assembly: step 9, image 1 of 3 Whirlpool Refrigerator Icemaker Auger Assembly Replacement, Reposition the icemaker auger assembly: step 9, image 2 of 3 Whirlpool Refrigerator Icemaker Auger Assembly Replacement, Reposition the icemaker auger assembly: step 9, image 3 of 3
      • Pull the icemaker auger assembly off of its slot in the chassis.

      • Let the assembly hang to access its connectors.

      Ask FixBot

      Add Comment

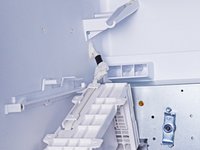
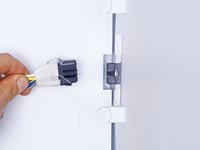
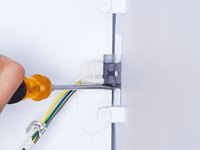
    3. Whirlpool Refrigerator Icemaker Auger Assembly Replacement, Disconnect the icemaker auger assembly: step 10, image 1 of 3 Whirlpool Refrigerator Icemaker Auger Assembly Replacement, Disconnect the icemaker auger assembly: step 10, image 2 of 3 Whirlpool Refrigerator Icemaker Auger Assembly Replacement, Disconnect the icemaker auger assembly: step 10, image 3 of 3
      • Disconnect any connectors attached to the icemaker auger assembly.

      Ask FixBot
      Add Comment
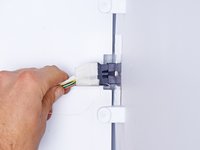
    4. Whirlpool Refrigerator Icemaker Auger Assembly Replacement, Remove the icemaker auger assembly: step 11, image 1 of 1
      • Remove the icemaker auger assembly.

      Ask FixBot

      Add Comment

Conclusion

To reassemble your device, follow these instructions in reverse order.

Take your e-waste to an R2 or e-Stewards certified recycler.

Repair didn’t go as planned? Ask our Answers community for help.

Cancel: I did not complete this guide.

nicO

Member since: 04/14/15

15,990 Reputation

88 Guides authored

0 Guide Comments

Add Comment

View Statistics:

Past 24 Hours: 2

Past 7 Days: 21

Past 30 Days: 77

All Time: 1,141