Free Shipping on Domestic Orders $75+

Whirlpool Refrigerator Drain Pan Replacement

Views: 15K

View statistics:

Past 24 Hours:
7
Past 7 Days:
83
Past 30 Days:
432
All Time:
15,484
Comments: 0

No one has left comments on this guide. Will you be first?

Go to guide comments
Completed: 1

1 person has marked this guide "completed." Will you be next?

Favorites: 0

No one has favorited (and subscribed to) this guide. Will you be the first?

Time Required: 1 - 2 hours
Difficulty: Moderate
Whirlpool Refrigerator Drain Pan Replacement

Introduction

Go to step 1 ↓

Use this guide to replace the drain pan in your Whirlpool Refrigerator.

The drain pan collects water from the defrost drain that eventually gets evaporated by the condenser. If your refrigerator is leaking water onto the floor, your drain pan might be bent or broken.

This guide will work for most Whirlpool refrigerators. This guide is written with a model WRS315SDHW refrigerator. If you have a different model, you may encounter some minor disassembly differences, but the overall repair process will be the same.

Note: Some photos show the doors removed for clarity purposes. Removing them is not required and will not change the procedure.

What you need

Tools

    1. Whirlpool Refrigerator Drain Pan Replacement, Safety precautions: step 1, image 1 of 1
      • Before you begin your repair, perform the following:

      • Turn off your main water supply

      • Unplug your device

      Ask FixBot

      Add Comment

    1. Whirlpool Refrigerator Drain Pan Replacement, Open the doors: step 2, image 1 of 3 Whirlpool Refrigerator Drain Pan Replacement, Open the doors: step 2, image 2 of 3 Whirlpool Refrigerator Drain Pan Replacement, Open the doors: step 2, image 3 of 3
      • Depending on your repair, open one or both doors.

      Ask FixBot

      Add Comment

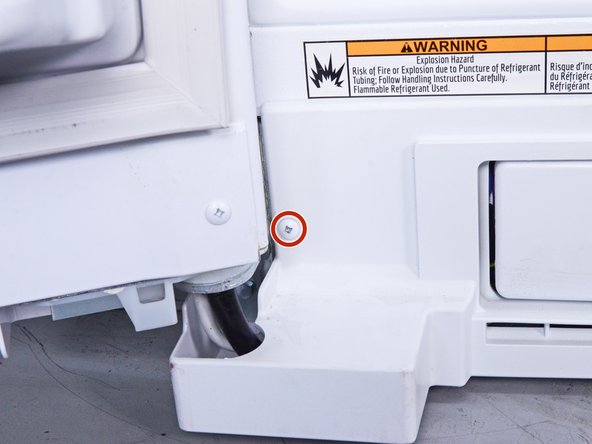
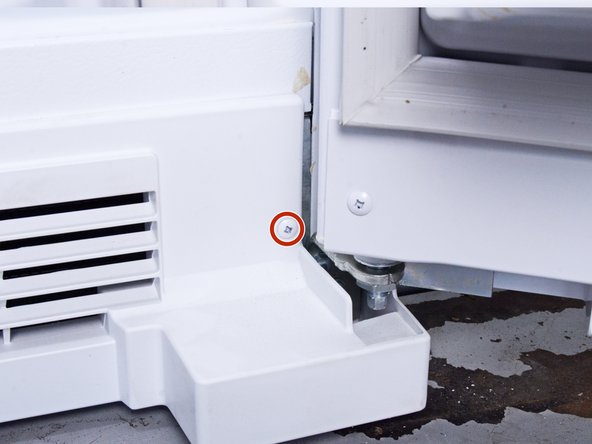
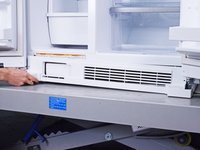
    1. Whirlpool Refrigerator Drain Pan Replacement, Unfasten the front panel: step 3, image 1 of 3 Whirlpool Refrigerator Drain Pan Replacement, Unfasten the front panel: step 3, image 2 of 3 Whirlpool Refrigerator Drain Pan Replacement, Unfasten the front panel: step 3, image 3 of 3
      • Remove the screw(s) securing the front panel.

      Ask FixBot

      Add Comment

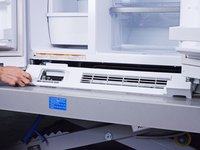
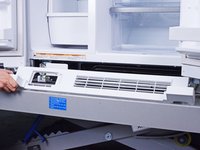
    2. Whirlpool Refrigerator Drain Pan Replacement, Remove the front panel: step 4, image 1 of 3 Whirlpool Refrigerator Drain Pan Replacement, Remove the front panel: step 4, image 2 of 3 Whirlpool Refrigerator Drain Pan Replacement, Remove the front panel: step 4, image 3 of 3
      • Pull the front panel straight off the chassis and remove it.

      • You may have to slightly open the water filter door to remove the front panel completely.

      Ask FixBot

      Add Comment

    1. Whirlpool Refrigerator Drain Pan Replacement, Unfasten the wiring harness: step 5, image 1 of 1
      • Use a 1/4 inch socket wrench to remove the 16.7 mm-long screw securing the wiring harness.

      Ask FixBot

      Add Comment

    2. Whirlpool Refrigerator Drain Pan Replacement, Reposition the wiring harness: step 6, image 1 of 2 Whirlpool Refrigerator Drain Pan Replacement, Reposition the wiring harness: step 6, image 2 of 2
      • Pull the wiring harness out of its slot in the chassis to access its connectors.

      Ask FixBot

      Add Comment

    3. Whirlpool Refrigerator Drain Pan Replacement, Disconnect the wiring harness: step 7, image 1 of 3 Whirlpool Refrigerator Drain Pan Replacement, Disconnect the wiring harness: step 7, image 2 of 3 Whirlpool Refrigerator Drain Pan Replacement, Disconnect the wiring harness: step 7, image 3 of 3
      • Disconnect the two connectors attached to the door wiring harness.

      Ask FixBot

      Add Comment

    1. Whirlpool Refrigerator Drain Pan Replacement, Unfasten the rear panel: step 8, image 1 of 3 Whirlpool Refrigerator Drain Pan Replacement, Unfasten the rear panel: step 8, image 2 of 3 Whirlpool Refrigerator Drain Pan Replacement, Unfasten the rear panel: step 8, image 3 of 3
      • Remove the screw(s) securing the rear panel.

      • Loosen the screw securing the water hose enough for the rear panel to freely move.

      Ask FixBot

      Add Comment

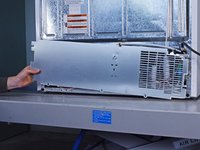
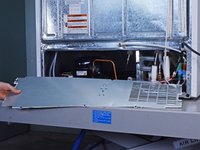
    2. Whirlpool Refrigerator Drain Pan Replacement, Remove the rear panel: step 9, image 1 of 3 Whirlpool Refrigerator Drain Pan Replacement, Remove the rear panel: step 9, image 2 of 3 Whirlpool Refrigerator Drain Pan Replacement, Remove the rear panel: step 9, image 3 of 3
      • Pull the rear panel off the chassis to remove it.

      Ask FixBot

      Add Comment

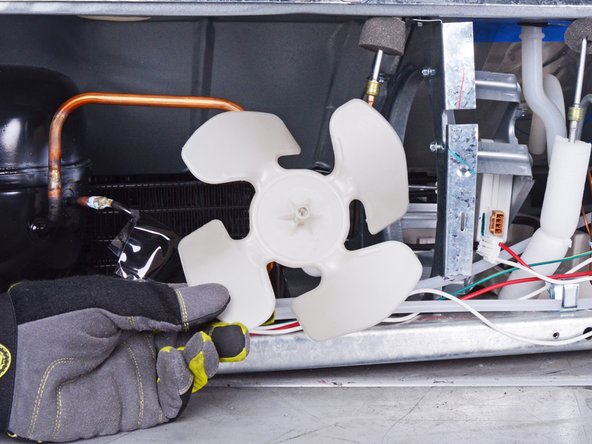
    1. Whirlpool Refrigerator Drain Pan Replacement, Remove the condenser fan: step 10, image 1 of 3 Whirlpool Refrigerator Drain Pan Replacement, Remove the condenser fan: step 10, image 2 of 3 Whirlpool Refrigerator Drain Pan Replacement, Remove the condenser fan: step 10, image 3 of 3
      • Put on gloves before continuing, as the sheet metal and the condenser fan itself are sharp.

      • Pull the condenser fan straight off its peg to remove it.

      Ask FixBot

      Add Comment
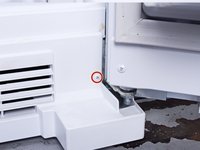
    1. Whirlpool Refrigerator Drain Pan Replacement, Unclip the drain pan: step 11, image 1 of 2 Whirlpool Refrigerator Drain Pan Replacement, Unclip the drain pan: step 11, image 2 of 2
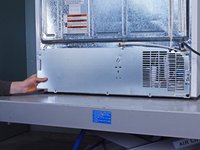
      • Use a flathead screwdriver, or a similar tool, to pry up the metal clip from the back of the drain pan.

      Ask FixBot

      Add Comment

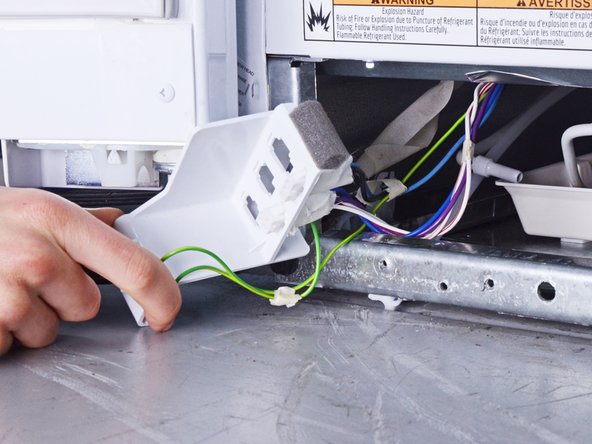
    2. Whirlpool Refrigerator Drain Pan Replacement, Reposition the wiring harness: step 12, image 1 of 3 Whirlpool Refrigerator Drain Pan Replacement, Reposition the wiring harness: step 12, image 2 of 3 Whirlpool Refrigerator Drain Pan Replacement, Reposition the wiring harness: step 12, image 3 of 3
      • Pull the wiring harness straight out of the chassis until you can access the drain pan.

      Ask FixBot

      Add Comment

    3. Whirlpool Refrigerator Drain Pan Replacement, Peel the tape: step 13, image 1 of 3 Whirlpool Refrigerator Drain Pan Replacement, Peel the tape: step 13, image 2 of 3 Whirlpool Refrigerator Drain Pan Replacement, Peel the tape: step 13, image 3 of 3
      • Peel the tape off the front metal clip attached to the drain pan.

      Ask FixBot

      Add Comment

    4. Whirlpool Refrigerator Drain Pan Replacement, Unclip the drain pan: step 14, image 1 of 3 Whirlpool Refrigerator Drain Pan Replacement, Unclip the drain pan: step 14, image 2 of 3 Whirlpool Refrigerator Drain Pan Replacement, Unclip the drain pan: step 14, image 3 of 3
      • Use your fingers to release the metal clip on the front of the drain pan.

      • Fold the metal clip so that it lays flat on the floor of the chassis.

      Ask FixBot

      Add Comment

    5. Whirlpool Refrigerator Drain Pan Replacement, Remove the drain pan: step 15, image 1 of 3 Whirlpool Refrigerator Drain Pan Replacement, Remove the drain pan: step 15, image 2 of 3 Whirlpool Refrigerator Drain Pan Replacement, Remove the drain pan: step 15, image 3 of 3
      • Pull the drain pan toward the front of the chassis to release any remaining clips.

      • Remove the drain pan.

      Ask FixBot

      Add Comment

Conclusion

To reassemble your device, follow these instructions in reverse order.

Take your e-waste to an R2 or e-Stewards certified recycler.

Repair didn’t go as planned? Ask our Answers community for help.

Cancel: I did not complete this guide.

One other person completed this guide.

nicO

Member since: 04/14/15

15,990 Reputation

88 Guides authored

0 Guide Comments

Add Comment

View Statistics:

Past 24 Hours: 7

Past 7 Days: 83

Past 30 Days: 432

All Time: 15,484