Free Shipping on Domestic Orders $75+

Whirlpool Dryer Steam Nozzle Replacement

What you need

  1. Whirlpool Dryer Steam Nozzle Replacement, Safety Precautions: step 1, image 1 of 1
    • Before you begin your repair, unplug your dryer.

    • Your power cord may have four prongs rather than three. The additional prong is a ground connection.

    Ask FixBot
  2. Whirlpool Dryer Steam Nozzle Replacement, Unfasten the top panel: step 2, image 1 of 3 Whirlpool Dryer Steam Nozzle Replacement, Unfasten the top panel: step 2, image 2 of 3 Whirlpool Dryer Steam Nozzle Replacement, Unfasten the top panel: step 2, image 3 of 3
    Tool used on this step:
    FixMat
    $36.95
    Buy
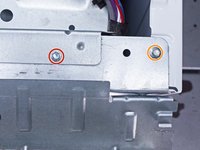
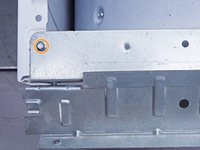
    • Throughout this guide, keep track of each screw and reinstall it exactly where it came from.

    • Use a nut driver to remove the screws securing the top panel to the rear panel bracket.

    Ask FixBot
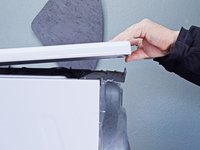
  3. Whirlpool Dryer Steam Nozzle Replacement, Remove the top panel: step 3, image 1 of 2 Whirlpool Dryer Steam Nozzle Replacement, Remove the top panel: step 3, image 2 of 2
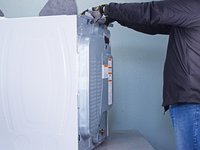
    • Grasp the top and slide it 1/2 to 1 inch toward the rear of the machine.

    Ask FixBot
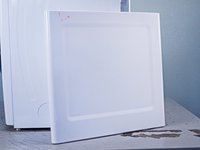
  4. Whirlpool Dryer Steam Nozzle Replacement: step 4, image 1 of 2 Whirlpool Dryer Steam Nozzle Replacement: step 4, image 2 of 2
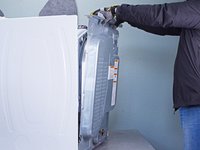
    • Lift the top panel upward to separate it from the chassis.

    • Remove the top panel from the machine.

    Ask FixBot
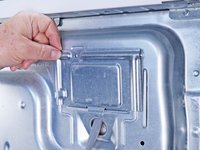
  5. Whirlpool Dryer Steam Nozzle Replacement, Unfasten the cover plate: step 5, image 1 of 1
    • Remove the cover plate screw.

    Ask FixBot
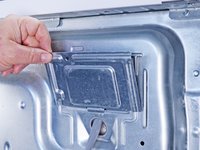
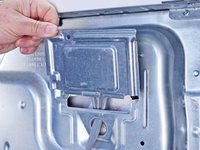
  6. Whirlpool Dryer Steam Nozzle Replacement, Remove the cover plate: step 6, image 1 of 3 Whirlpool Dryer Steam Nozzle Replacement, Remove the cover plate: step 6, image 2 of 3 Whirlpool Dryer Steam Nozzle Replacement, Remove the cover plate: step 6, image 3 of 3
    • Remove the cover plate.

    Ask FixBot
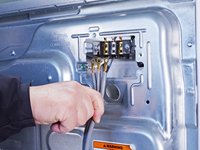
  7. Whirlpool Dryer Steam Nozzle Replacement, Disconnect the cord: step 7, image 1 of 1
    • Remove the screws securing the cord cables.

    • Mark the cables with a permanent marker if needed and take a picture or draw a diagram.

    Ask FixBot
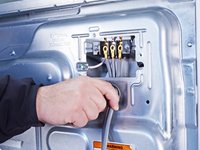
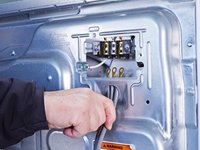
  8. Whirlpool Dryer Steam Nozzle Replacement, Remove the cord: step 8, image 1 of 3 Whirlpool Dryer Steam Nozzle Replacement, Remove the cord: step 8, image 2 of 3 Whirlpool Dryer Steam Nozzle Replacement, Remove the cord: step 8, image 3 of 3
    • Pull the cord carefully down through the round hole.

    • Make sure you replace the connections correctly when you reassemble.

    Ask FixBot
  9. Whirlpool Dryer Steam Nozzle Replacement, Unfasten the cord terminal block: step 9, image 1 of 1
    • Remove the green ground screw.

    • Remove the cord terminal block screws.

    Ask FixBot
  10. Whirlpool Dryer Steam Nozzle Replacement, Move the cord terminal block: step 10, image 1 of 3 Whirlpool Dryer Steam Nozzle Replacement, Move the cord terminal block: step 10, image 2 of 3 Whirlpool Dryer Steam Nozzle Replacement, Move the cord terminal block: step 10, image 3 of 3
    • Move the cord terminal block behind the rear panel.

    Ask FixBot
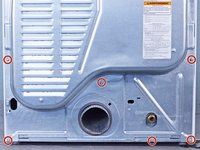
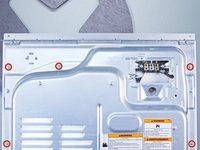
  11. Whirlpool Dryer Steam Nozzle Replacement, Unfasten the rear panel: step 11, image 1 of 2 Whirlpool Dryer Steam Nozzle Replacement, Unfasten the rear panel: step 11, image 2 of 2
    Tool used on this step:
    FixMat
    $36.95
    Buy
    • Remove the rear panel screws.

    • Throughout this guide, keep track of each screw and reinstall it exactly where it came from.

    Ask FixBot
  12. Whirlpool Dryer Steam Nozzle Replacement: step 12, image 1 of 2 Whirlpool Dryer Steam Nozzle Replacement: step 12, image 2 of 2
    • Remove the screw holding the main board bracket to the chassis.

    • Remove the screws from the top rear of the machine.

    Ask FixBot
  13. Whirlpool Dryer Steam Nozzle Replacement, Remove the rear panel: step 13, image 1 of 3 Whirlpool Dryer Steam Nozzle Replacement, Remove the rear panel: step 13, image 2 of 3 Whirlpool Dryer Steam Nozzle Replacement, Remove the rear panel: step 13, image 3 of 3
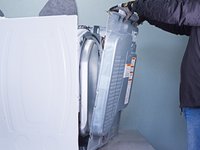
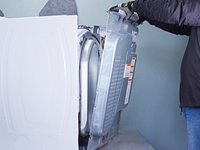
    • Put on gloves before continuing, as the rear panel is sharp.

    • Lift the panel about 1/2 inch and tilt it to the rear to release it from the vent pipe.

    • Slide the panel off the vent pipe and remove it.

    Ask FixBot
  14. Whirlpool Dryer Steam Nozzle Replacement, Reassembly information: step 14, image 1 of 2 Whirlpool Dryer Steam Nozzle Replacement, Reassembly information: step 14, image 2 of 2
    • During reassembly, perform the following:

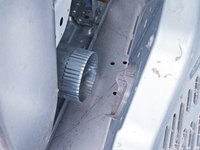
    • Make sure that the vent pipe is fitted into the collar on the panel.

    • Make sure the tabs at the bottom are aligned to the bottom rim of the chassis.

    • Position the panel so its screw holes match with the chassis.

    Ask FixBot
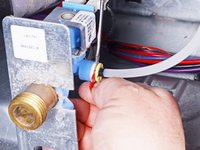
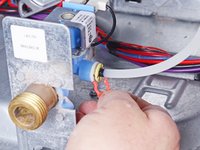
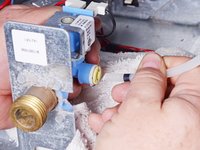
  15. Whirlpool Dryer Steam Nozzle Replacement, Disconnect the water tube: step 15, image 1 of 3 Whirlpool Dryer Steam Nozzle Replacement, Disconnect the water tube: step 15, image 2 of 3 Whirlpool Dryer Steam Nozzle Replacement, Disconnect the water tube: step 15, image 3 of 3
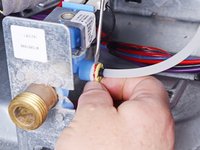
    • Push the retaining clip out with a small screwdriver or spudger.

    • Grab the retaining clip with your fingertips and remove it.

    Ask FixBot
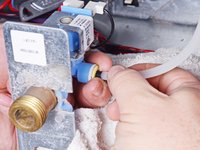
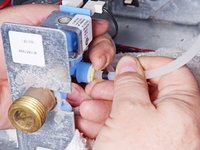
  16. Whirlpool Dryer Steam Nozzle Replacement: step 16, image 1 of 3 Whirlpool Dryer Steam Nozzle Replacement: step 16, image 2 of 3 Whirlpool Dryer Steam Nozzle Replacement: step 16, image 3 of 3
    • Press the yellow sleeve toward the valve to release the water tube.

    • While holding the sleeve in place, pull the water tube out of the sleeve

    Ask FixBot
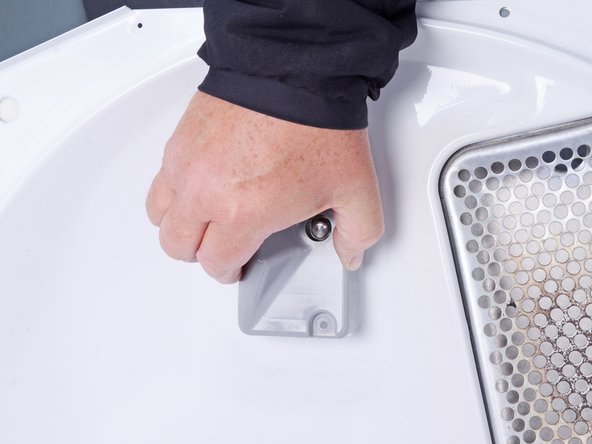
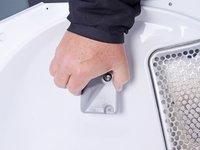
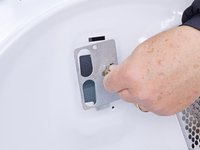
  17. Whirlpool Dryer Steam Nozzle Replacement, Unfasten the nozzle cover: step 17, image 1 of 1
    • Remove the sheet metal screw securing the steam nozzle cover.

    • Be careful not to drop any tools as you work, or you may chip the drum's enamel coating

    Ask FixBot
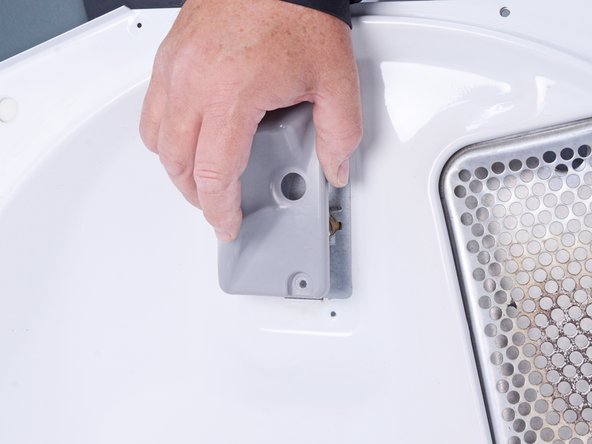
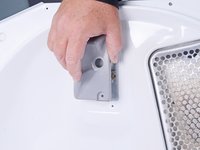
  18. Whirlpool Dryer Steam Nozzle Replacement, Remove the nozzle cover: step 18, image 1 of 3 Whirlpool Dryer Steam Nozzle Replacement, Remove the nozzle cover: step 18, image 2 of 3 Whirlpool Dryer Steam Nozzle Replacement, Remove the nozzle cover: step 18, image 3 of 3
    • Lift the lower edge of the cover and tilt it outward to clear the nozzle.

    • Slide the cover down to disengage the tab at the upper end of the cover.

    • Remove the cover.

    Ask FixBot
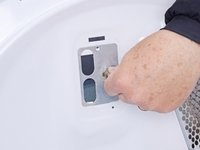
  19. Whirlpool Dryer Steam Nozzle Replacement, Unfasten nozzle assembly: step 19, image 1 of 1
    • Remove the nozzle assembly screw.

    Ask FixBot
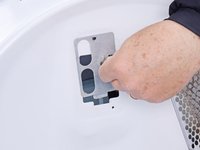
  20. Whirlpool Dryer Steam Nozzle Replacement, Remove nozzle assembly: step 20, image 1 of 3 Whirlpool Dryer Steam Nozzle Replacement, Remove nozzle assembly: step 20, image 2 of 3 Whirlpool Dryer Steam Nozzle Replacement, Remove nozzle assembly: step 20, image 3 of 3
    • Lift the nozzle assembly up to disengage the tab at the lower end.

    • Remove the nozzle assembly.

    Ask FixBot
Conclusion

To reassemble your device, follow these instructions in reverse order.

Repair didn’t go as planned? Ask our Answers community for help.

Bill Gilbert

Member since: 06/30/22

39,454 Reputation

261 Guides authored

Team

iFixit Member of iFixit

Staff

123 Members

25,699 Guides authored

0 Guide Comments

Add Comment

View Statistics:

Past 24 Hours: 0

Past 7 Days: 5

Past 30 Days: 44

All Time: 648