Free Shipping on Domestic Orders $75+

Whirlpool Dryer Control Panel Replacement

Views: 4.3K

View statistics:

Past 24 Hours:
9
Past 7 Days:
33
Past 30 Days:
138
All Time:
4,294
Comments: 1

1 comment on steps.

Completed: 0

No one has marked this guide "completed." Will you be the first?

Favorites: 0

No one has favorited (and subscribed to) this guide. Will you be the first?

Time Required: 1 - 2 hours
Difficulty: Moderate
Whirlpool Dryer Control Panel Replacement

Introduction

Go to step 1 ↓

Use this guide to replace the control panel of your Whirlpool Dryer.

The control panel allows you to operate your dryer, select the cycles and monitor the drying time. It's also where the end-of-cycle speaker is located. If you can't set the machine to different cycles or get it to start, this unit may be the problem.

This is a straightforward repair, and there are no especially difficult steps.

This guide will work for most Whirlpool dryers. This guide is written with a model WED87HED dryer. If you have a different model, you may encounter some minor disassembly differences, but the overall repair process will be the same.

The control panel isn't the "brain" of the machine. The brain is called the Main Board, (a.k.a. Cycle Control Unit — CCU) and is located inside the machine cabinet. To replace the main board, follow this link.

What you need

Tools

    1. Whirlpool Dryer Control Panel Replacement, Safety Precautions: step 1, image 1 of 1
      • Before you begin your repair, unplug your dryer.

      • Your power cord may have four prongs rather than three. The additional prong is a ground connection.

      Ask FixBot

      Add Comment

    1. Whirlpool Dryer Control Panel Replacement, Unfasten the top panel: step 2, image 1 of 3 Whirlpool Dryer Control Panel Replacement, Unfasten the top panel: step 2, image 2 of 3 Whirlpool Dryer Control Panel Replacement, Unfasten the top panel: step 2, image 3 of 3
      Tool used on this step:
      FixMat
      $36.95
      Buy
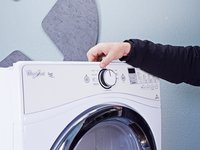
      • Throughout this guide, keep track of each screw and reinstall it exactly where it came from.

      • Use a nut driver to remove the screws securing the top panel to the rear panel bracket.

      Ask FixBot
      Add Comment

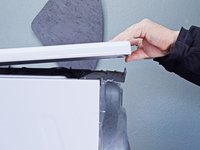
    2. Whirlpool Dryer Control Panel Replacement, Remove the top panel: step 3, image 1 of 2 Whirlpool Dryer Control Panel Replacement, Remove the top panel: step 3, image 2 of 2
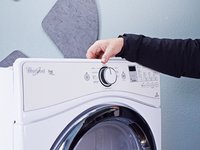
      • Grasp the top and slide it 1/2 to 1 inch toward the rear of the machine.

      Ask FixBot
      Add Comment

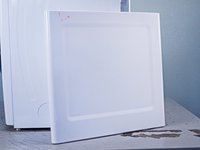
    3. Whirlpool Dryer Control Panel Replacement: step 4, image 1 of 2 Whirlpool Dryer Control Panel Replacement: step 4, image 2 of 2
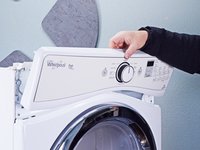
      • Lift the top panel upward to separate it from the chassis.

      • Remove the top panel from the machine.

      Ask FixBot
      Add Comment

    1. Whirlpool Dryer Control Panel Replacement, Disconnect the control panel: step 5, image 1 of 2 Whirlpool Dryer Control Panel Replacement, Disconnect the control panel: step 5, image 2 of 2
      • Disconnect the control panel cable from the main board.

      Ask FixBot

      Add Comment

    2. Whirlpool Dryer Control Panel Replacement: step 6, image 1 of 2 Whirlpool Dryer Control Panel Replacement: step 6, image 2 of 2
      • Disconnect the drum light connector.

      Ask FixBot

      Add Comment

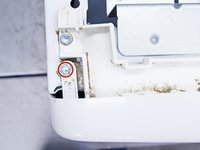
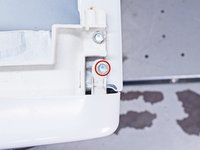
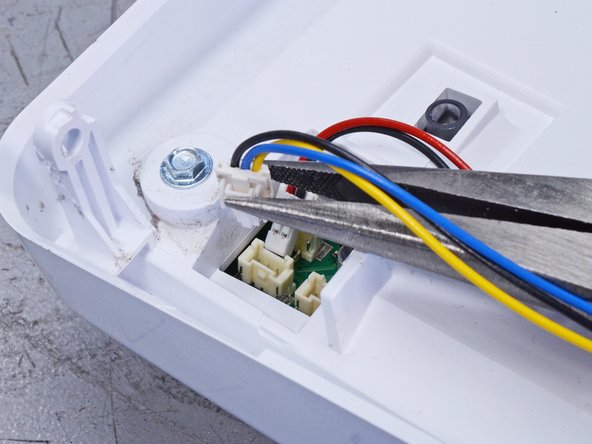
    3. Whirlpool Dryer Control Panel Replacement, Unfasten the control panel: step 7, image 1 of 2 Whirlpool Dryer Control Panel Replacement, Unfasten the control panel: step 7, image 2 of 2
      • Remove the screws securing the control panel.

      Ask FixBot
      Add Comment

    4. Whirlpool Dryer Control Panel Replacement, Remove the control panel: step 8, image 1 of 3 Whirlpool Dryer Control Panel Replacement, Remove the control panel: step 8, image 2 of 3 Whirlpool Dryer Control Panel Replacement, Remove the control panel: step 8, image 3 of 3
      • Lift the control panel up and tilt it away from the chassis to remove it.

      • Make sure to thread the cable through the hole in the chassis.

      • During reassembly, thread the cable through its proper hole before reinstalling the control panel.

      Ask FixBot

      Add Comment

    1. Whirlpool Dryer Control Panel Replacement, Remove the wiring harness: step 9, image 1 of 3 Whirlpool Dryer Control Panel Replacement, Remove the wiring harness: step 9, image 2 of 3 Whirlpool Dryer Control Panel Replacement, Remove the wiring harness: step 9, image 3 of 3
      • Disconnect the wiring harness connectors.

      • Lay the control panel down on a towel or other soft surface to perform the next few steps.

      Ask FixBot

      Add Comment

    2. Whirlpool Dryer Control Panel Replacement, Unfasten the control board: step 10, image 1 of 1
      • Remove the screws which secure the front control board to its housing.

      Ask FixBot

      Add Comment

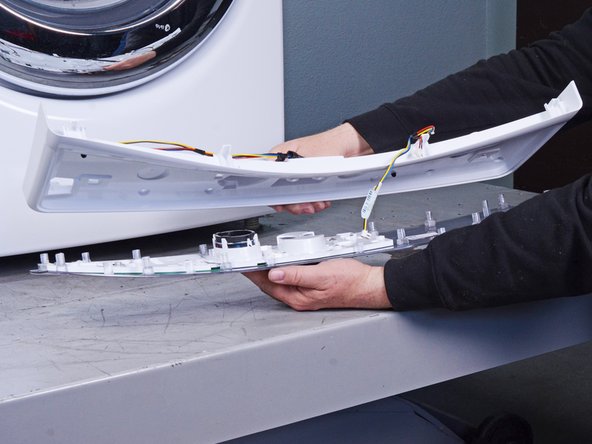
    3. Whirlpool Dryer Control Panel Replacement, Remove the control panel unit: step 11, image 1 of 3 Whirlpool Dryer Control Panel Replacement, Remove the control panel unit: step 11, image 2 of 3 Whirlpool Dryer Control Panel Replacement, Remove the control panel unit: step 11, image 3 of 3
      • Lift up the back plate off the control panel and remove it.

      • The control panel is a circuit board attached to a face plate. Replace the entire unit if possible.

      Ask FixBot

      Add Comment

Conclusion

To reassemble your device, follow these instructions in reverse order.

Take your e-waste to an R2 or e-Stewards certified recycler.

Repair didn’t go as planned? Ask our Answers community for help.

Cancel: I did not complete this guide.

Bill Gilbert

Member since: 06/30/22

40,654 Reputation

261 Guides authored

Team

iFixit Member of iFixit

Staff

121 Members

72,895 Guides authored

0 Guide Comments

Add Comment

View Statistics:

Past 24 Hours: 9

Past 7 Days: 33

Past 30 Days: 138

All Time: 4,294