
Free Shipping on Domestic Orders $75+

Weed Eater Rotary Lawn Mower Engine Control Cable Replacement

What you need

  1. Weed Eater Rotary Lawn Mower Engine Control Cable Replacement, Engine Control Cable: step 1, image 1 of 3 Weed Eater Rotary Lawn Mower Engine Control Cable Replacement, Engine Control Cable: step 1, image 2 of 3 Weed Eater Rotary Lawn Mower Engine Control Cable Replacement, Engine Control Cable: step 1, image 3 of 3
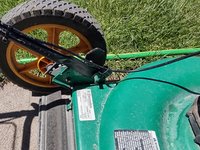
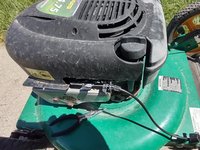
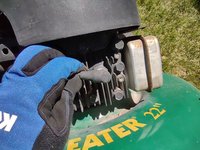
    • Disconnect the spark plug wire and tuck it away from the spark plug to avoid any accidental startups.

    • CAUTION: failure to disconnect the spark plug wire may lead to bodily injury and/or equipment damage.

    Ask FixBot

    Add Comment

  2. Weed Eater Rotary Lawn Mower Engine Control Cable Replacement: step 2, image 1 of 3 Weed Eater Rotary Lawn Mower Engine Control Cable Replacement: step 2, image 2 of 3 Weed Eater Rotary Lawn Mower Engine Control Cable Replacement: step 2, image 3 of 3
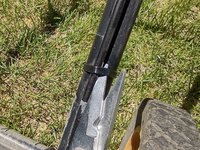
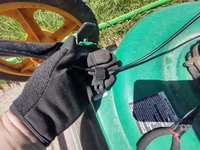
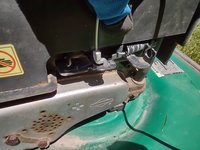
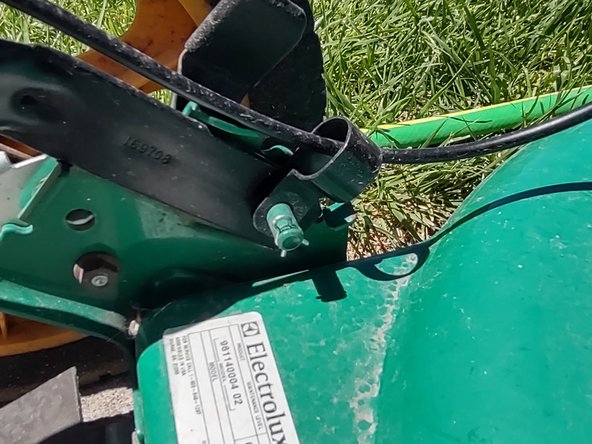
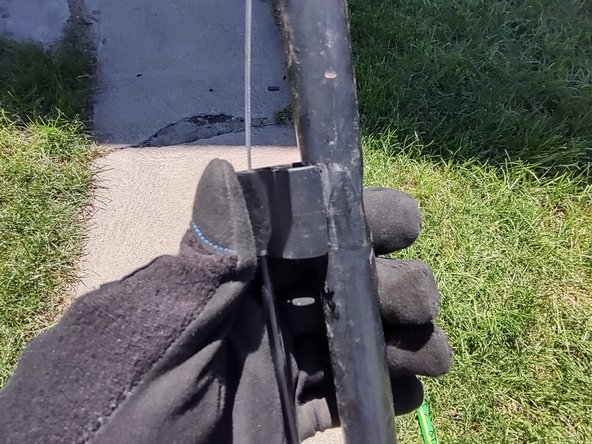
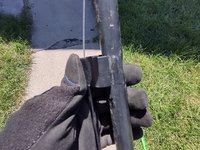
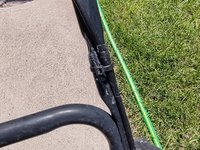
    • To remove the cable bracket from the handle, insert the flathead screwdriver into the bottom of the bracket and pry it off.

    Ask FixBot

    Add Comment

  3. Weed Eater Rotary Lawn Mower Engine Control Cable Replacement: step 3, image 1 of 3 Weed Eater Rotary Lawn Mower Engine Control Cable Replacement: step 3, image 2 of 3 Weed Eater Rotary Lawn Mower Engine Control Cable Replacement: step 3, image 3 of 3
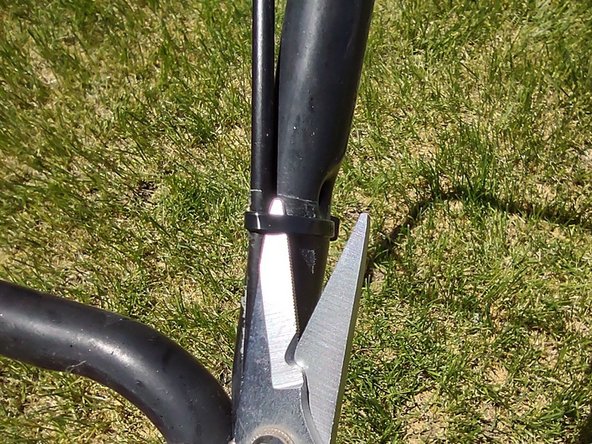
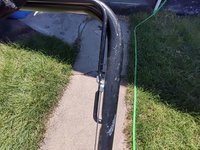
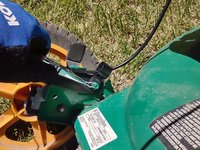
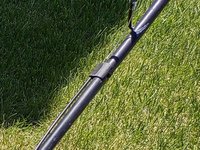
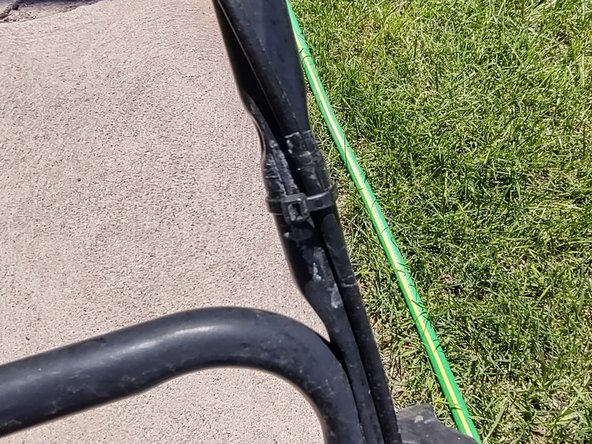
    • Use the utility shears to cut the zip ties which secure the cable to the upper and lower handles of the mower.

    Ask FixBot

    Add Comment

  4. Weed Eater Rotary Lawn Mower Engine Control Cable Replacement: step 4, image 1 of 3 Weed Eater Rotary Lawn Mower Engine Control Cable Replacement: step 4, image 2 of 3 Weed Eater Rotary Lawn Mower Engine Control Cable Replacement: step 4, image 3 of 3
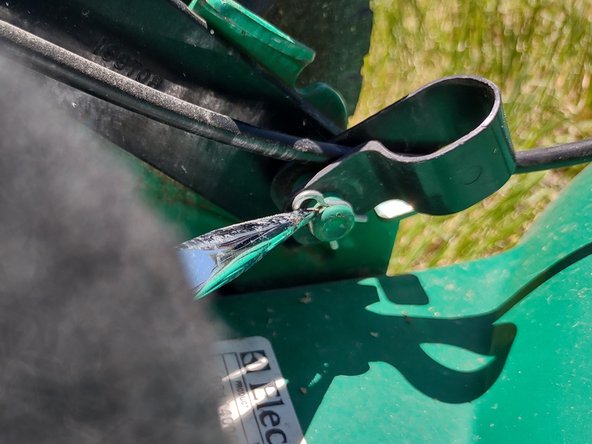
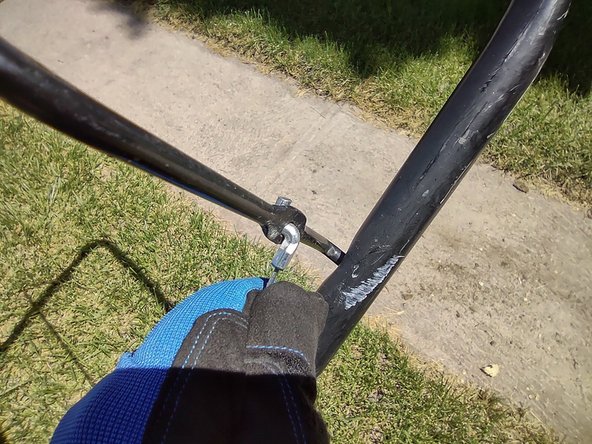
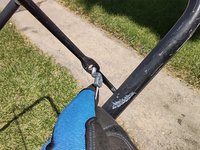
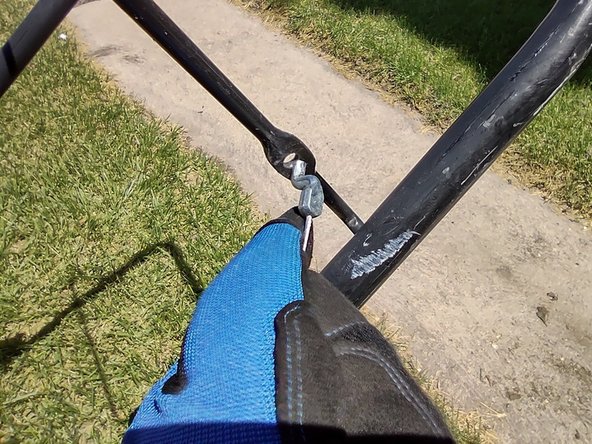
    • Use the needle nose pliers to remove the cotter pin holding the rear wheel cable clip in place.

    • Remove the clip from the retaining post.

    Ask FixBot

    Add Comment

  5. Weed Eater Rotary Lawn Mower Engine Control Cable Replacement: step 5, image 1 of 3 Weed Eater Rotary Lawn Mower Engine Control Cable Replacement: step 5, image 2 of 3 Weed Eater Rotary Lawn Mower Engine Control Cable Replacement: step 5, image 3 of 3
    • Disconnect the Z end of the cable from the control bar.

    • You may need to slightly pull the cable toward the control bar to get enough slack to remove the hook.

    Ask FixBot

    Add Comment

  6. Weed Eater Rotary Lawn Mower Engine Control Cable Replacement: step 6, image 1 of 3 Weed Eater Rotary Lawn Mower Engine Control Cable Replacement: step 6, image 2 of 3 Weed Eater Rotary Lawn Mower Engine Control Cable Replacement: step 6, image 3 of 3
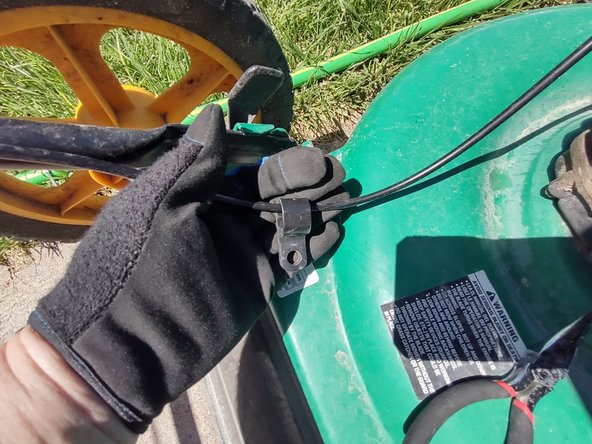
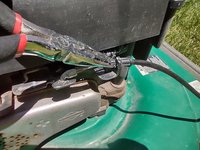
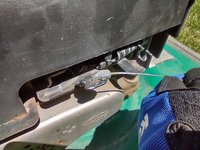
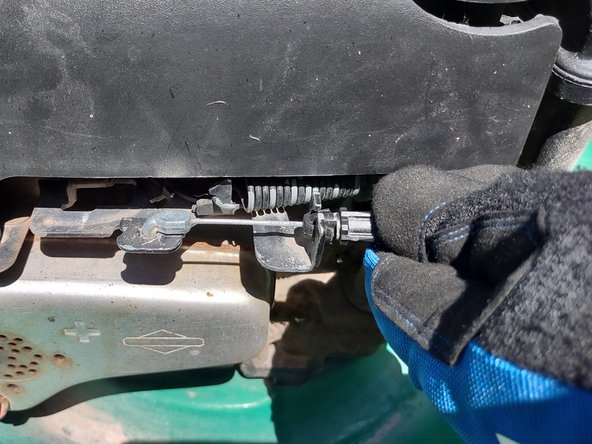
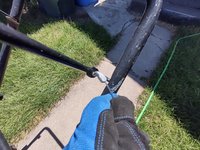
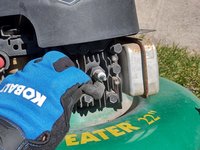
    • Use the needle nose pliers to squeeze the wings of the retaining clip together; push it through the hole in the brake assembly plate.

    • Remove the Z end of the cable from the brake assembly retaining plate.

    Ask FixBot

    Add Comment

  7. Weed Eater Rotary Lawn Mower Engine Control Cable Replacement: step 7, image 1 of 3 Weed Eater Rotary Lawn Mower Engine Control Cable Replacement: step 7, image 2 of 3 Weed Eater Rotary Lawn Mower Engine Control Cable Replacement: step 7, image 3 of 3
    • To install the new engine control cable:

    • Attach the Z end of the cable to the brake assembly retaining plate.

    • Push the plastic retaining clip through the hole in the brake assembly plate.

    Ask FixBot

    Add Comment

  8. Weed Eater Rotary Lawn Mower Engine Control Cable Replacement: step 8, image 1 of 2 Weed Eater Rotary Lawn Mower Engine Control Cable Replacement: step 8, image 2 of 2
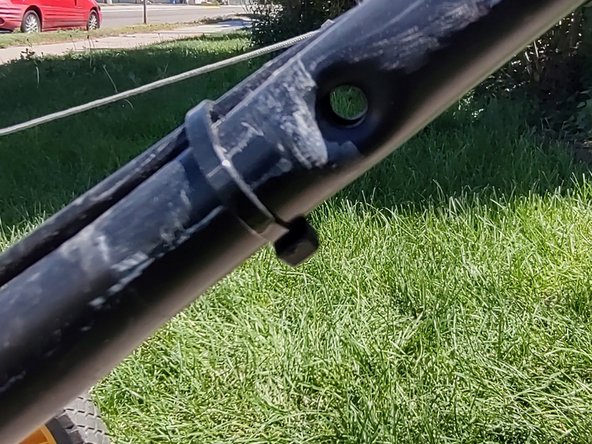
    • Attach the cable to the control bar by pushing the Z end of the cable into the hole.

    Ask FixBot

    Add Comment

  9. Weed Eater Rotary Lawn Mower Engine Control Cable Replacement: step 9, image 1 of 3 Weed Eater Rotary Lawn Mower Engine Control Cable Replacement: step 9, image 2 of 3 Weed Eater Rotary Lawn Mower Engine Control Cable Replacement: step 9, image 3 of 3
    • Slide the cable clip onto the rear wheel retaining post.

    • Use the needle nose pliers to attach the cotter pin to the retaining post.

    Ask FixBot

    Add Comment

  10. Weed Eater Rotary Lawn Mower Engine Control Cable Replacement: step 10, image 1 of 3 Weed Eater Rotary Lawn Mower Engine Control Cable Replacement: step 10, image 2 of 3 Weed Eater Rotary Lawn Mower Engine Control Cable Replacement: step 10, image 3 of 3
    • Attach the cable bracket to the upper handle of the mower.

    • You may need to use both hands to squeeze the bracket onto the handle.

    Ask FixBot

    Add Comment

  11. Weed Eater Rotary Lawn Mower Engine Control Cable Replacement: step 11, image 1 of 3 Weed Eater Rotary Lawn Mower Engine Control Cable Replacement: step 11, image 2 of 3 Weed Eater Rotary Lawn Mower Engine Control Cable Replacement: step 11, image 3 of 3
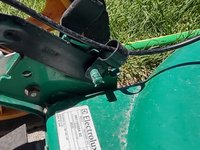
    • Secure the cable to the upper and lower handle of the mower with zip ties.

    • Clip the ends of the zip ties off.

    • CAUTION: The zip ties may have sharp edges after being trimmed. Turn the zip ties underneath the frame to avoid bodily injury when working around the mower.

    Ask FixBot

    Add Comment

  12. Weed Eater Rotary Lawn Mower Engine Control Cable Replacement: step 12, image 1 of 3 Weed Eater Rotary Lawn Mower Engine Control Cable Replacement: step 12, image 2 of 3 Weed Eater Rotary Lawn Mower Engine Control Cable Replacement: step 12, image 3 of 3
    • Reconnect the spark plug wire to the spark plug.

    Ask FixBot

    Add Comment

Finish Line

Cancel: I did not complete this guide.

0 Guide Comments

Add Comment

View Statistics:

Past 24 Hours: 4

Past 7 Days: 39

Past 30 Days: 132

All Time: 4,236