
Water connection seal replacement

VauWeh and one other contributor
Last updated on Feb 18, 2021
Views: 3.3K
View statistics:
- Past 24 Hours:
- 3
- Past 7 Days:
- 60
- Past 30 Days:
- 148
- All Time:
- 3,335
Comments: 2
2 guide comments.
Go to guide commentsCompleted: 1 2
1 person has marked this guide "completed." Will you be next?
2 people have marked this guide "completed." Including you — great job!
Favorites: 0 1
No one has favorited (and subscribed to) this guide. Will you be the first?
1 person has favorited (and subscribed to) this guide — and that's you!
Community-Contributed Guide
An awesome member of our community made this guide. It was not created by iFixit staff.
Introduction
Go to step 1 ↓If the water runs out of the water tank when the tank is installed, then this seal (inner manifold sleeve) must be replaced. The repair is very simple. You do not have to open the coffee machine. If the water runs out of the tank itself, the seal in the tank must be replaced, this is described here.
What you need
Parts
Tools

-
-
-
Take the water tank off.
-
The seal is held in place only by a cover.
 Ask FixBot
-
-
-
The cover is held in place by two notches below the marked points.
-
Using a plastic opening tool, gently pry the seal cover alternately near the notches until it releases.
-
Remove the cover
-
-
-
-
With the cover removed, simply remove and replace the gasket.
-
Replace the seal cover by pressing it firmly until it clicks into place
-
-


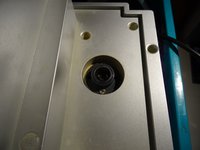
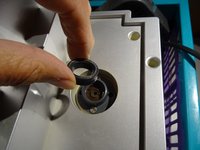
Reinsert the water tank and enjoy a cup of coffee
Cancel: I did not complete this guide.
One other person completed this guide.
Special thanks to these translators:
100%

These translators are helping us fix the world! Want to contribute?
Start translating ›

2 Guide Comments
I was not able to remove the seal cover with a narrow plastic pry tool, the seal could not be pried out,
I did not want to use a lot of force in fear I might damage the two guide holes.
Any other suggestion will be greatly appreciated.
It was tough, but we were able to do remove it with a plastic tweezer alternating sides under the two posts. The plastic posts are tall. Keep at it.
