Introduction
This guide includes clear steps on how to properly remove and replace a motherboard in a Wacom Intuos Pro tablet. If you run into a situation where a certain part of your touchpad doesn’t work, then this is the guide for you. You will need a Phillips #00 screwdriver, and soldering kit. Be very careful when using a soldering iron. The element can reach up to 400 degrees celsius! Remember to keep the sponge wet at all times. Lastly, remember to return the iron to its stand when not in use.
What you need
-
-
-
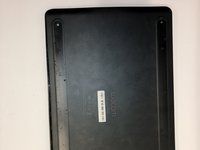
Orient the device so the bottom casing is facing upwards.
-
Use your fingers to gently pull on the rubber covers on the bottom of the device to remove them.
 Ask FixBot
-
-
-
Remove the four 4mm screws from underneath the rubber feet using a Phillips #00 screwdriver.
-
The screws are located 40mm in from the edge, so it not necessary to completely remove the rubber if you prefer not to.
-
-
-
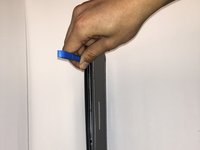
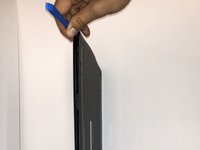
Insert the iFixit Opening Tool between the front and back cover of the device in order to snap and separate the type locks from around the edges.
-
Use the iFixit Opening Tool all the way around the edges until all the snaps have been released.
-
-
-
-
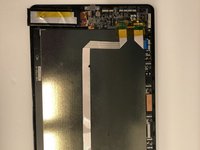
Remove the case backing from the rear of the device with your hands so the internal components are exposed.
-
-
-
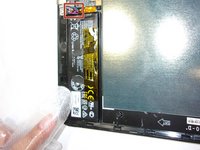
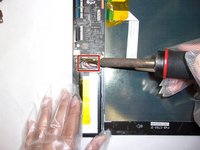
If not already done, desolder the three colored cables that connect the battery to the motherboard.
-
After desoldering the battery, carefully remove it.
-
-
-
-
-
Gently pull the blue tabs on the four ribbon cables from the ZIF connectors on the motherboard.
-
-
-
Remove the 4.5mm screw holding down the motherboard using a Phillips #00 screwdriver.
-
-
-
Remove all three ribbon cables by gently pulling on their respective ''Black" and "Blue" tabs.
-
-








To reassemble your device, follow these instructions in reverse order.
Cancel: I did not complete this guide.
One other person completed this guide.

Team

The Citadel Military College of South Carolina, Team 2-13, Eggleston Fall 2021 Member of The Citadel Military College of South Carolina, Team 2-13, Eggleston Fall 2021
CMCSC-EGGLESTON-F21S2G13
3 Members
24 Guides authored
1 Guide Comment
i am having a problem with my wacom Intuos pro m 2017, its a Bluetooth issue with the tablet itself self so i am planning to change the Bluetooth connector inside the tablet there is no documentation or anything about the exact device that i should use.
