
Wacom DTU-1031X Disassembly

00004707 and one other contributor
Last updated on Nov 16, 2023
Views: 838
View statistics:
- Past 24 Hours:
- 2
- Past 7 Days:
- 22
- Past 30 Days:
- 83
- All Time:
- 838
Comments: 0
No one has left comments on this guide. Will you be first?
Go to guide commentsCompleted: 0 1
No one has marked this guide "completed." Will you be the first?
1 person has marked this guide "completed." It's you — great job!
Favorites: 0 1
No one has favorited (and subscribed to) this guide. Will you be the first?
1 person has favorited (and subscribed to) this guide — and that's you!
Community-Contributed Guide
An awesome member of our community made this guide. It was not created by iFixit staff.
Introduction
Go to step 1 ↓DTU-1031X is a fairly easy device to disassemble. The most challenging part of the disassembly process is detaching the bottom plastic cover secured with quite large plastic clips.
The display is not glued to the front glass.
All internal parts are held together with common phillips screws.
What you need
Tools
-
Spudger4.9
-


-
-
-
Place the tablet with the screen facing down the surface.
-
(Optional) Remove the plastic dummy plug in the pen holder
 Ask FixBot
-
-
-
To remove the USB daughter board, unscrew 3 Philips #00 screws
-
Disconnect the cable and remove the board
-
-
-
To remove the mainboard, unscrew 4 Phillips #00 screws
-
Unplug the 40-pin LVDS flex cable
-
Unplug two cables connecting the digitizer daughter board to mainboard
-
Unplug the USB daughter board cable
-
-
-
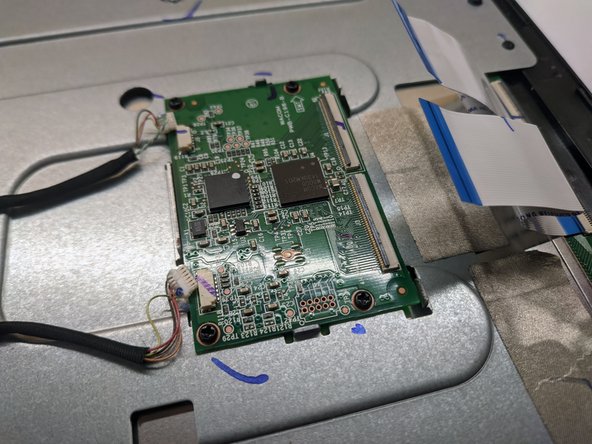
To remove the digitizer daughter board, unscrew 4 Phillips #00 screws
-
Unclip two flex cables connecting the digitizer to the digitizer board
-
Disconnect two cables connecting the daugher board with the mainboard
-
-
-
-
Unplug the 40-pin LVDS cable from the LCD display
-
Unscrew 11 Phillips #00 screws holding the metal piece to the front plastic casing
-
-
-
Unscrew 9 wide Phillips #00 screws holding the LCD panel to the front plastic casing
-
The LCD display will now be loose, and can be removed
-
-




To reassemble your device, follow these instructions in reverse order.

