This translation was generated by a machine and has not been reviewed by a person yet. Speak this language? Review it.

Velleman DVM020 Multimeter Fuse Replacement

Coco and one other contributor
Last updated on Sep 2, 2026
Views: 1.1K
View statistics:
- Past 24 Hours:
- 1
- Past 7 Days:
- 7
- Past 30 Days:
- 75
- All Time:
- 1,127
Comments: 1
1 guide comment.
Go to guide commentsCompleted: 3 4
3 people have marked this guide "completed." Will you be next?
4 people have marked this guide "completed." Including you — great job!
Favorites: 0 1
No one has favorited (and subscribed to) this guide. Will you be the first?
1 person has favorited (and subscribed to) this guide — and that's you!
Featured Guide
This guide has been found to be exceptionally cool by the iFixit staff.
Community-Contributed Guide
An awesome member of our community made this guide. It was not created by iFixit staff.
Introduction
Go to step 1 ↓This is a step-by-step guide to replace the fuses of a Velleman DVM020 multimeter.
This multimeter includes two fuses with the following specifications:
- 10 A - 600 V: protects the high current measurement function
- 200 mA - 600 V: protects most of the multimeter's functions
If your multimeter stops measuring current in the 10 A mode, the 10 A fuse likely needs to be replaced with the following:
- 5 x 20 mm 10 A - 600 V ceramic fuse
If your multimeter stops measuring voltage, resistance, or current, the 200 mA fuse is likely blown. It must be replaced with the following fuse:
- 5 x 20 mm 200 mA - 600 V ceramic fuse
Do not install fuses with higher amperage or voltage ratings than the specifications, as this could damage your multimeter. You can safely install fuses with lower current or voltage ratings; your multimeter will simply not function at full capacity.
Fuses rarely need to be replaced, and blown fuses are almost always the result of human error.
What you need
Parts

Tools


-
-
-
Turn off your multimeter.
-
Unplug the test leads from the measurement jacks of your multimeter.
 Ask FixBot
-
-
-
Release the edge from the top-left corner.
-
Release the edge from the top-right corner.
-
-
-
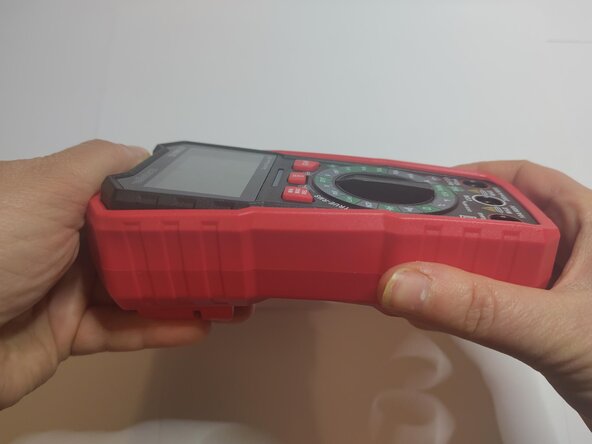
Press the case to pop the top of the multimeter out.
-
Remove the multimeter.
-
-
-
-
-
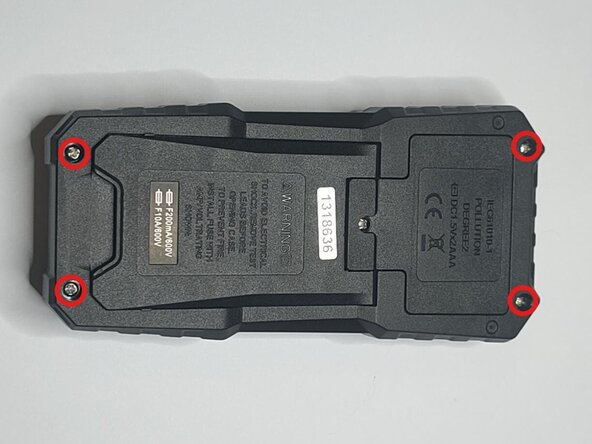
Grasp the two halves (front and back) of the multimeter and pull to separate them.
-
-
-
-
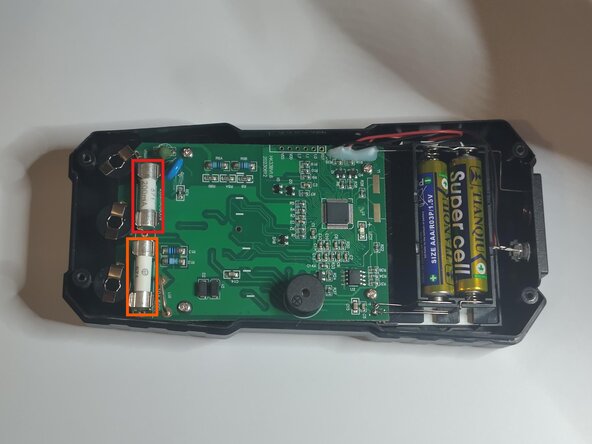
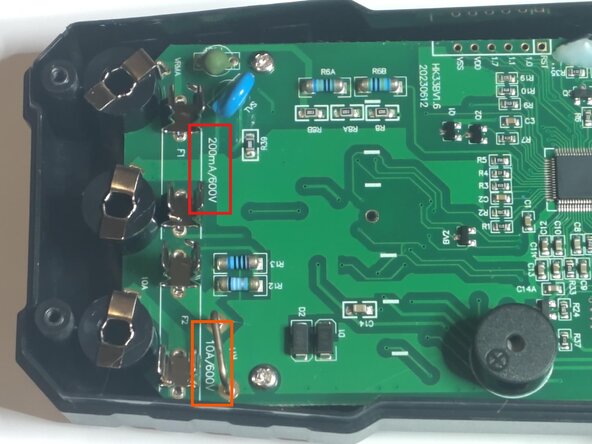
Locate the two fuses:
-
200 mA / 600 V
-
10 A / 600 V
-
Use a spudger or your fingers to extract the fuse from its holder.
-
-
-
5 x 20 mm 200 mA - 600 V ceramic fuse
-
5 x 20 mm 10 A - 600 V ceramic fuse
-








To reassemble your device, follow the instructions in reverse order.
Cancel: I did not complete this guide.
3 other people completed this guide.

