
Turtle Beach Recon Cloud Joystick Replacement

Daphne Dodson and 2 other contributors
Last updated on Jul 30, 2026
Views: 382
View statistics:
- Past 24 Hours:
- 3
- Past 7 Days:
- 17
- Past 30 Days:
- 74
- All Time:
- 382
Comments: 0
No one has left comments on this guide. Will you be first?
Go to guide commentsCompleted: 0 1
No one has marked this guide "completed." Will you be the first?
1 person has marked this guide "completed." It's you — great job!
Favorites: 0 1
No one has favorited (and subscribed to) this guide. Will you be the first?
1 person has favorited (and subscribed to) this guide — and that's you!
Better Introduction
Improve this guide by completing or revising its introduction.
Introduction
Go to step 1 ↓If you need to replace the joystick of your Turtle Beach Recon Cloud controller, follow this guide. You may need to replace a joystick if it is damaged or stuck and need to be cleaned.
Before you begin, power off and disconnect your controller from the charging cable.
What you need
Tools
-
Spudger4.9


-
-
-
Use a Phillips #00 screwdriver to remove 7 screws from the back casing.
 Ask FixBot
-
-
-
Use the iFixit opening tool to wedge it between the inner grip and the casing to pry it off.
-
Do the same to the other inner grip.
-
-
-
-
-
Insert a spudger between the controller and the battery pack.
-
Use the spudger to loosen the battery from the motherboard.
-
Gently lift the battery pack until just out so as to not pull on the wire attached.
-
-
-
Use the point of a spudger to push on alternating sides of the battery connector to "walk" it out of its socket.
-
If that doesn't work, use a pair of tweezers to firmly grip the sides of the connector and pull straight away from the socket. Hold the tweezers closer to the connector to get a better grip.
-
-
-
-
-
Use a Phillips #00 screwdriver to remove the four screws securing the board.
-
-
-
-
Lift out the motherboard at an angle to detach it from the clips securing it to the case.
-
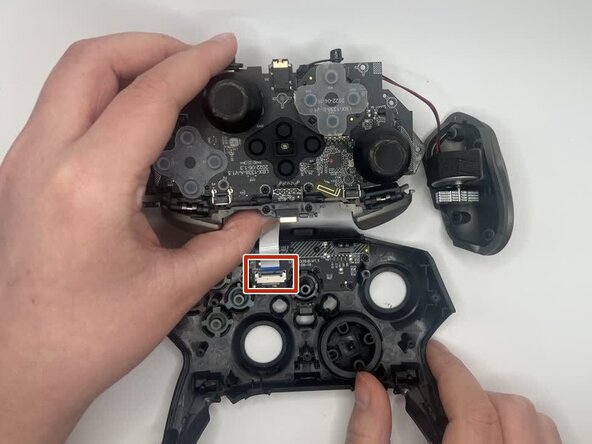
Use a spudger or a clean fingernail to flip up the locking flap of the ZIF connector—this is the unlocked position.
-
Use tweezers or your fingers to gently pull the cable out of its socket.
-
-
-




To reassemble your device, follow these instructions in reverse order. Take your e-waste to an R2 or e-Stewards certified recycler.

Team

University of North Texas, Team 1-5, Kilpatrick Fall 2025 Member of University of North Texas, Team 1-5, Kilpatrick Fall 2025
UNT-KILPATRICK-F25S1G5
3 Members
84 Guides authored
