
Turtle Beach Pure Air Button Microswitch Replacement

Malachi Davis and 3 other contributors
Last updated on May 22, 2026
Views: 222
View statistics:
- Past 24 Hours:
- 2
- Past 7 Days:
- 10
- Past 30 Days:
- 63
- All Time:
- 222
Comments: 0
No one has left comments on this guide. Will you be first?
Go to guide commentsCompleted: 0 1
No one has marked this guide "completed." Will you be the first?
1 person has marked this guide "completed." It's you — great job!
Favorites: 0 1
No one has favorited (and subscribed to) this guide. Will you be the first?
1 person has favorited (and subscribed to) this guide — and that's you!
Introduction
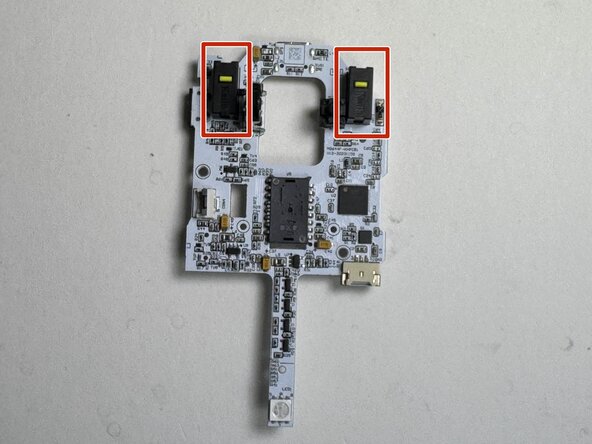
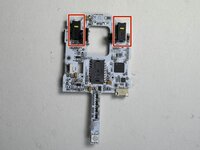
Go to step 1 ↓Use this guide to access and identify the left and right click microswitches in the Turtle Beach Pure Air White wireless RGB gaming mouse (Model TBM-1102-15). These motherboard-mounted switches register button presses—if they wear out or fail, clicks may not register, may register inconsistently, or may “double-click.” If your mouse buttons aren’t responding, review Turtle Beach Pure Air Buttons Not Registering Input for symptom checks first. This guide focuses on locating the microswitches and related components; microswitch replacement requires desoldering and soldering on the motherboard.
What you need
Tools
-
-
Solder Flux InjectorOptional
-


-
-
-
Peel back the mouse feet.
-
Remove the three 1.6mm screws using a JIS #000 screwdriver.
-
Remove the single 1.6mm screws using remove using a 1.3 mm hex screwdriver.
-
-
-
Disconnect the ribbon cable securing the upper shell to the motherboard.
-
Lift the locking clip to release the cable from its connector.
-
-
-
-
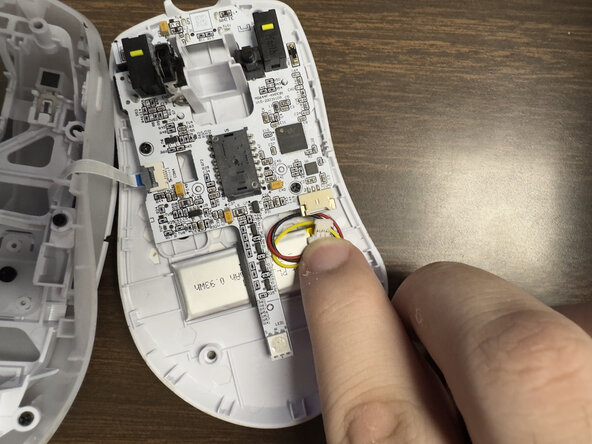
Carefully disconnect the battery clip from the motherboard socket by softly pulling the bottom of the clip.
-
-
-
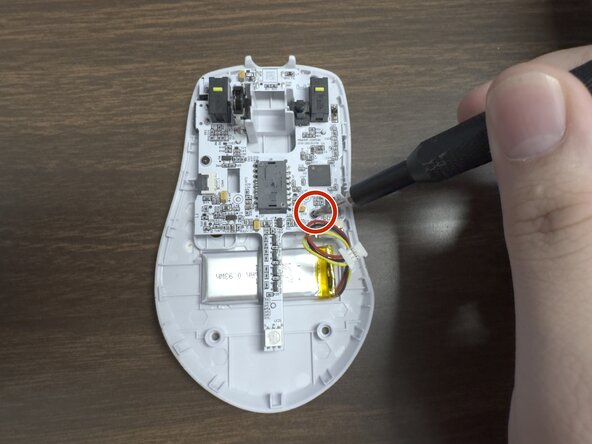
Remove the two 1.6 mm screws on the middle left and lower right sides with a JIS000 screwdriver to disconnect the motherboard from the lower shell.
-
-
-
-
-
-
-
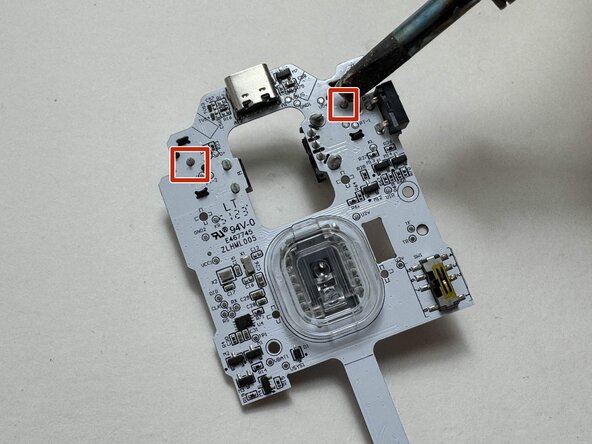
Carefully lift the motherboard to expose the rear side of the board, including the microswitch solder joints.
-
Desolder the solder joints of the microswitch.
-
-


 Ask FixBot







This guide is rated Moderate for disassembly. Replacing the microswitch itself requires soldering and is recommended only for users with advanced repair experience.To reassemble your device, follow these instructions in reverse order.

Team

Austin Community College, Team 9-1, Watkins Spring 2026 Member of Austin Community College, Team 9-1, Watkins Spring 2026
AUSTINCC-WATKINS-S26S9G1
3 Members
72 Guides authored
