
Track Cleats Spikes Replacement

Gabriel Williams and one other contributor
Last updated on Jun 14, 2022
Views: 2K
View statistics:
- Past 24 Hours:
- 4
- Past 7 Days:
- 48
- Past 30 Days:
- 161
- All Time:
- 1,956
Comments: 0
No one has left comments on this guide. Will you be first?
Go to guide commentsCompleted: 1 2
1 person has marked this guide "completed." Will you be next?
2 people have marked this guide "completed." Including you — great job!
Favorites: 0 1
No one has favorited (and subscribed to) this guide. Will you be the first?
1 person has favorited (and subscribed to) this guide — and that's you!
Introduction
Go to step 1 ↓People who run track often use a specific shoe when running, called a track cleat. Track cleats are great for achieving maximum performance when competing or training.
Track cleats, like any other equipment, need to be maintained. This guide will demonstrate how to maintain track cleats, and replace the spikes on the bottom of the sole.
Before beginning, it's recommended to clean any dirt or muck out from around the spikes to make removal easier.
If the cleat spikes are rusted or stuck, try adding a spritz of WD-40 around the threads, wait a few moments for the lubricant to settle in, and then try again.
What you need
Parts
Tools
-
-
-
Place a cleat wrench over the spike and rotate it clockwise until it locks in place.
 Ask FixBot
-
-
-
Rotate the wrench counterclockwise 4 to 5 times, or until the spike detaches from the sole.
-
-
-
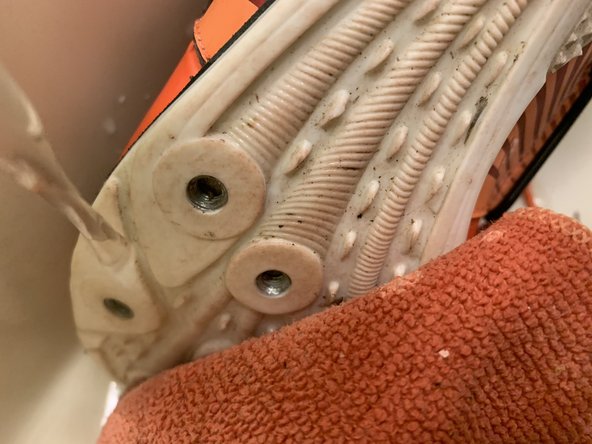
Clean the sole and screw holes using dish soap, a sponge or cloth, and warm water.
-
-
-
Dry the shoe with a towel, and allow the sockets time to fully dry before installing new spikes.
-
-
-
Grab the new spike and place the thread into the screw hole. Screw the spikes clockwise back in place.
-
-
-
-
Make sure all the spikes are tight, and then proceed to test out shoes on an appropriate surface.
-
-




Have fun running!
Cancel: I did not complete this guide.
One other person completed this guide.

Team

University of Memphis, Team 2-6, Willis Spring 2022 Member of University of Memphis, Team 2-6, Willis Spring 2022
UM-WILLIS-S22S2G6
1 Member
12 Guides authored
