
TopTro TR25 Dust Filter Replacement

Keion.M.Shelton and 2 other contributors
Last updated on Jan 2, 2025
Views: 500
View statistics:
- Past 24 Hours:
- 1
- Past 7 Days:
- 12
- Past 30 Days:
- 65
- All Time:
- 500
Comments: 0
No one has left comments on this guide. Will you be first?
Go to guide commentsCompleted: 0 1
No one has marked this guide "completed." Will you be the first?
1 person has marked this guide "completed." It's you — great job!
Favorites: 0 1
No one has favorited (and subscribed to) this guide. Will you be the first?
1 person has favorited (and subscribed to) this guide — and that's you!
Introduction
Go to step 1 ↓If you are looking to replace or just clean the dust filter, this guide is for that. You'll need an opening tool such as a plastic or metal spudger. The steps are straightforward and don't involve anything overtly complicated, but be sure to be careful to avoid damage to the rivets.

-
-
-
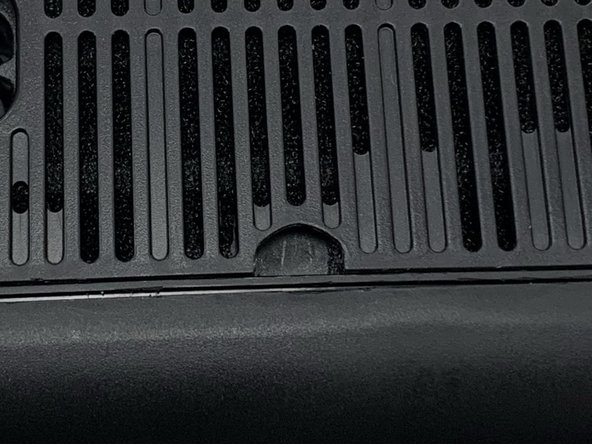
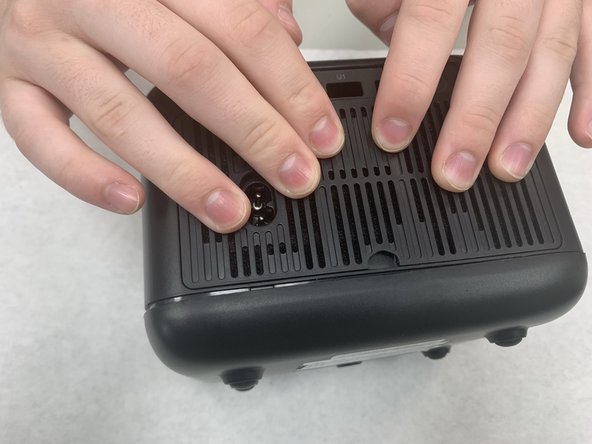
Wedge a spudger into the half-circle idnent and pry the panel off until it partially pops open.
-
Go around the perimeter of the panel with the spudger to pry it the rest of the way off.
-
-
-
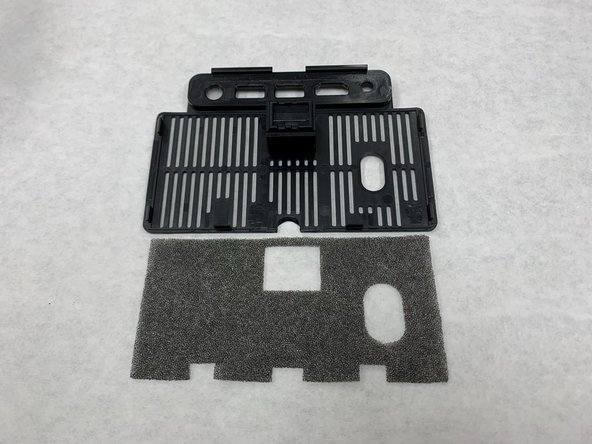
The panel you've just removed has a foam dust filter in it. It is not attached to the panel, so just remove it by hand.
-
-

 Ask FixBot




To reassemble your device, follow these instructions in reverse order.

Team

University of North Texas, Team 7-3, Kilpatrick Fall 2024 Member of University of North Texas, Team 7-3, Kilpatrick Fall 2024
UNT-KILPATRICK-F24S7G3
4 Members
60 Guides authored
