Free Shipping on Domestic Orders $75+

TopMate C11 Fan Replacement

Views: 1.1K

View statistics:

Past 24 Hours:
1
Past 7 Days:
23
Past 30 Days:
104
All Time:
1,113
Comments: 1

1 comment on steps.

Completed: 1

1 person has marked this guide "completed." Will you be next?

Favorites: 0

No one has favorited (and subscribed to) this guide. Will you be the first?

Time Required: 5 - 10 minutes
Difficulty: Easy
TopMate C11 Fan Replacement

Introduction

Go to step 1 ↓

If one of the fans in your TopMate C11 laptop cooling pad stops working, it can impact your laptop's cooling performance, leading to overheating issues. This guide will show you how to replace the fan.

For added safety, consider using hand protection gloves during the handling of the mesh grill cover in steps 6 and 11 to prevent injuries from its sharp edges.

In steps 5 and 12, securely hold the mesh grill cover with the cooler while flipping to prevent the fans from falling out, as they are not secured inside.

Before beginning, make sure to disconnect your laptop cooler from power. Remember to follow general electrostatic discharge (ESD) safety procedures while replacing the fan.

What you need

Tools

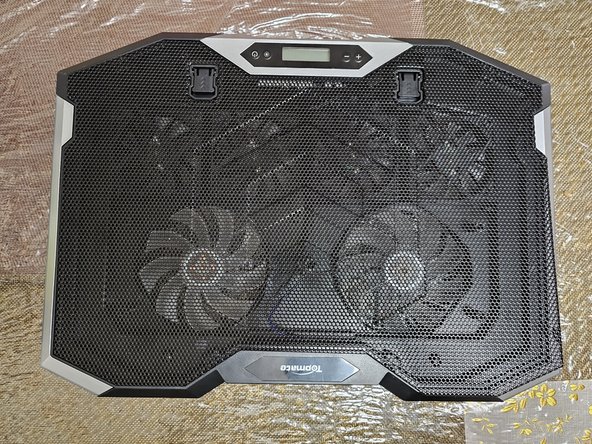
    1. TopMate C11 Fan Replacement, Fan: step 1, image 1 of 1
      • Place the cooler on a flat surface.

      Ask FixBot

      Add Comment

    2. TopMate C11 Fan Replacement: step 2, image 1 of 1
      • Flip the cooler upside down.

      Ask FixBot

      Add Comment

    3. TopMate C11 Fan Replacement: step 3, image 1 of 1
      • Identify all 10 metal flaps.

      Ask FixBot

      Add Comment

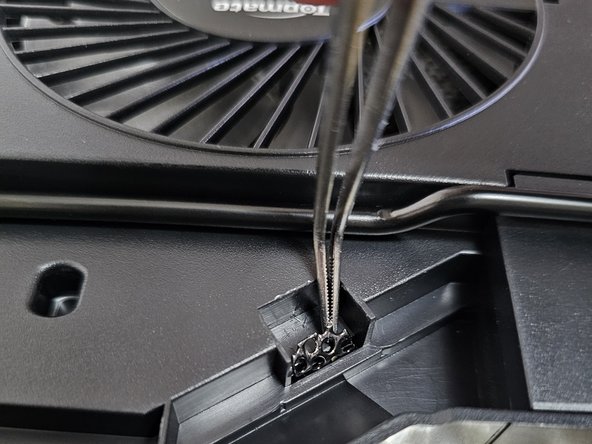
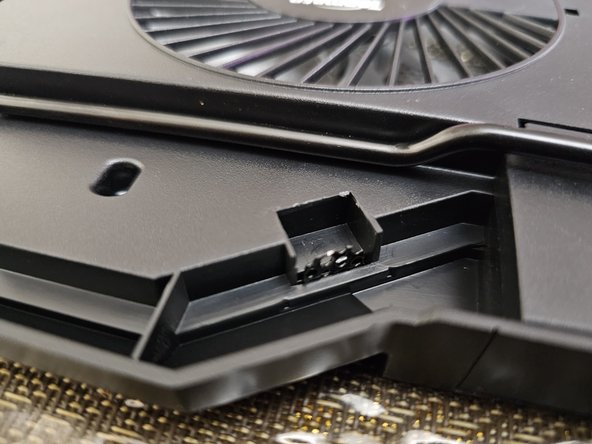
    4. TopMate C11 Fan Replacement: step 4, image 1 of 3 TopMate C11 Fan Replacement: step 4, image 2 of 3 TopMate C11 Fan Replacement: step 4, image 3 of 3
      • Straighten all 10 metal flaps with tweezers.

      Ask FixBot

      Add Comment

    5. TopMate C11 Fan Replacement: step 5, image 1 of 2 TopMate C11 Fan Replacement: step 5, image 2 of 2
      • Flip the cooler while securely holding the mesh grille cover.

      Ask FixBot
      Add Comment

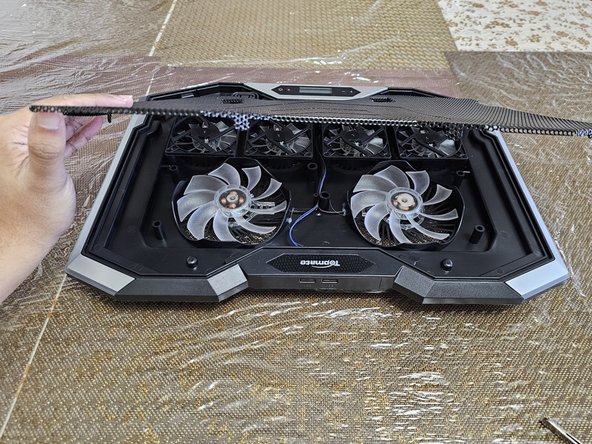
    6. TopMate C11 Fan Replacement: step 6, image 1 of 3 TopMate C11 Fan Replacement: step 6, image 2 of 3 TopMate C11 Fan Replacement: step 6, image 3 of 3
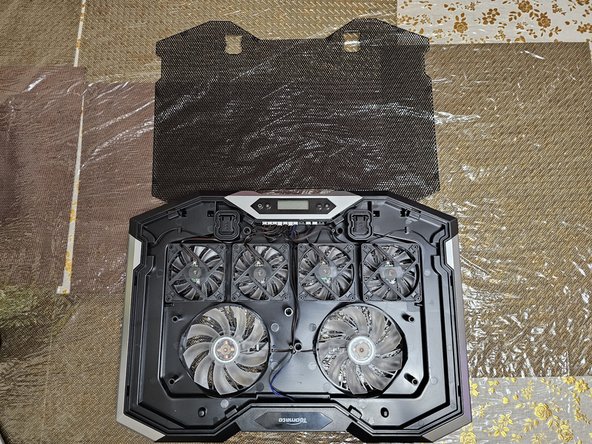
      • Remove the mesh grille cover.

      • WARNING: Be careful with the mesh grille cover, it has sharp edges.

      Ask FixBot

      Add Comment

    7. TopMate C11 Fan Replacement: step 7, image 1 of 1
      • Identify the broken fan.

      Ask FixBot

      Add Comment

    8. TopMate C11 Fan Replacement: step 8, image 1 of 3 TopMate C11 Fan Replacement: step 8, image 2 of 3 TopMate C11 Fan Replacement: step 8, image 3 of 3
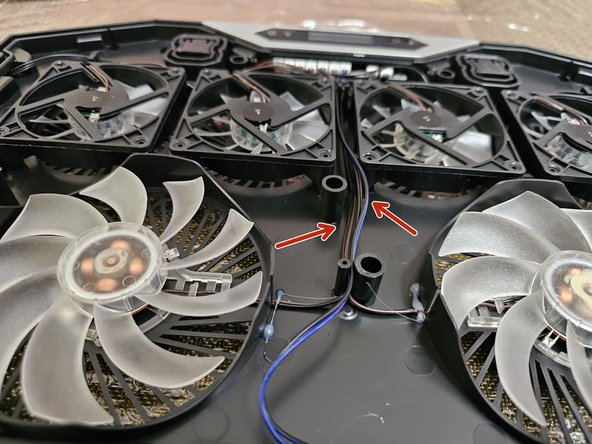
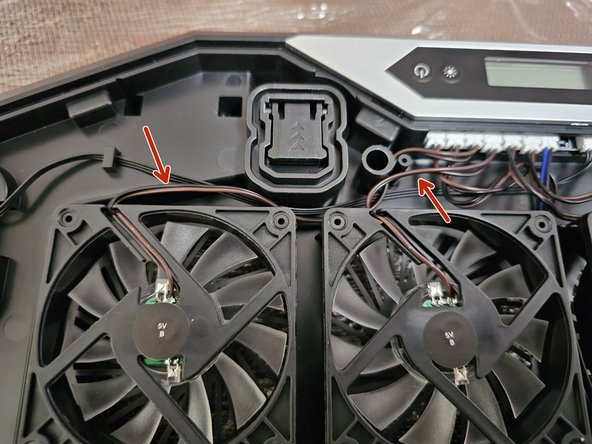
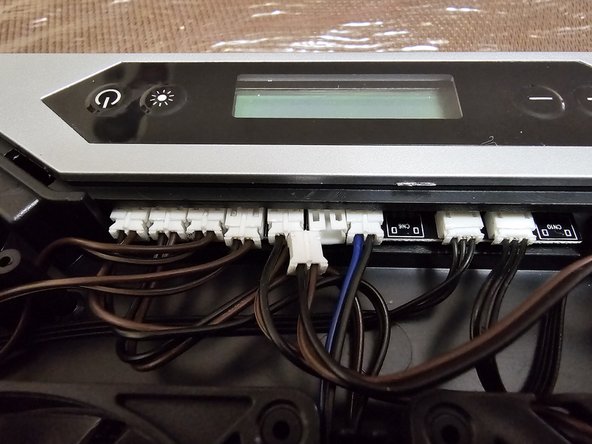
      • Trace the wire from the broken fan to the controller board.

      Ask FixBot

      Add Comment

    9. TopMate C11 Fan Replacement: step 9, image 1 of 3 TopMate C11 Fan Replacement: step 9, image 2 of 3 TopMate C11 Fan Replacement: step 9, image 3 of 3
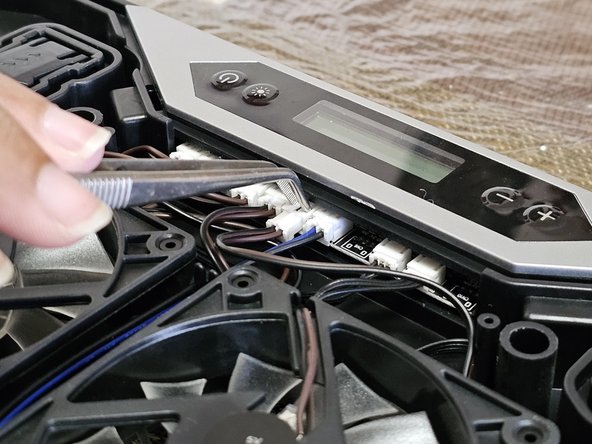
      • Gently press two points on the top of the white plug with tweezers to disconnect the wire.

      • Don't use excessive force. The wire is fragile.

      Ask FixBot

      Add Comment

    10. TopMate C11 Fan Replacement: step 10, image 1 of 3 TopMate C11 Fan Replacement: step 10, image 2 of 3 TopMate C11 Fan Replacement: step 10, image 3 of 3
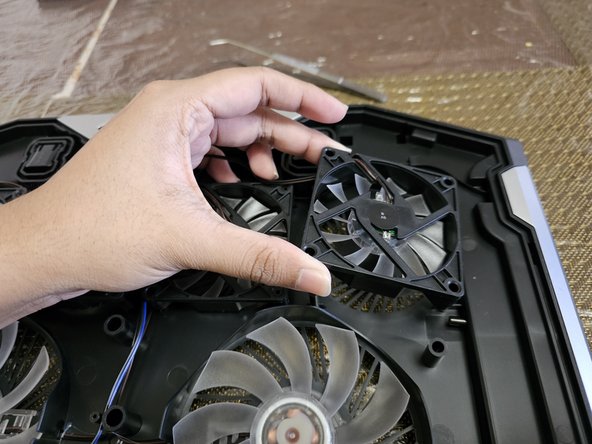
      • Replace the fan and connect the wire.

      • Make sure to put the fan in the correct orientation.

      • Make sure also the white connector is fully connected.

      Ask FixBot

      Add Comment

Conclusion

To reassemble your device, follow these instructions in reverse order.

Cancel: I did not complete this guide.

One other person completed this guide.

Dominic Botlero

Member since: 01/11/24

181 Reputation

1 Guide authored

Team

0 Guide Comments

Add Comment

View Statistics:

Past 24 Hours: 1

Past 7 Days: 23

Past 30 Days: 104

All Time: 1,113